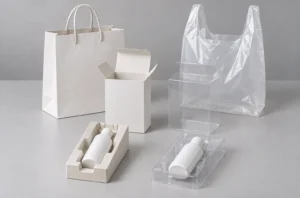
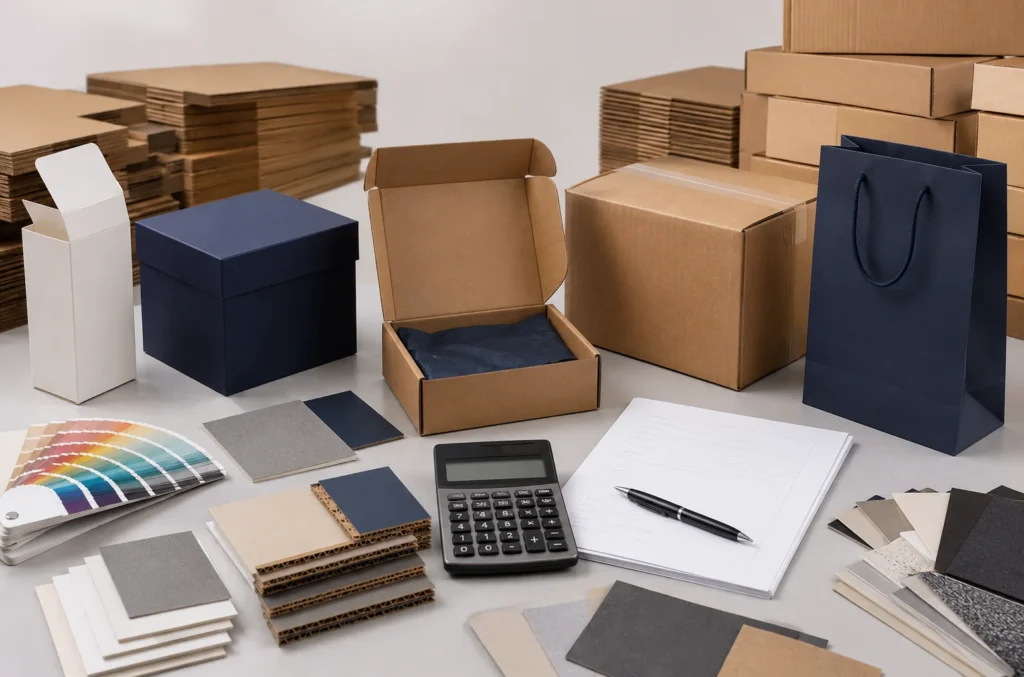

When I talk about custom packaging cost, I never see it as a simple question with one fixed answer. The price of a custom box, mailer, paper bag, or rigid gift box depends on more than the packaging name. It changes with packaging type, order quantity, dimensions, material, board thickness, printing coverage, surface finishes, inserts, tooling, packing method, freight, and delivery terms. This is why two projects that both sound like “custom packaging” can have very different prices once the real specifications are reviewed.
Custom packaging cost depends on packaging type, order quantity, size, material, printing, finishes, inserts, tooling, packing, and delivery scope. Higher quantities usually reduce unit cost, but the best budget should balance product protection, brand presentation, logistics efficiency, and total project cost.
Custom packaging cost usually becomes clearer when it is viewed by type and quantity. A folding carton is normally priced differently from a rigid box because the material, structure, and assembly process are different. A corrugated mailer box is not the same as a corrugated shipping carton because one may focus more on branded unboxing while the other focuses more on transport protection. A paper bag may look simple at first, but its cost can change quickly when paper GSM, handle type, reinforcement, printing, and finishing are added. Even within the same packaging type, the price at 1,000 units can be very different from the price at 5,000 or 10,000 units because setup costs are spread across more pieces.
I also think it is important to separate the factory unit price from the total packaging project cost. A quotation may show a low unit price, but the final budget may still include samples, cutting dies, printing plates, foil or embossing dies, custom inserts, protective packing, master cartons, palletization, freight, duties, taxes, and warehousing. If these costs are not checked early, the packaging may seem affordable during the quotation stage but become more expensive after production and shipping details are confirmed.
In this guide, I will explain how custom packaging prices usually change by packaging type and order quantity, what cost factors affect the final quote, why suppliers may quote very different prices, and how to compare packaging quotations more fairly. My goal is not to give a one-size-fits-all price, because that would not be accurate. Instead, I want to help you understand how packaging cost is built so the budget can support product protection, brand presentation, logistics efficiency, and long-term commercial value.
Custom Packaging Prices by Type and Order Quantity
When I estimate a custom packaging budget, I normally start with two variables before reviewing smaller production details: the packaging type and the order quantity. These two factors give me the fastest indication of the likely price level because a folding carton, rigid box, corrugated mailer, shipping carton, and paper bag use very different amounts of material, labor, tooling, and production time.
For an early-stage project, I therefore find it more useful to begin with a realistic price range than with a single number. A range shows where a project may sit before the dimensions, board specification, artwork, finishes, inserts, packing method, and delivery requirements are fully confirmed. The table below is designed for that purpose: budget planning rather than final quotation.
How These Custom Packaging Price Ranges Should Be Used
I use the following figures as indicative factory-level budgeting ranges for common custom paper packaging projects. They are shown in USD per unit and are intended to help compare the relative cost of different packaging formats and production quantities.
These ranges should not be treated as fixed market prices. Custom packaging is manufactured to specification, which means even two boxes with the same general name can have very different production costs. A 5,000-piece folding carton made from standard paperboard with straightforward printing is not commercially equivalent to a 5,000-piece carton using heavier board, inside printing, Pantone color matching, foil stamping, embossing, and a custom insert.
For the purpose of this comparison, I treat the figures primarily as production-price references. Project-specific sampling, cutting dies, printing or finishing tooling, international freight, duties, taxes, palletization, warehousing, and other logistics costs may sit outside the unit price depending on how the supplier structures the quotation. I therefore check those costs separately before treating any unit price as the final packaging budget.
The ranges are intentionally broad because size and specification can move a project substantially within the same packaging category. Their main value is not telling me exactly what a box will cost. Their value is helping me answer a more practical first question:
Is this packaging concept likely to require a $0.30, $1.00, $3.00, or $6.00-per-unit budget before I develop the final specification?
| Packaging Type | 1,000 Units | 2,500 Units | 5,000 Units | 10,000+ Units | Main Cost Drivers |
|---|---|---|---|---|---|
| Folding Cartons | $0.40–$1.50 per unit | $0.30–$1.10 per unit | $0.22–$0.85 per unit | $0.15–$0.65 per unit | Board grade, dimensions, printing, finishes |
| Rigid Boxes | $2.00–$8.00+ per unit | $1.60–$6.50 per unit | $1.30–$5.50 per unit | $1.00–$4.50+ per unit | Greyboard, wrapping paper, structure, hand assembly |
| Corrugated Mailer Boxes | $0.80–$2.80 per unit | $0.60–$2.20 per unit | $0.45–$1.80 per unit | $0.35–$1.50 per unit | Dimensions, flute, print method, print coverage |
| Corrugated Shipping Boxes | $0.70–$3.00 per unit | $0.55–$2.40 per unit | $0.40–$2.00 per unit | $0.30–$1.60 per unit | Board strength, dimensions, construction, printing |
| Custom Paper Bags | $0.35–$2.00 per unit | $0.28–$1.60 per unit | $0.22–$1.25 per unit | $0.16–$1.00 per unit | Paper GSM, size, handles, reinforcement, finishes |
The table shows why I avoid discussing “custom packaging cost” as if all packaging belonged to one pricing category. At the same order quantity, a folding carton may remain relatively economical because printing, die-cutting, folding, and gluing can be organized efficiently, while a rigid box normally carries more material and manual assembly. Corrugated packaging is influenced heavily by dimensions and board structure, while paper bags can move from economical kraft constructions to much more elaborate retail packaging depending on handles, reinforcement, paper grade, and finishing.
Quantity also changes the economics, but I would use the table to understand the direction rather than assume that every project will decrease at exactly the same rate. Higher quantities usually spread production setup across more units, while material consumption, manual assembly, special processes, and packing requirements continue to contribute to every finished piece.
I explain those quantity effects in more detail later in this guide rather than using this first price table to make assumptions about the ideal order size.
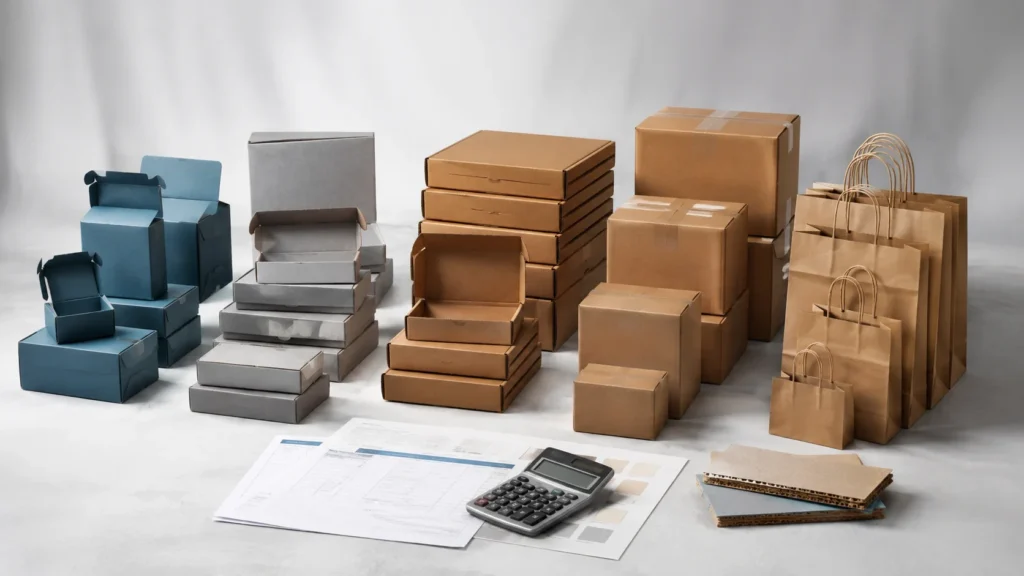
What Moves a Project Toward the Lower or Higher End of the Range
A project normally moves toward the lower end of a price range when its dimensions are compact, material specifications are conventional, printing is straightforward, the structure is efficient to manufacture, finishing is limited, the insert is simple or unnecessary, and production can use standard processes with relatively little manual assembly.
The same packaging type can move toward the higher end of the range when the box becomes larger, heavier board is required, specialty paper is selected, print coverage increases, inside printing or tighter color control is added, or premium effects such as foil stamping, embossing, debossing, spot UV, soft-touch surfaces, magnetic closures, ribbon details, or custom inserts become part of the specification.
Rigid boxes are a good example. A straightforward two-piece rigid box and a magnetic closure presentation box may both be classified as rigid packaging, but their production requirements are not equivalent. The magnetic box may require additional components, more wrapping and assembly work, precise magnet positioning, premium finishes, and a fitted insert. The quantity may be identical while the cost per unit remains substantially different.
The same principle applies to corrugated packaging. A standard printed mailer intended primarily for e-commerce protection does not have the same cost structure as a full-color litho-laminated mailer with inside printing and a precision insert. A shipping carton designed for lightweight products also should not be compared directly with a stronger specification intended for heavier loads, stacking, or international transport.
For paper bags, the lower end is more likely to reflect a relatively straightforward paper and handle construction, while premium coated or specialty papers, rope handles, reinforced top and bottom cards, lamination, foil stamping, and more demanding finishing move the project upward.
This is why I treat the price table as the starting point for budgeting, not the final quotation. Once I know the packaging dimensions, material specification, printing requirement, finishes, insert, quantity, packing method, and delivery scope, I can move from a broad price range to a specification-based production cost.
How Much Does Each Type of Custom Packaging Cost?
The cost of custom packaging changes significantly depending on the packaging structure because each format uses a different combination of paper, board thickness, printing, converting, assembly, and finishing. I do not compare a folding carton directly with a rigid box or a corrugated mailer simply by looking at the unit price. Instead, I first look at what the packaging needs to do: protect the product, present the brand, support retail display, survive e-commerce shipping, or create a more premium unboxing experience.
The price ranges shown earlier in this guide provide a useful budgeting reference, but this section explains why each packaging type sits at a different cost level. Understanding that difference is important because the lowest-priced structure is not always the most suitable one, and a more expensive format may sometimes reduce the need for additional inserts, outer packaging, or secondary protection.
Folding Cartons: Usually the Most Cost-Efficient Option for Retail Packaging
Folding cartons are usually one of the most economical forms of custom printed packaging when the product does not require the thickness or presentation of a rigid box. I commonly use them for cosmetics, supplements, skincare, small electronics, candles, food products, accessories, and other retail products where the box needs to provide branding, product information, moderate protection, and efficient packing.
Their cost advantage comes largely from the production process. Folding cartons are normally printed on paperboard sheets, die-cut, creased, folded, and glued using relatively efficient converting equipment. Once the printing plates, cutting die, artwork, and production settings are prepared, higher quantities can be produced efficiently, which is why folding carton unit prices usually fall noticeably as order quantity increases.
The lower end of the folding carton price range normally applies to relatively small boxes using conventional paperboard, straightforward CMYK or spot-color printing, standard tuck-end or similar structures, and limited finishing. The cost increases when I move toward larger dimensions, thicker board, specialty paper, interior printing, foil stamping, embossing, debossing, spot UV, soft-touch lamination, custom windows, or more complicated structural designs.
The box style also matters. A standard straight tuck-end carton is generally easier and less expensive to manufacture than an auto-lock bottom carton, crash-lock structure, sleeve-and-tray combination, or carton with an integrated insert. These structures may use more board, require additional die-cutting or gluing, or take longer to assemble.
For buyers comparing different folding carton quotations, I therefore look beyond the unit price and check whether the paperboard grade, thickness, printing coverage, surface finish, structural style, packing method, and tooling costs are actually comparable. Two cartons can appear similar in a photograph but have very different manufacturing specifications.
Rigid Boxes: Higher Cost for Premium Structure and Presentation
Rigid boxes normally sit at the highest end of the custom paper packaging price range because they use thicker board, more materials, more components, and considerably more assembly than folding cartons. I typically consider rigid packaging when the product needs stronger presentation, a premium opening experience, better structural stability, or a higher perceived value.
Unlike a folding carton, a rigid box is generally made from thick greyboard or chipboard that is cut into panels and then wrapped with printed or specialty paper. The wrapping process, corner construction, alignment, and assembly require more production steps. Depending on the structure, part of this work may also involve substantial manual finishing.
A simple two-piece rigid box is usually less expensive than a magnetic closure box, drawer box, shoulder-neck box, book-style box, or presentation box with multiple components. Each additional structural element can increase material use, assembly time, and production complexity.
The insert can also become a major part of the total packaging cost. A simple paperboard platform is relatively economical, while EVA foam, molded pulp, fabric-covered inserts, multiple compartments, or precision structures designed around several products can add significant cost. This is particularly relevant for perfume, cosmetics, jewelry, electronics, gift sets, and premium wellness products where the insert forms part of the presentation rather than serving only as basic protection.
Finishing also affects rigid box pricing more strongly because premium rigid packaging often combines several processes. Specialty wrapping paper, hot foil stamping, embossing, debossing, spot UV, textured surfaces, soft-touch finishes, magnetic closures, ribbons, and custom accessories can all increase the final cost.
When I evaluate whether a rigid box is justified, I therefore do not ask only whether it costs more than a folding carton. I ask whether the additional structure, presentation, protection, and perceived value support the positioning of the product. For a premium fragrance, gift set, luxury cosmetic product, or high-value electronics package, that difference can be commercially meaningful.
Corrugated Mailer Boxes: Cost Depends Strongly on Size, Flute, and Printing
Corrugated mailer boxes usually fall between lightweight folding cartons and more substantial shipping packaging in terms of cost. I commonly use them for e-commerce orders, subscription packaging, gift sets, apparel, cosmetics, accessories, electronics, and products that need stronger protection during parcel delivery.
Their pricing is influenced heavily by the box dimensions because corrugated packaging consumes much more board as the length, width, and depth increase. A small mailer can be relatively economical, while a larger mailer with the same artwork may cost substantially more simply because of the additional material area.
The flute structure also matters. E-flute and other relatively fine corrugated constructions are commonly used when print quality and presentation are important, while stronger board combinations may be required for heavier products or more demanding shipping conditions. Increasing board strength normally increases material cost, although the correct specification should be based on the product weight and distribution risk rather than simply choosing the thickest board.
Printing method can create another major price difference. Simple flexographic printing may be economical for straightforward graphics and larger production runs. Digital printing can be attractive for lower-volume or multi-SKU projects where flexibility is important. Litho-laminated corrugated packaging generally provides a more refined retail-quality print surface, but it adds additional printing, lamination, and converting steps.
Inside printing, full-color exterior coverage, specialty coatings, inserts, tear strips, adhesive closures, and more complicated die-cut structures can push a mailer toward the higher end of the price range.
For e-commerce projects, I also look at shipping efficiency. A slightly cheaper mailer is not necessarily a better choice if it creates excessive empty space, requires more filler, increases dimensional shipping weight, or does not protect the product adequately. In many cases, optimizing the box dimensions can improve both packaging cost and downstream fulfillment cost.
Corrugated Shipping Boxes: Material Strength and Dimensions Drive the Cost
Corrugated shipping boxes are primarily designed around transport protection, stacking, storage, and logistics rather than premium presentation. Their cost is therefore influenced more strongly by board grade, box dimensions, flute combination, strength requirements, and shipping environment than by decorative finishing.
A standard regular slotted container used for relatively lightweight products can be very economical at volume. Costs increase when the carton becomes larger, when heavier board or stronger flute combinations are required, or when the product needs better compression strength for stacking, palletization, export shipment, or long-distance transportation.
For these projects, I normally look at the product weight, number of units per carton, stacking height, pallet configuration, handling conditions, and distribution method before deciding the board specification. Choosing a board that is too weak can lead to crushing, product damage, or pallet instability, while unnecessarily over-specifying the corrugated board can increase both packaging cost and shipping weight.
Printing is another factor, although shipping cartons often use simpler graphics than retail mailers. One- or two-color flexographic printing may be sufficient for logos, handling symbols, product information, barcodes, or shipping identification. Full-color printing, coated liners, or litho-laminated surfaces move the carton into a more premium category and increase the cost.
I also consider how the carton is packed and shipped from the packaging factory. Corrugated shipping boxes are normally supplied flat, which is efficient, but large cartons can still occupy considerable transport volume. For international orders, the packed volume of the empty cartons can materially affect the delivered packaging cost.
This is why I evaluate shipping cartons as part of the complete logistics system rather than only as a paper product. The most economical specification is normally the one that achieves the required protection without using unnecessary board, excessive dimensions, or more print and finishing than the supply chain actually needs.
Custom Paper Bags: Simple Structures Can Be Economical, but Premium Details Add Cost Quickly
Custom paper bags can range from relatively economical retail carriers to highly finished premium packaging, so the price difference between two bags can be substantial even when their dimensions are similar.
At the lower end, I usually see straightforward kraft or coated-paper bags with conventional printing, standard handles, and limited finishing. These structures are commonly suitable for retail stores, apparel, takeaway products, events, promotional use, or packaging projects where the main objective is convenient product carrying combined with brand visibility.
The cost rises as the paper specification becomes heavier or more specialized. Premium coated papers, textured papers, dyed papers, FSC-certified options, or more demanding print surfaces can all affect material cost. Larger bags also require more paper and stronger reinforcement, particularly when they are expected to carry heavier products.
Handle construction is another important factor. Twisted paper handles, flat paper handles, cotton rope, ribbon, or other premium handle options do not have the same cost structure. Some handle systems also require additional reinforcement around the top of the bag to support the load.
Premium retail bags may include laminated surfaces, foil stamping, embossing, debossing, spot UV, special printing, reinforced top cards, reinforced bottom boards, eyelets, or custom ribbons. Each of these details introduces additional materials or processing steps.
I therefore treat paper bag pricing in much the same way as box pricing: the dimensions alone are not enough. I need to understand the paper GSM, handle type, reinforcement, printing coverage, finishing, quantity, and expected carrying weight before deciding whether a price comparison is meaningful.
For coordinated retail packaging projects, I also look at the paper bag together with the product box rather than as a separate item. Matching paper tone, logo color, print finish, and overall presentation across both components can create a more consistent brand experience, but it may also require tighter color control and material selection.
How I Compare the Cost of Different Packaging Types
When I compare these packaging formats, I do not assume that one type is universally more cost-effective than another. Folding cartons are usually the most efficient option for lightweight retail packaging, rigid boxes are better suited to premium presentation, corrugated mailers combine branding with shipping protection, shipping cartons focus on logistics performance, and paper bags support retail carrying and brand presentation.
The correct comparison therefore starts with the packaging function. If a lightweight product only needs a printed retail carton, using a rigid box may add unnecessary cost. If a premium gift set needs to stay organized and present well when opened, a folding carton may not provide the same experience. If an e-commerce product already needs a protective shipping box, a properly designed corrugated mailer may reduce the need for an additional outer carton.
That is why I use the price ranges as a decision framework rather than a purchasing rule. Once the correct packaging format is identified, I can then optimize the dimensions, material, structure, printing, finishing, and quantity within that category to control the final cost more effectively.
How Order Quantity Changes Custom Packaging Cost
Order quantity is one of the strongest influences on custom packaging unit cost, but the relationship is not as simple as “the more I order, the cheaper every box becomes.” Quantity changes how fixed production costs are distributed, how efficiently materials can be purchased and converted, how long equipment can run without interruption, and how much manual work remains in each finished package.
When I compare quotations at different quantities, I therefore look at both the unit-price reduction and the total purchasing commitment. A lower unit price can improve packaging economics, but ordering more packaging than the product can realistically consume may create excess inventory, outdated artwork, storage cost, or unnecessary cash tied up in packaging.
For most projects, the better question is not simply, “Which quantity gives me the lowest unit price?” It is:
At what quantity do production efficiency, inventory risk, cash flow, and expected product demand reach a sensible balance?
Why Unit Cost Usually Falls as Quantity Increases
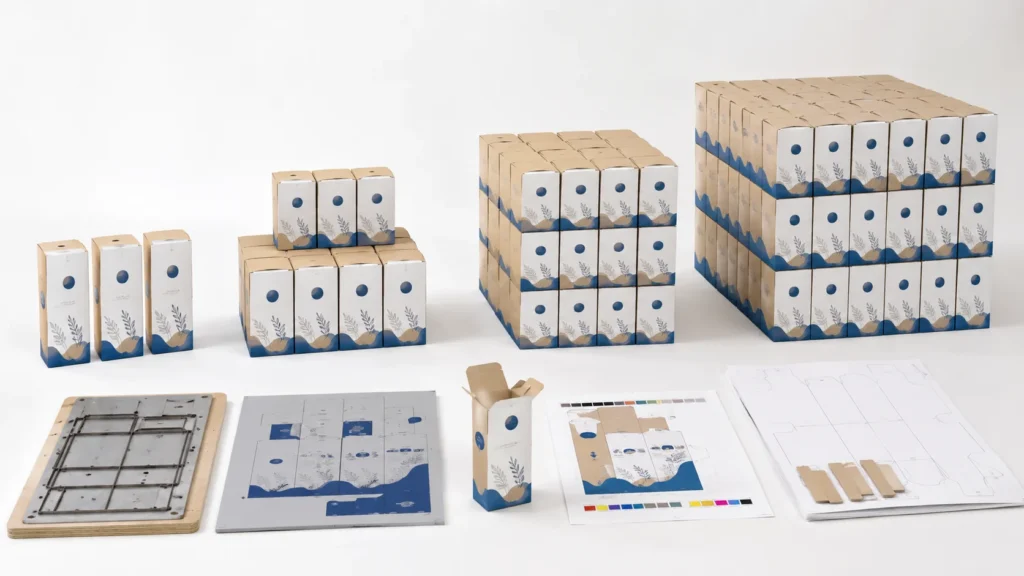
Every custom packaging order contains costs that must be prepared before the first finished box is produced. Depending on the packaging type and printing process, these can include structural development, prepress preparation, printing plates, cutting dies, machine setup, color adjustment, finishing setup, and production testing.
These costs do not increase proportionally with every box.
If a cutting die and machine setup cost the same whether I produce 1,000 or 5,000 cartons, the setup cost is distributed across far more units at 5,000 pieces. That immediately lowers the fixed-cost contribution to each finished package.
The same principle applies to many production processes. Printing presses, die-cutting machines, laminating equipment, foil stamping machines, folder-gluers, and other converting equipment require preparation before stable production begins. Short production runs spend a larger percentage of total production time on setup, adjustment, inspection, and changeover, while longer runs allow the machinery to operate efficiently for more of the order.
Material purchasing can also become more efficient at higher volumes. Larger paperboard, corrugated board, specialty paper, or wrapping-paper requirements may improve sheet utilization or purchasing conditions, while small orders can create unused material, minimum material commitments, or higher waste percentages.
This is why the largest unit-price reduction often occurs when a project moves from a relatively small production run into a more efficient commercial quantity. After that point, unit costs can continue to decrease, but the rate of reduction normally becomes smaller.
What to Expect at 1,000 Units
At approximately 1,000 units, fixed production costs still have a relatively strong effect on the price of each box. Printing setup, dies, finishing preparation, machine adjustment, and quality-control procedures are being distributed across a comparatively small number of finished packages.
I usually see this quantity as useful when a brand is introducing a new product, testing a packaging structure, launching a new SKU, entering a new market, or trying to avoid committing too heavily to packaging inventory before actual sales demand becomes clearer.
However, buyers should not expect the economics of a 1,000-piece run to match a mature 5,000- or 10,000-piece production order. The factory still needs to complete most of the same preparation work even though fewer finished units are produced.
The effect becomes particularly noticeable when the packaging uses several special processes. A carton with printing, foil stamping, embossing, lamination, and a custom insert may require several separate setups. At lower quantities, those setup costs can represent a significant portion of the final unit price.
Material efficiency can also be weaker. If a project needs only part of a standard production batch of paper or specialty material, the unused balance does not automatically disappear from the manufacturing cost.
For that reason, I normally treat a 1,000-piece order primarily as a flexibility quantity rather than an efficiency quantity. The higher unit price may be justified if it reduces the commercial risk of ordering packaging before the product, artwork, or market demand has been fully proven.
What Changes at 2,500 to 5,000 Units
For many custom packaging projects, the 2,500-to-5,000-unit range begins to create a more favorable balance between manufacturing efficiency and inventory commitment.
At this level, setup costs are spread across significantly more units, production machinery can operate for longer continuous runs, and material utilization often becomes more efficient. The difference is particularly noticeable for folding cartons, printed corrugated packaging, and other formats where the production process can scale effectively once the equipment is running.
This quantity range can also provide more flexibility when selecting materials or finishes because the cost of special processes is no longer concentrated across such a small order.
For example, the setup cost for foil stamping does not disappear at 5,000 units, but its contribution to the cost of each individual box becomes much smaller than at 1,000 units. The same applies to printing plates, embossing dies, cutting tools, and many other one-time or semi-fixed production costs.
From a purchasing perspective, I often consider this range particularly relevant for established products with predictable sales, growing e-commerce brands, repeat retail orders, or packaging programs where the design is unlikely to change in the near term.
There is still an important inventory question, however. If a business sells several SKUs, 5,000 boxes for one design can be very different from 5,000 boxes distributed across five designs.
This leads to one of the most common misunderstandings in packaging quotations.
Total Quantity and Quantity Per SKU Are Not Always the Same Thing
When I evaluate packaging cost for a multi-SKU project, I always distinguish between the total order quantity and the quantity of each individual artwork or specification.
Suppose a project requires 10,000 folding cartons in total but includes five different products, with 2,000 cartons for each SKU. From a purchasing perspective, the order contains 10,000 boxes. From a production perspective, however, the factory may need to prepare five different artworks, printing layouts, color adjustments, product codes, or finishing setups.
The production economics therefore may not be equivalent to one single 10,000-piece SKU.
If the carton dimensions, material, structure, and printing process are identical, some production stages may still be combined efficiently. But artwork changes, Pantone colors, foil positions, product information, barcodes, language versions, or different box dimensions can introduce additional setup and changeover costs.
This is particularly important for supplement, cosmetic, skincare, fragrance, food, and other product lines where one brand may have many flavors, formulas, sizes, or product variants.
For multi-SKU projects, I therefore do not ask only:
“How many boxes are we ordering?”
I also ask:
“How many packaging specifications and artwork versions are those boxes divided between?”
That distinction can have a significant effect on the final quotation.
What Changes at 10,000 Units and Above
At 10,000 units and above, many custom packaging projects reach a more efficient production scale. Fixed setup costs have already been distributed across a large quantity, machinery can operate in longer runs, and material purchasing can often be planned more effectively.
The unit price may therefore become substantially lower than at 1,000 units.
However, I would not expect the percentage reduction from 5,000 to 10,000 units to always be as dramatic as the reduction from 1,000 to 5,000 units.
Once setup costs have already become a relatively small part of the unit price, the remaining cost is increasingly determined by expenses that continue with every finished package. Paper, board, ink, lamination film, magnets, ribbon, foam, inserts, adhesive, manual assembly, packing materials, and production labor do not disappear simply because the quantity increases.
This creates a natural pricing floor.
For example, if a rigid box requires thick greyboard, specialty wrapping paper, magnets, a fitted insert, foil stamping, and substantial hand assembly, increasing the quantity can improve production efficiency, but the manufacturer still needs those materials and assembly operations for every individual box.
This is why premium rigid packaging usually has a different quantity-price curve from a relatively simple folding carton.
At larger quantities, I also pay much more attention to material purchasing, quality consistency, packing configuration, palletization, warehouse capacity, and shipping planning. Saving several cents per box can become commercially meaningful across tens of thousands of units, but a production or logistics problem at the same scale can also create a much larger financial impact.
Why the Lowest Unit Price Is Not Always the Best Order Quantity
A larger order normally produces a lower unit price, but it also increases the total amount of money committed to packaging.
If 1,000 boxes cost $0.80 each, the packaging purchase is $800. If 5,000 boxes reduce the price to $0.45 each, the unit economics look much better, but the total packaging purchase increases to $2,250.
The second option may be an excellent decision if the product has stable demand and those boxes will be consumed within a reasonable period. It may be a poor decision if the product is still being tested, the packaging artwork is likely to change, regulatory information may need updating, or sales volume remains uncertain.
Packaging inventory also occupies physical warehouse space. Large rigid boxes and corrugated packaging can require substantial storage volume even when supplied efficiently, while long storage periods can create additional risks such as dust, humidity, deformation, color changes, or obsolete packaging.
For products that change frequently, I therefore put more weight on flexibility. For mature products with stable specifications and predictable consumption, I can put more weight on manufacturing efficiency.
How I Decide Which Quantity Makes Economic Sense
I normally compare several quotation quantities rather than asking for only one price. For example, comparing 1,000, 2,500, 5,000, and 10,000 units allows me to see where the strongest unit-cost reductions occur and where the price curve begins to flatten.
If the price drops substantially between 1,000 and 2,500 units but changes only slightly between 5,000 and 10,000 units, ordering 10,000 units purely to achieve the lowest unit price may not create enough additional savings to justify the inventory commitment.
I also compare the expected packaging consumption period. A quantity that can realistically be consumed within several months may be easier to justify than packaging that could remain in storage for several years.
For repeat orders, there may also be another advantage. Once the structure, artwork, color standards, material specification, and production requirements have been confirmed, future orders may become easier to reproduce consistently. That can allow the purchasing strategy to focus less on testing the packaging and more on balancing forecast demand with efficient manufacturing quantities.
For this reason, I treat order quantity as part of a broader purchasing decision rather than simply a route to the lowest possible unit price. The most economical quantity is normally the one that combines efficient production with realistic demand, manageable inventory, stable specifications, and acceptable cash-flow exposure.
What Actually Determines Your Custom Packaging Price?

Once the packaging type and order quantity are known, I can estimate the general cost level, but I still cannot determine an accurate price from those two details alone. The final quotation depends on the specification of the packaging itself: its dimensions, material, printing, finishes, structure, inserts, and the amount of manufacturing work required to turn those specifications into a finished package.
This is why two quotations for “5,000 custom boxes” can still be very different. One supplier may be pricing a compact carton with standard paperboard and straightforward printing, while another may be pricing heavier material, tighter color control, special finishes, a more complicated structure, or a fitted insert.
I therefore prefer to compare custom packaging prices by asking a more useful question:
Which specification is creating the cost, and does that specification create enough value to justify it?
That approach makes it much easier to reduce unnecessary cost without weakening product protection, brand presentation, or production reliability.
Packaging Size and Material Usage
Dimensions are one of the first specifications I review because size affects much more than whether the product fits inside the package. It determines how much paper or board is consumed, how efficiently the dieline fits onto a production sheet, how much waste is created during converting, and how much space the finished packaging occupies when it is packed, stored, and transported.
A slightly larger box can sometimes cost noticeably more even when the visual difference seems small. Increasing the length, width, or depth increases the total material area, but it can also change how many dielines fit onto one production sheet. If a carton size allows efficient sheet utilization, more boxes can be produced from the same amount of paperboard. If a small dimensional change reduces that yield, material consumption per box can increase.
The effect is different across packaging formats. A larger folding carton requires more paperboard and increases the printable area. A larger rigid box requires more greyboard, wrapping paper, adhesive, and handling. A larger corrugated box consumes more board and can increase both packed volume and freight cost. A larger paper bag may require additional paper, wider gussets, stronger handles, or more reinforcement.
This is why I do not begin structural development by making a package larger than necessary simply to create a more substantial appearance. I normally start with the actual product dimensions, required clearance, insert space, packing method, protection requirement, and distribution conditions, and then right-size the structure around those needs.
Right-sizing is not only a cost-control decision. Reducing unnecessary packaging material can also support a broader approach source reduction and reuse. For me, however, this does not mean making every package as small or lightweight as possible. The package still needs enough material and internal space to protect the product, run reliably in production, and perform throughout storage and distribution.
A few millimeters do not always create a meaningful price difference, but dimensions that change sheet utilization, board consumption, insert size, packed volume, or shipping configuration can affect both manufacturing cost and the eventual landed cost.
I therefore treat packaging dimensions as a commercial specification as well as a structural specification. Before increasing the size of a box, I want to understand what practical function that extra material is performing.
Material and Board Specification
Material affects cost because paper-based packaging is not manufactured from one universal paper grade, weight, or thickness. Folding cartons, rigid boxes, corrugated packaging, inserts, sleeves, and paper bags all require different material specifications because they perform different structural jobs.
For folding cartons, I normally consider the paperboard grade, GSM, actual caliper, stiffness, surface quality, printing requirement, and folding performance together. A lightweight retail product may not require the heaviest board available, while a larger or heavier product may need additional stiffness to prevent bowing, deformation, or weak panels.
This distinction is important because GSM does not tell me everything about the physical behavior of a paperboard. Two materials with the same GSM can have different thickness, density, stiffness, surface characteristics, and folding performance. Likewise, a 350 GSM folding carton board should not be compared directly with a 2 mm rigid-box greyboard because they perform completely different structural functions.
When a quotation uses GSM, PT, caliper, or millimeters, I therefore check what that measurement actually represents before comparing prices. I explain these differences in more detail in my paper weight chart for packaging, where I compare how weight and thickness specifications apply to folding cartons, rigid boxes, paper bags, inserts, and corrugated packaging.
For rigid boxes, greyboard thickness and wrapping paper both influence cost. Increasing the greyboard thickness uses more material and can affect cutting, wrapping, corner formation, box weight, and the overall feel of the finished package. The outer wrapping paper creates another variable because coated, uncoated, textured, dyed, recycled, and specialty papers can have very different costs and converting characteristics.
Corrugated packaging needs to be evaluated differently again. I look at flute type, liner and medium combinations, board construction, product weight, compression requirements, stacking conditions, shipping method, and distribution risk rather than judging strength by GSM or thickness alone. A stronger board specification can be justified for heavier products or difficult logistics, but automatically increasing the board grade without a performance reason can add material cost without producing a meaningful benefit.
For paper bags, paper GSM must work together with bag dimensions, gusset depth, handle type, reinforcement, and expected carrying weight. A lightweight apparel bag and a large retail bag carrying several boxed products should not use the same material logic.
I therefore avoid using “thicker is better” or “higher GSM is better” as purchasing rules. Under-specifying material can lead to deformation, weak packaging, damaged products, or inconsistent production. Over-specifying it can increase material consumption, weight, cost, storage requirements, and sometimes converting difficulty.
The better target is the lowest practical material specification that still achieves the required strength, appearance, print quality, protection, and production consistency.
Material sourcing requirements can also affect the specification. If a project requires FSC-certified paper or board, I confirm that requirement before quotation rather than treating “FSC” as a generic material description. FSC chain of custody certification is relevant because Chain of Custody concerns how FSC-certified material is identified and managed through the supply chain. For a packaging buyer, that means certification requirements should be confirmed together with the material grade, documentation requirements, product claim, and intended use rather than added casually after production planning has already begun.
Material consistency becomes especially important for repeat orders. If paper shade, surface texture, board thickness, stiffness, or print behavior changes between production batches, the finished packaging may look or perform differently even when the artwork has not changed.
For multi-SKU brands and recurring purchasing programs, I therefore prefer a clearly defined material specification over selecting whichever paper happens to be cheapest for each individual order.
Printing Method and Print Coverage
Printing cost is determined by much more than whether the packaging contains a logo or full-color artwork. I look at the printing method, number and type of colors, print coverage, material surface, interior and exterior printing, color-control requirements, and production quantity together.
Offset printing is commonly suitable for folding cartons, printed sheets used to wrap rigid boxes, and other applications where detailed graphics and consistent color reproduction are important. Flexographic printing is widely used for corrugated packaging and can be efficient for many shipping and e-commerce applications. Digital printing can provide useful flexibility for prototypes, lower production quantities, or projects containing several artwork versions, although its cost structure changes as production quantity increases.
The correct printing method therefore depends on the project rather than on one process being universally cheaper.
Artwork complexity also changes the production requirement. A relatively small logo or limited printed area is different from artwork with full-panel color coverage, large solid backgrounds, photographs, gradients, multiple Pantone colors, or printing across both the exterior and interior surfaces.
Heavy solid colors may require more careful ink control and inspection to maintain an even appearance. Brand-critical Pantone colors may need tighter matching and production approval. Printing on kraft, textured paper, uncoated stock, specialty paper, or corrugated board can also produce a different visual result from printing on smooth white coated paperboard.
This is why I prefer to consider the printing process while the artwork is being developed rather than waiting until the design is completely finished. A design that looks relatively simple on screen may become considerably more demanding once the substrate, print coverage, color tolerance, registration, and production process are taken into account.
My goal is not to reduce every project to the cheapest printing method. It is to select a process that can reproduce the artwork consistently at the required quantity without introducing printing complexity that the packaging does not actually need.
Finishes and Special Effects
Finishing is one of the areas where custom packaging cost can increase quickly because each additional effect represents a separate manufacturing operation rather than simply another element in the artwork file.
Lamination, foil stamping, embossing, debossing, spot UV, soft-touch surfaces, textured materials, metallic effects, and similar treatments can improve the visual or tactile experience, but they also add materials, setup requirements, production time, inspection, and sometimes additional waste.
For example, foil stamping requires dedicated tooling and a separate application process. Embossing and debossing require dies, controlled pressure, and accurate alignment. Spot UV needs registration with the printed graphics. Lamination introduces another production stage before subsequent converting operations can take place.
When several effects are combined, the cost impact is not simply the price of the decorative material. The entire manufacturing sequence becomes more complicated.
Printing, lamination, foil stamping, embossing, die-cutting, gluing, wrapping, and other processes may need to occur in a specific order. Every additional production stage creates another point where registration, surface quality, adhesion, alignment, or consistency needs to be controlled.
This is why I normally ask what each finish is expected to achieve.
A small foil logo may create enough visual emphasis without applying foil across an entire panel. Embossing may add tactile value to the main brand mark without covering the whole package. A carefully selected specialty paper may already provide enough premium character without combining several decorative processes.
I prefer one or two finishes with a clear purpose over adding multiple effects simply because they are technically available. This can preserve the intended premium appearance while making the package easier to manufacture, inspect, and reproduce consistently.
The most effective finish is therefore not necessarily the most expensive one. It is the finish that creates a noticeable brand, retail, or customer-experience benefit relative to the cost and production complexity it adds.
Structure and Assembly Complexity
Two packages can use similar materials and have similar overall dimensions but still have very different prices because their structures require different amounts of converting and assembly.
A straightforward folding carton can normally move efficiently through printing, die-cutting, folding, and gluing. A more complicated structure may contain additional panels, locking mechanisms, multiple glue areas, windows, integrated handles, trays, sleeves, separate components, or unusual opening features.
Each additional structural requirement can increase material consumption, tooling complexity, machine time, or manual assembly.
Rigid boxes show this difference particularly clearly. A conventional two-piece rigid box is generally less complicated than a magnetic closure box, drawer box, shoulder-neck construction, book-style presentation box, or multi-component gift box.
Magnets need to be positioned correctly. Drawers need enough clearance to open smoothly without feeling loose. Shoulder-neck components need accurate fitting between the inner and outer sections. Multi-component gift boxes may require several independently wrapped and assembled parts.
Paper bags follow the same principle. Standard structures can be manufactured efficiently, while premium bags with rope or ribbon handles, eyelets, reinforced top cards, reinforced bottom boards, or special closures require additional materials and assembly.
The amount of manual work is particularly important.
Automation can improve cost efficiency when packaging can move continuously through die-cutting, folding, gluing, or forming equipment. More complicated premium packaging may still require manual wrapping, magnet placement, ribbon installation, accessory fitting, insert assembly, or final hand finishing.
Unlike a tooling or machine-setup cost that can be distributed across a larger quantity, manual assembly still needs to be performed on every finished package.
This is one reason a complicated rigid box can remain relatively expensive even when the production quantity increases substantially.
When I review the structure, I therefore ask whether each element improves protection, usability, presentation, packing efficiency, or the opening experience. If a feature does not contribute meaningfully to one of these functions, simplifying the structure can often reduce cost without making the packaging feel cheaper.
Inserts and Internal Packaging
An insert should not be treated as an accessory selected after the outer box has already been developed. In many projects, the insert directly affects the required box dimensions, protection level, structural design, assembly time, material consumption, and final packaging cost.
A simple folded paperboard insert may be an economical option for lightweight products. Corrugated inserts can provide additional support for e-commerce or heavier products. Molded pulp can be suitable for certain product shapes and paper-based packaging strategies. EVA, foam, or fabric-covered inserts can create a more precise premium presentation but normally involve higher material and processing costs.
Complexity also matters within the same insert material.
Holding one bottle in position is very different from developing a gift-set insert for several products with different dimensions, shapes, and heights. A multi-product layout may require several cavities, support walls, finger-access areas, layered components, or separated compartments.
The insert can then force the outer box to become wider, longer, or deeper, which means its cost impact extends beyond the price of the insert itself.
This is why I prefer to develop the product, insert, and outer box as one packaging system rather than designing each component separately.
I also consider packing efficiency. An insert may hold the product beautifully once assembled but still be commercially inefficient if operators require too much time to form the insert, align components, or force each product into position.
A fit that is too tight can slow packing and make product removal difficult. A fit that is too loose may allow excessive movement and reduce both protection and presentation quality.
Whenever possible, I prefer to validate the insert using the actual product rather than relying only on nominal dimensions. This allows me to check product fit, removal, presentation, structural support, and packing efficiency before bulk production.
A more expensive insert is justified when it solves a genuine protection, organization, or presentation problem. If a simpler paperboard or corrugated structure can achieve the same result, additional material and assembly complexity may not create enough value to justify the extra cost.
How I Turn These Cost Drivers Into a Better Specification
Once I have reviewed the dimensions, material, printing, finishes, structure, and insert, I can usually identify where the packaging budget is actually being consumed.
If the package is too expensive, I do not immediately replace the material with something cheaper. I first look for specifications that can be optimized without changing the role of the package.
The dimensions may be larger than necessary. The material may be heavier than the product requires. Full interior printing may add little practical value. The foil area may be larger than necessary. A complicated insert may be replaceable with a simpler paperboard structure. A structural feature may look interesting but contribute little to protection, usability, or presentation.
The opposite problem is equally important.
A quotation can appear artificially low because the material has been under-specified, the board strength has not been defined, the structure does not provide enough protection, the required color standard has not been included, or an insert that the final project needs is missing from the quotation.
For that reason, I do not treat either the highest or lowest quotation as automatically representing the correct custom packaging price.
At this stage, my objective is to create a clear, production-ready specification in which every major cost has a reason to exist.
Once that specification is established, I can separate the costs that occur before production from the costs attached to every finished unit. That distinction is important because tooling, setup, and development costs behave very differently from materials, printing, assembly, and other per-unit costs as the order quantity changes.
Fixed Costs vs Unit Costs in Custom Packaging
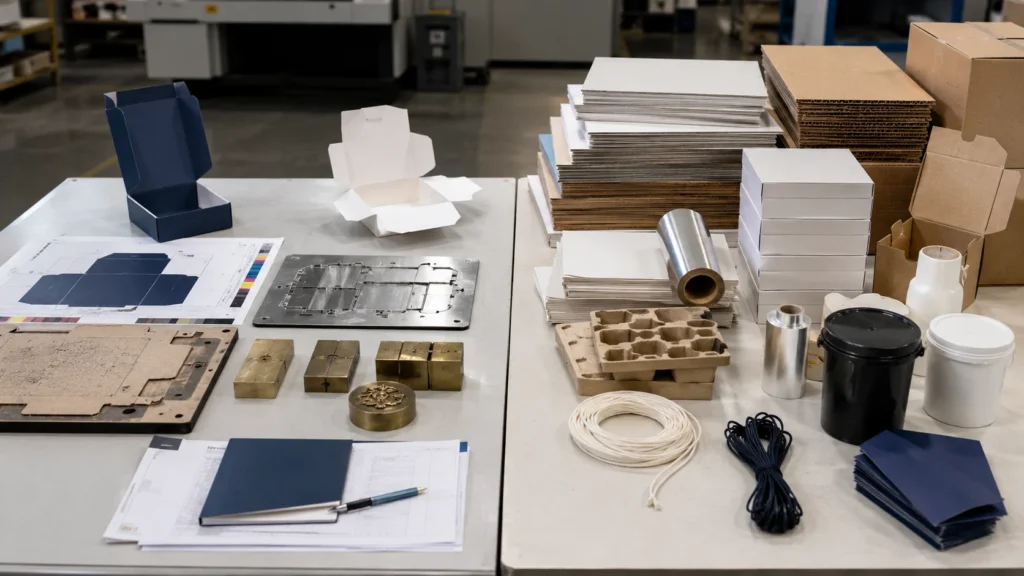
When I review a custom packaging quotation, I separate the total price into two broad categories: fixed costs and unit costs. This distinction helps explain why the same packaging specification can have very different unit prices at different order quantities and why some production costs decrease rapidly with volume while others remain relatively stable.
Fixed costs are the expenses required to prepare a project for production. They usually occur before or at the beginning of manufacturing and do not increase in direct proportion to the number of finished boxes. Unit costs, by contrast, are tied more closely to each individual package and continue to accumulate as production volume increases.
Understanding the difference between these two cost groups makes it much easier to compare quotations, evaluate MOQ, estimate repeat-order economics, and decide whether a more complicated packaging specification is financially practical.
What I Consider Fixed Costs in Custom Packaging
Fixed costs are the costs that must usually be paid whether I produce 1,000 boxes or 10,000 boxes. Their exact form depends on the packaging structure, printing method, finishing process, and supplier, but the principle is the same: they are necessary to prepare the project before stable bulk production can begin.
A cutting die is one of the clearest examples. Before a folding carton, sleeve, insert, mailer, or other die-cut package can be produced, the structure normally needs a confirmed dieline showing the cutting lines, crease lines, glue areas, panels, and final dimensions. Once the dieline is approved, a physical cutting die may be produced so the printed sheets can be converted into the correct shape.
I therefore treat dieline development as part of the production-preparation stage rather than as a simple artwork task. A structural error at this point can affect product fit, folding, gluing, insert alignment, artwork positioning, and the final cutting tool. I explain these structural files, approval points, and common preparation errors in more detail in my packaging dieline guide.
The cost of producing the cutting die does not normally become ten times higher simply because the quantity increases from 1,000 to 10,000 pieces. Once the tool has been prepared, it can usually be used throughout the production run, which is why I classify it primarily as a fixed project cost.
Printing preparation can behave in a similar way. Offset or flexographic production may require plates, prepress work, press setup, color adjustment, test sheets, and registration checks before the main production run begins. These activities consume time and materials even before a large number of saleable boxes have been produced.
Special finishes can introduce additional fixed costs. Foil stamping may require a dedicated die. Embossing or debossing may require custom tooling. More complicated inserts may need their own cutting tools. A rigid box with several components can require multiple dies or preparation steps rather than one simple tool.
Sampling and structural development can also sit partly outside the normal unit price. A project may require CAD development, blank structural samples, digitally printed samples, production-grade samples, or several rounds of adjustment before bulk manufacturing is approved.
Not every supplier presents these costs in the same way. Some quotations show dies, plates, sampling, structural development, or setup as separate charges. Others distribute part of them into the unit price.
I therefore do not assume that a quotation with fewer visible line items automatically contains fewer fixed costs.
What matters is understanding which project-preparation costs are included, which are charged separately, and whether any of those tools can be reused for repeat production.
Why Fixed Costs Matter More at Lower Quantities
Fixed costs have the greatest effect on unit price when the production quantity is relatively small.
If a project requires $300 of tooling and setup, that amount represents $0.30 per unit when spread across 1,000 boxes. If the same $300 supports 5,000 boxes, its equivalent contribution falls to $0.06 per unit.
The packaging specification has not changed. What has changed is how widely the preparation cost is distributed.
This is one of the main reasons I avoid evaluating a small custom packaging order using the unit economics of a large repeat production run. At lower quantities, the project is carrying a relatively large share of tooling, press setup, machine adjustment, and production preparation.
The effect becomes stronger when several fixed-cost processes are combined. A carton may require a cutting die, printing plates, a foil die, an embossing die, and insert tooling. Each individual setup may be reasonable, but together they can create a meaningful cost before bulk production has even started.
For a new product launch, this may still be commercially acceptable because the lower quantity reduces inventory risk. However, I want the buyer to understand that part of the higher unit price is paying for production readiness, not simply for the physical paperboard used in each box.
What I Consider Unit Costs
Unit costs are the expenses that continue to exist for every package produced. These costs do not disappear after setup has been completed.
Paperboard is an obvious example. Producing 10,000 folding cartons requires more paperboard than producing 1,000. A rigid box requires greyboard, wrapping paper, adhesive, and potentially magnets or ribbons for every unit. Corrugated packaging consumes liner and medium for every box. Paper bags require paper, handles, reinforcement, and adhesive for every finished bag.
Printing also contains a variable-cost component. Even after the press has been prepared, additional sheets, ink, coatings, machine time, and production labor are still required as the quantity increases.
The same principle applies to finishing. Foil stamping may involve a fixed tooling cost, but foil material and machine time are still consumed on every box. Lamination requires film and processing for every printed sheet. Spot UV, embossing, debossing, window application, and other processes continue to use production time or material throughout the run.
Manual assembly is particularly important because it behaves more like a unit cost than a setup cost.
If every rigid box requires manual wrapping, magnet placement, ribbon installation, insert fitting, or final assembly, the labor must be repeated for every box. Producing ten times as many boxes may improve workflow efficiency, but it does not remove the need to perform those operations on each individual unit.
This is why packaging with substantial manual assembly often has a higher cost floor than a relatively simple carton that can move efficiently through automated equipment.
Why Some Packaging Prices Fall Faster Than Others
The balance between fixed and unit costs helps explain why different packaging formats do not respond to quantity in the same way.
A relatively simple folding carton can have meaningful setup costs at the beginning of production, but once the press, die-cutter, and folder-gluer are running efficiently, large quantities can be produced with relatively little manual intervention. As the order quantity increases, the fixed costs become a progressively smaller part of the unit price.
A premium rigid box behaves differently. The tooling and setup can also be distributed across more units, but greyboard, wrapping paper, magnets, inserts, finishing, and manual assembly still need to be applied to every box.
This means increasing quantity can reduce the rigid box unit price, but not always as dramatically as with a more automated packaging format.
The same logic applies to elaborate paper bags, multi-component gift boxes, or packaging with complicated inserts. If much of the total cost comes from materials and repeated manual operations rather than one-time preparation, there is a natural limit to how far the unit price can fall.
This is why I do not apply one standard quantity-discount assumption across every type of custom packaging.
Fixed and Unit Costs Can Exist in the Same Process
Some packaging processes contain both a fixed component and a unit component, which is why quotations can sometimes appear more complicated than expected.
Foil stamping is a good example. The foil die is generally a fixed cost because it must be created before production. The foil material and stamping operation, however, continue to create cost for each unit.
Embossing follows a similar logic. Tooling must be prepared first, but machine time, handling, and quality inspection continue throughout the production run.
Printing can also contain both elements. Plate making, prepress, setup, and initial color adjustment are relatively fixed, while paper, ink, machine time, and production waste continue to increase with volume.
Even inserts can contain both types of cost. A paperboard insert may require a one-time cutting die, but the paperboard and converting work still apply to every individual insert.
For this reason, I prefer to evaluate the production process rather than force every quotation line into a purely fixed or purely variable category.
The more useful question is whether the cost is mainly created once, repeated with every unit, or contains both elements.
What Happens to Fixed Costs on Repeat Orders
Repeat production can sometimes improve cost efficiency because certain project-development expenses may not need to be paid again.
If the box dimensions, dieline, artwork, material, and finishing remain unchanged, an existing cutting die or finishing tool may be reusable, depending on its condition and how the supplier manages tooling. Structural development may also be unnecessary because the approved packaging structure already exists.
However, I never assume that every fixed cost automatically disappears on a repeat order.
Printing plates may need to be remade if the artwork changes. Foil or embossing tooling may require replacement after wear or if the design is modified. A cutting die may no longer be suitable if the board thickness, box dimensions, or structure changes.
Even a small structural adjustment can matter. Changing a panel width, insert opening, glue flap, or product clearance can mean that the original dieline and cutting tool can no longer be used.
For long-term packaging programs, I therefore prefer to confirm which tools are retained, how long they are stored, whether they can be reused, and which charges are likely to return on future orders.
This is particularly important for multi-SKU projects. Two products may use the same carton dimensions and structure but different artwork. Some structural tooling may potentially be shared, while printing-related preparation may still differ between SKUs.
Clear tooling and dieline records can make repeat-order budgeting much more predictable.
Why This Distinction Matters When Comparing Quotations
Two packaging quotations can show very different unit prices even when their total project costs are closer than they initially appear.
One supplier may quote a lower unit price but list dies, plates, sampling, setup, and special tooling separately. Another may include some of those costs inside the unit price.
If I compare only the unit-price column, I can easily reach the wrong conclusion.
For example, one supplier may quote:
$0.55 per box plus tooling and setup
while another supplier quotes:
$0.62 per box with most standard setup already included.
The lower unit price is not automatically the lower-cost project.
This is why I want a quotation to make the cost structure clear enough that I can identify what is paid once, what is paid for every unit, what may be reusable on future orders, and what is excluded completely.
That comparison becomes even more important when evaluating several quantities. A quotation that looks expensive at 1,000 units may become much more competitive at 5,000 units because fixed costs are being distributed more efficiently.
Another specification may remain relatively expensive even at higher quantities because most of its cost is driven by materials, finishing, and manual assembly.
How I Use Fixed and Unit Costs to Control a Packaging Budget
When a packaging project exceeds budget, I first identify whether the problem is coming mainly from fixed costs or repeated unit costs.
If the order quantity is relatively small and the specification includes several dies, printing setups, foil tooling, embossing tooling, different structures, and multiple SKUs, fixed costs may be one of the main reasons the unit price feels high.
In that situation, simplifying the number of special processes, standardizing structures across several SKUs, or sharing the same dieline where the product dimensions allow it can have a meaningful effect.
If the project is already at a high quantity, fixed-cost reduction may have much less impact. The larger opportunity may come from reducing board consumption, optimizing dimensions, simplifying inserts, decreasing foil coverage, reducing manual assembly, or changing another specification that affects every unit.
This distinction matters because a $300 tooling reduction may be significant on a 1,000-piece order but relatively minor on a 50,000-piece production run. By contrast, reducing the recurring production cost by $0.05 per unit saves only $50 at 1,000 pieces but $2,500 at 50,000 pieces.
I therefore control packaging cost by looking at where the cost repeats.
For low-volume projects, I pay close attention to tooling, structural development, setup, and the number of separate production processes. For higher-volume projects, I pay increasingly close attention to material consumption, structural efficiency, printing coverage, finishing area, insert design, and manual assembly.
This is also why I do not treat custom packaging cost as one single number. A useful quotation should help me understand the economics behind that number: what I pay to prepare the project, what I pay for each finished unit, and which costs can change when the quantity or specification changes.
Factory Unit Price Is Not Always Your Final Packaging Cost
When I compare custom packaging quotations, I never treat the factory unit price as the complete cost of the packaging project. A quoted price such as $0.45 per box may describe only the manufacturing cost of the finished box at the supplier’s factory. It may not include sampling, tooling, packing materials, export handling, freight, import charges, warehousing, or the cost created by inefficient carton dimensions.
For that reason, I separate the factory unit price from the landed packaging cost.
The factory unit price tells me what the supplier charges to manufacture each package under a defined specification. The landed cost tells me what the packaging actually costs by the time it reaches the warehouse, fulfillment center, distributor, or production site where it will be used.
That difference matters because a packaging option that appears cheaper at the factory can become more expensive after transport, packing, duties, storage, and handling are included.
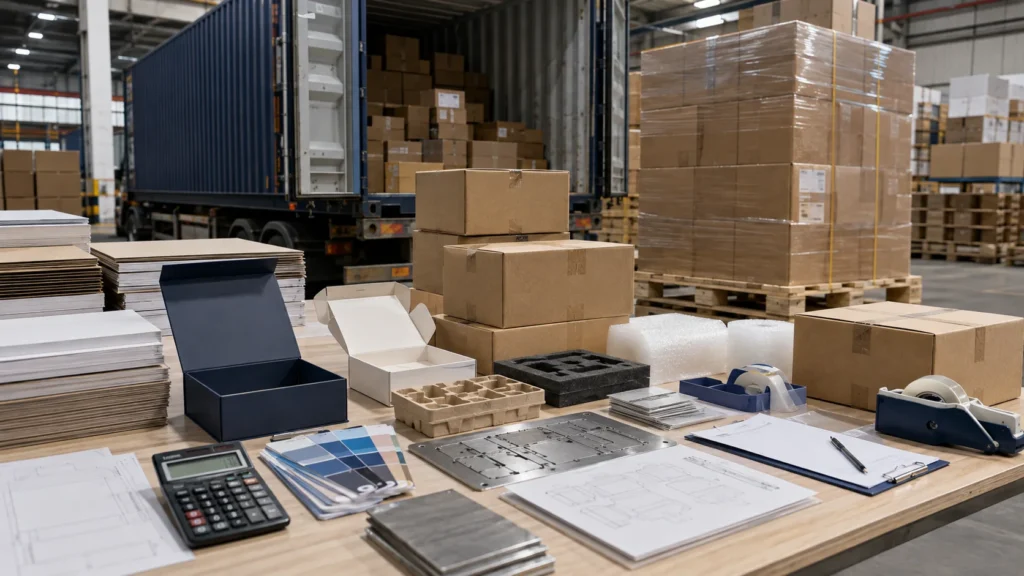
What Is Usually Included in the Factory Unit Price
The factory unit price normally covers the direct manufacturing processes required to produce the finished packaging according to the approved specification.
For a folding carton, this may include the paperboard, printing, surface treatment, die-cutting, folding, gluing, and standard quality inspection. For a rigid box, it may include greyboard, wrapping paper, printing, wrapping, assembly, and the specified finishing processes. Corrugated packaging may include board, printing, die-cutting or slotting, gluing, and normal packing preparation.
However, the exact scope varies significantly between suppliers.
Some quotations include standard packing cartons in the unit price, while others list them separately. Some suppliers absorb normal production setup into the price, while others charge tooling, plates, foil dies, embossing dies, or sampling separately.
This is why I never assume that two unit prices represent the same commercial scope simply because both are stated “per piece.”
Before comparing the numbers, I confirm what the unit price actually includes.
Tooling, Sampling, and Development May Sit Outside the Unit Price
Many custom packaging projects include costs that are necessary for production but are not always included in the quoted unit price.
These can include structural development, sample making, cutting dies, printing plates, foil dies, embossing tools, insert tooling, color proofs, or pre-production samples.
For a new project, these costs can materially change the total first-order budget.
For example, a carton quoted at $0.50 per unit for 2,000 pieces appears to have a manufacturing value of $1,000. If the project also requires $250 of tooling and $150 of sampling, the first production cycle already carries an additional $400 before freight or import costs are considered.
The effective first-order packaging cost is therefore higher than the $0.50 factory unit price suggests.
On repeat orders, some of these development or tooling costs may not return if the structure and artwork remain unchanged and the tools are reusable. This is one reason I separate first-order cost from repeat-order cost when evaluating long-term packaging economics.
Packing Method Can Change the Cost Before the Goods Leave the Factory
The way empty packaging is packed for shipment can also affect the final cost.
Folding cartons are usually shipped flat, which makes them relatively space-efficient. Corrugated boxes can also often be supplied flat. Rigid boxes, by contrast, normally occupy much more volume because most rigid structures cannot be flattened after assembly.
This difference can have a major effect on freight cost.
A rigid box may weigh relatively little but occupy a large amount of shipping space. In international transport, freight is often influenced by cargo volume as well as actual weight, which means bulky empty packaging can become expensive to transport even when the material itself is not particularly heavy.
Paper bags can also consume substantial volume depending on bag dimensions, handle construction, and packing method.
I therefore look at the master carton quantity, carton dimensions, gross weight, and total shipment volume rather than considering only the packaging unit price.
A packaging structure that saves a few cents in manufacturing may not create a real saving if it increases export volume significantly.
International Freight Can Change the Cost Comparison
Freight is one of the biggest reasons factory price and delivered packaging cost can tell different stories.
The cost of shipping custom packaging internationally depends on several variables, including shipment volume, weight, transport method, route, destination, fuel conditions, carrier rates, and whether the goods move by courier, air freight, LCL sea freight, or full container.
The most economical shipping method also changes with order size.
A small sample or very low-volume shipment may be practical by courier or air freight. A larger commercial order may make more sense by sea. Once the packaging quantity becomes large enough to fill a meaningful portion of a container, the freight economics can change again.
This is especially important when comparing suppliers in different countries.
A supplier with a lower manufacturing price does not automatically deliver the lowest total cost if the freight route, shipping volume, export packing, or delivery arrangement is less efficient.
I therefore prefer to compare suppliers using a clearly defined delivery basis rather than mixing one supplier’s factory price with another supplier’s delivered price.
Incoterms Change What the Quoted Price Actually Means
A packaging quotation should also be read together with its trade term.
A price quoted EXW is commercially different from a price quoted FOB, CIF, DDP, or another Incoterm because the responsibilities and costs included are different.
Under an EXW-style quotation, the buyer may be responsible for collecting the goods from the supplier and arranging much of the transportation process. Under an FOB-style arrangement, the supplier normally handles the goods through the agreed export port stage. Other arrangements may include additional freight or delivery responsibilities.
The important point for me is not that one trade term is automatically better than another.
It is that the same unit price can represent a very different total cost depending on where the supplier’s responsibility ends.
When I compare packaging quotations, I therefore confirm the Incoterm, named place or port, export charges, freight scope, destination charges, and final delivery responsibility before deciding which price is actually lower.
Duties, Taxes, and Import Charges May Sit Outside the Supplier Quote
International packaging purchases can also generate costs after the goods leave the factory.
Depending on the destination country, product classification, customs rules, and shipping arrangement, these can include import duties, taxes, customs clearance fees, brokerage charges, destination handling fees, port charges, documentation costs, or local delivery expenses.
These charges vary by market and should not be treated as one universal percentage.
I therefore avoid adding a generic “import cost” assumption to every packaging project. Instead, I separate the manufacturing quotation from destination-side costs and confirm them using the actual shipping route and import requirements.
This is particularly important when comparing domestic and overseas suppliers. The overseas factory price may be lower, but the commercial comparison should still include transportation and import-related costs where they apply.
Warehousing and Inventory Also Have a Packaging Cost
Packaging continues to create cost even after it arrives at the destination.
Large packaging orders require warehouse space. This matters particularly for rigid boxes, large corrugated mailers, shipping cartons, and paper bags because empty packaging can occupy considerable volume.
If I purchase a much larger quantity simply to reduce the unit price, I may create additional storage cost for several months.
There is also an inventory risk.
Packaging artwork can become obsolete if the product formulation, regulatory information, barcode, product size, promotional message, branding, language, or legal text changes before all of the packaging has been used.
This risk is especially important for product categories with frequent SKU changes or packaging updates.
For that reason, I do not consider excess inventory to be “free” simply because the factory unit price was lower. Unsold or unusable packaging still represents tied-up cash, occupied storage space, and potentially wasted material.
The lowest factory price can therefore become expensive if it requires an order quantity that does not match realistic consumption.
Packaging Dimensions Can Affect Product Shipping Costs
The packaging cost does not end with transporting empty boxes from the packaging supplier.
The final package can also influence the cost of shipping the finished product to retailers, distributors, or e-commerce customers.
An oversized box may increase dimensional weight, carton count, pallet usage, storage volume, or fulfillment material requirements. It may also require additional cushioning to control product movement inside the package.
This means a structural change that increases the packaging size can create costs in several parts of the supply chain.
For example, making an e-commerce mailer unnecessarily large may increase the cost of the mailer itself, require more void fill, reduce the number of orders that fit on a pallet, and increase parcel shipping charges.
I therefore evaluate dimensions with both packaging production and downstream logistics in mind.
A slightly more efficient structure can sometimes create greater savings in fulfillment and transportation than the saving achieved by negotiating a few cents off the factory unit price.
Damage and Quality Problems Are Also Part of the Real Cost
A very low packaging price can also become expensive if the specification is not strong enough for the product or distribution environment.
If a carton collapses, a rigid box arrives damaged, an insert fails to hold the product, or a corrugated shipper performs poorly during transportation, the cost is not limited to replacing the packaging.
The business may also face damaged products, returns, rework, repacking, replacement shipments, customer complaints, or retailer issues.
For this reason, I treat packaging quality and protection as part of cost control.
I do not want to over-engineer the structure, but I also do not want to save a small amount on board thickness, insert design, or corrugated strength if that decision increases the probability of product damage.
The most economical packaging is not simply the package with the lowest production cost. It is the package that performs reliably enough to prevent avoidable downstream cost.
How I Calculate the Real Packaging Cost
When I evaluate the real cost of a packaging project, I look beyond the quoted manufacturing price and consider the complete commercial path from development to use.
For the first order, that may include the finished packaging, sampling, tooling, export packing, freight, import costs, local delivery, and any additional handling needed before the packaging is ready for use.
For ongoing production, I also consider warehouse space, inventory turnover, repeat-order tooling, packing efficiency, product shipping volume, and the financial impact of quality problems or excess packaging stock.
I therefore think about packaging cost in three layers:
Factory production cost, which covers the manufacturing of the package itself.
Delivered or landed cost, which includes the expenses required to move the packaging to the location where it will be used.
Total operational cost, which also considers storage, packing efficiency, downstream freight, inventory risk, and packaging performance.
The supplier with the lowest factory unit price may still be the best commercial option, but I only reach that conclusion after those other costs have been considered.
For me, the useful question is not simply:
“How much does this box cost to manufacture?”
It is:
“How much will this packaging cost by the time it is produced, delivered, stored, packed, shipped with the product, and used reliably at scale?”
That is the number I use when I compare the real economic value of different packaging options.
Why Two Packaging Suppliers Can Quote Very Different Prices
When I send the same packaging project to several suppliers, I do not expect every quotation to come back at the same price. A large price difference does not automatically mean that one supplier is overpriced or another is offering a better deal. In many cases, the suppliers are simply not pricing exactly the same specification, production method, quality standard, or commercial scope.
This is one of the most important points I check before comparing custom packaging quotations. A box may look identical in a rendering or reference photo, but small differences in board grade, thickness, printing method, surface treatment, insert construction, tolerances, packing method, or included services can create meaningful differences in production cost.
For that reason, I do not start by asking which supplier has the lowest number. I first ask:
Are these suppliers actually quoting the same packaging project?
Only after I answer that question does the price comparison become useful.
Different Suppliers May Be Assuming Different Specifications
An incomplete RFQ is one of the most common reasons packaging quotations vary widely.
If I send a supplier only a product photo, approximate dimensions, quantity, and a reference image, the supplier still has to make assumptions about the missing details. Different suppliers may make very different assumptions.
One supplier may calculate the project using 350 GSM paperboard, while another assumes 400 GSM. One may quote matte lamination while another assumes a water-based coating. One supplier may include inside printing, while another prices only the exterior. A rigid box supplier may calculate a 2 mm greyboard structure while another uses a different board thickness.
All of these quotations may appear to describe the same “custom box,” but they are not commercially equivalent.
This is why I prefer to define the main specification before requesting final prices. At minimum, I want the dimensions, packaging style, material, thickness or board grade, printing requirement, surface treatment, special finishes, insert construction, order quantity, and packing requirements to be reasonably clear.
The more accurately those specifications are defined, the less room there is for suppliers to fill the gaps with different assumptions.
Material Quality Can Create a Price Difference That Is Not Immediately Visible
Two materials can have similar descriptions while performing differently in real production.
For example, two suppliers may both quote “350 GSM paperboard,” but the boards may differ in thickness, stiffness, whiteness, surface smoothness, fiber composition, printing behavior, or consistency between batches.
The same applies to rigid-box greyboard, kraft paper, specialty wrapping paper, corrugated board, and paper bag materials.
A lower-cost material is not automatically unsuitable, and a more expensive material is not automatically better. The issue is whether the quoted material matches the structural and visual requirements of the project.
I therefore try to compare a specific material specification rather than a generic material name.
This becomes particularly important when the packaging will be reordered over a long period. If one supplier sources paper opportunistically according to the lowest available price while another maintains a more controlled material specification, the first quotation may be cheaper while the repeat-order consistency may be different.
For established packaging programs, that difference can matter as much as the initial unit price.
Printing and Color-Control Standards Can Change the Quote
Printing is another area where suppliers can price the same artwork differently.
One quotation may assume standard CMYK printing with normal commercial tolerances. Another may include specific Pantone colors, tighter brand-color control, additional press adjustment, or more demanding approval requirements.
The difference becomes more noticeable when the artwork contains large solid-color areas, dark backgrounds, metallic effects, gradients, fine details, or colors that need to remain consistent across several SKUs.
Substrate also changes the result. Printing the same artwork on coated white paperboard, natural kraft paper, textured paper, specialty stock, or corrugated liner does not involve exactly the same production conditions.
I therefore ask whether a quotation assumes standard commercial printing or a more controlled color-matching requirement.
This does not mean every packaging project needs the highest possible print standard. Many shipping cartons and straightforward retail boxes do not require luxury-level color control. But if accurate brand colors are important, that requirement should be included before suppliers are compared.
Otherwise, the cheaper quotation may simply be based on a different printing expectation.
Finishing Details May Be Quoted Differently
Special finishes can create surprisingly large differences between quotations because the description of a finish is often not specific enough.
“Foil stamping,” for example, does not tell me the foil area, number of foil positions, foil type, tooling requirement, or registration difficulty.
“Embossing” does not define the size, depth, complexity, or relationship between the embossing and printed artwork.
“Soft touch” may refer to different coating or lamination approaches depending on the supplier and project.
The same applies to spot UV, debossing, textured surfaces, window patches, metallic effects, and other decorative processes.
Even the size of a finishing area matters. Applying a small foil logo on the front panel is not the same production requirement as applying large foil areas across several panels.
When I compare suppliers, I therefore confirm not only which finish is included, but also how that finish is being produced and where it is being applied.
Without that detail, two apparently similar quotations may represent very different production requirements.
Structural Engineering and Assembly Method Can Affect Cost
Packaging structure influences price beyond the amount of paper or board used.
A supplier with experience producing a specific structure may already have an efficient way to die-cut, fold, glue, wrap, or assemble it. Another supplier may need more manual operations or may approach the structure differently.
This is particularly important for rigid boxes, drawer boxes, magnetic boxes, shoulder-neck boxes, complicated folding cartons, paperboard inserts, and multi-component gift packaging.
For example, an insert can sometimes be redesigned to use fewer components or less manual assembly without reducing product protection. A folding carton structure may be adjusted so that it runs more efficiently on automated gluing equipment. A rigid box may require several independently wrapped components that increase labor substantially.
Two suppliers can therefore produce packaging with a similar final appearance but use different manufacturing routes.
When I see a significant price difference, I want to understand whether it comes from lower material cost, greater production efficiency, a simplified structure, more automation, or simply a different interpretation of the specification.
That distinction tells me much more than the final price alone.
Automation and Manual Assembly Create Different Cost Structures
The amount of manual work required is one of the major reasons quotations vary between manufacturers.
Some factories are configured for high-volume automated folding-carton production. Others specialize in rigid boxes that require much more manual wrapping and assembly. Some have automated gluing, window patching, laminating, or forming equipment that fits a particular structure well.
A packaging design that matches a supplier’s production capabilities can therefore be manufactured more efficiently.
The opposite can also happen. If a supplier does not have suitable equipment for one part of the project, the process may require additional manual work or external subcontracting.
This does not automatically make that supplier unsuitable. Many packaging manufacturers use specialized partners for particular processes. However, additional production stages, transportation between facilities, coordination, or subcontractor margins can influence both the cost and lead time.
This is why I look at supplier capability in relation to the specific packaging project, rather than assuming that every packaging manufacturer is equally efficient at every box type.
Quality-Control Requirements Can Affect Production Cost
Quality control also has a cost, although it is rarely shown as a separate line on a quotation.
A project that requires tighter tolerances, more frequent inspection, stricter color control, detailed surface inspection, precise insert fitting, or additional sample approval may require more production management than a straightforward commercial packaging order.
Rigid packaging provides a good example. Buyers may care about corner alignment, wrapping accuracy, glue marks, surface scratches, magnet positioning, lid fit, insert fit, and consistency across thousands of units.
For a simple corrugated shipping carton, the critical quality requirements may be very different. Board strength, dimensions, slotting, print position, glue quality, and compression performance may matter more than cosmetic surface perfection.
I therefore prefer to define the quality standard according to the packaging function.
Over-specifying tolerances can create unnecessary production cost, but leaving important quality expectations undefined can create disputes after production.
When quotations differ, I check whether both suppliers are pricing against the same acceptance standard rather than assuming that “good quality” means exactly the same thing to everyone.
Packaging Samples Can Reveal What the Quotation Does Not
A spreadsheet can compare numbers, but it cannot always show the physical differences behind those numbers.
This is why I consider sampling particularly useful when several suppliers appear similar on paper but quote noticeably different prices.
A physical sample can reveal differences in board stiffness, print density, color reproduction, wrapping quality, surface finish, folding performance, insert fit, magnet strength, structural stability, and overall assembly.
For projects where the packaging is critical to presentation or protection, I would rather discover those differences before bulk production than after thousands of boxes have been manufactured.
The goal of the sample is not simply to decide which box “looks nicer.” I use it to verify whether the quoted specification actually produces the expected result.
That makes the later price comparison much more meaningful because I am no longer comparing quotations based only on written descriptions.
Supplier Location and Production Economics Can Also Change the Price
Manufacturing location can influence packaging cost because labor, facility costs, material sourcing, energy, production scale, environmental requirements, currency, and supply-chain structure differ between regions.
A supplier operating in a higher-cost market may have a different manufacturing base from a large production facility in China or another major packaging-manufacturing region.
However, I do not use country alone as a shortcut for judging whether a supplier is expensive or economical.
Two factories located in the same country can still have very different cost structures depending on their equipment, specialization, production scale, material purchasing volume, factory utilization, subcontracting model, and target customer base.
A high-volume folding-carton manufacturer may be very competitive for automated carton production but less competitive for complicated handmade rigid packaging. A factory specializing in luxury rigid boxes may show the opposite pattern.
The relevant question is therefore not only:
“Where is this supplier located?”
It is:
“How well does this supplier’s manufacturing model fit the packaging I actually need?”
MOQ and Production Scale Affect How a Supplier Prices the Same Project
Suppliers do not all have the same ideal production quantity.
A factory designed for large automated production runs may be very competitive at 20,000 or 50,000 units but relatively expensive at 1,000 pieces because machine setup and operational overhead are being distributed across a small order.
Another supplier may specialize in lower-volume projects and offer a more competitive price at 1,000 units but lose that advantage when production increases substantially.
This is why I do not judge a manufacturer using only one quantity.
When possible, I compare several quantity levels such as 1,000, 2,500, 5,000, and 10,000 pieces. This shows me how each supplier’s pricing changes as the project moves into a more efficient production range.
The resulting price curve can tell me more about the supplier’s production model than one isolated unit price.
Some Quotations Include More Services Than Others
Another reason prices differ is that the suppliers may be quoting different levels of project support.
One quotation may cover only manufacturing after the buyer supplies finished artwork and a production-ready dieline.
Another supplier may also provide structural development, dieline adjustment, material recommendations, artwork checking, sample coordination, color approval, packing planning, inspection, export documentation, and shipping support.
These services should not automatically justify a substantially higher price, but they need to be recognized when comparing commercial scope.
For an experienced procurement team with fully developed technical files, a manufacturing-only model may work very well.
For a new packaging project that still requires structural development, sampling, material selection, insert adjustment, or production coordination, additional technical support can reduce the risk of errors before bulk manufacturing begins.
I therefore compare both what is being manufactured and what project support is included around the manufacturing process.
A Very Low Quote May Simply Be Missing Something
When one supplier’s quotation is dramatically lower than every other quotation, I do not immediately assume I have found the best price.
I first check the scope again.
The lower price may be completely legitimate because the supplier has better material purchasing, more suitable equipment, higher automation, or more efficient production.
But it can also happen because one element has been omitted or interpreted differently.
The material may be thinner. Interior printing may be missing. The insert may not be included. A special finish may be quoted differently. Tooling may be charged separately. Export packing may not be included. The quantity may have been calculated using a different SKU breakdown.
My objective is therefore not to distrust low prices. It is to make sure I understand why the price is lower.
If the supplier can explain the cost advantage clearly and the specification remains equivalent, the lower quotation may be genuinely attractive.
If the difference cannot be explained because the specifications are still unclear, I would resolve those differences before approving the order.
How I Make Packaging Quotations Comparable
Before I decide which quotation is commercially stronger, I try to bring the suppliers back to one common specification.
I confirm the finished dimensions, box style, material grade and thickness, printing process, artwork versions, colors, surface treatment, special finishes, insert material, order quantity, quantity per SKU, tooling, sample requirement, packing method, Incoterm, and any major quality expectations.
Once those variables are aligned, the remaining price difference becomes much more informative.
I can then investigate whether it comes from manufacturing efficiency, material sourcing, automation, labor structure, production scale, or supplier margin rather than trying to compare quotations that were never equivalent in the first place.
Price is still important. I simply want it to be the last major variable I compare rather than the first specification I assume is comparable.
When I evaluate a new supplier, I use the same principle for the broader sourcing decision. I look at whether the manufacturer has the relevant production capabilities, understands the specification, can develop and approve samples properly, manages quality consistently, and can support repeat production. I explain that supplier-evaluation process in more detail in my guide to choosing a reliable custom packaging manufacturer in China.
Once those fundamentals are clear, a price difference becomes easier to interpret. Instead of asking only “Why is Supplier A cheaper than Supplier B?”, I can ask the more useful question:
“What exactly am I receiving for each quoted price, and which differences actually matter to this packaging project?”
How to Reduce Custom Packaging Cost Without Sacrificing Quality
When I need to reduce the cost of custom packaging, I do not begin by asking for cheaper paper or removing every premium detail. That approach can reduce the quotation quickly, but it can also weaken the structure, change the appearance, create production problems, or make the final packaging inconsistent with the product positioning.
I prefer to reduce cost by identifying where the packaging is using more material, processing, space, or labor than the project actually needs. In many cases, the strongest savings come from improving the specification rather than lowering the quality standard.
The objective is not to make the packaging as cheap as possible. It is to make every major cost perform a clear function.
Right-Size the Packaging Before Reducing Material Quality
One of the first areas I review is the finished size of the package.
An oversized box increases cost in several ways at the same time. It uses more paperboard or corrugated material, increases the size of the printed sheet, may require a larger insert, occupies more space in master cartons, and can increase freight and warehousing requirements.
This means reducing unnecessary dimensions can sometimes create a better saving than replacing the material with a lower-grade alternative.
I normally begin with the actual product dimensions and then determine how much clearance is genuinely required for loading, protection, inserts, and product removal. I do not remove necessary clearance simply to save a few millimeters, but I also avoid adding empty space without a clear structural or presentation reason.
For a folding carton, a relatively small adjustment to the dieline may improve sheet utilization. For a rigid box, reducing unnecessary depth can lower greyboard, wrapping-paper, insert, and shipping-volume requirements simultaneously. For corrugated packaging, right-sizing can also reduce void fill and improve downstream shipping efficiency.
This is why I treat dimension optimization as one of the safest cost-reduction methods. The customer can often preserve the same paper quality, printing standard, and visual design while simply using the material more efficiently.
Match the Material Specification to the Product Instead of Over-Specifying It
Another common source of unnecessary cost is using a material specification that is stronger or heavier than the application requires.
I do not automatically reduce GSM or board thickness when a project is over budget. I first look at the product weight, box dimensions, structure, insert support, stacking requirements, shipping conditions, and presentation expectations.
A carton that feels slightly more rigid in the hand may not need the highest available paperboard weight. A rigid box does not automatically need very thick greyboard for a small lightweight product. A corrugated mailer should be strong enough for the distribution environment, but specifying a heavier board than necessary may add cost without improving actual performance.
The same principle applies to premium papers.
Specialty papers, dyed papers, textured stocks, and high-end wrapping materials can create a distinctive appearance, but they should be used because they support the design—not simply because premium packaging is assumed to require the most expensive substrate.
Sometimes I can retain the visual quality by using a more conventional base paper combined with well-controlled printing and one carefully selected finish. In other projects, the specialty paper itself creates enough character that additional decorative processes can be removed.
The goal is to choose the material based on required performance and appearance, not on the assumption that more material automatically means better packaging.
Simplify the Structure Before Compromising the Finished Appearance
Structural simplification can reduce cost without making the packaging look inexpensive.
A complicated structure may contain additional panels, double walls, separate trays, sleeves, shoulder components, magnetic closures, windows, locking systems, or several independently assembled parts. Each feature can increase material use, tooling, converting time, and manual assembly.
When I review an expensive structure, I ask whether every component performs a real function.
If a separate sleeve adds very little to presentation, it may not be necessary. If a rigid gift box uses several wrapped components that could be combined into one simpler structure, the packaging may become easier to produce without changing the overall brand impression.
I also consider whether a structural effect can be created through graphic design rather than additional components. Strong artwork, typography, color blocking, or carefully positioned finishing can sometimes provide visual hierarchy without introducing another physical packaging layer.
For folding cartons, I look for structures that can be efficiently die-cut, folded, and glued. For rigid boxes, I pay close attention to the number of wrapped components and hand-assembly operations. For e-commerce packaging, I consider whether the mailer can provide both presentation and shipping protection without requiring another secondary box.
A simpler structure is valuable not only because it can cost less. It can also improve production repeatability, reduce assembly errors, shorten packing time, and make future reorders easier to control.
Use Premium Finishes Selectively Rather Than Everywhere
Finishing is one of the easiest places for a packaging budget to grow because individual effects can appear relatively small when they are added one at a time.
Foil stamping, embossing, debossing, spot UV, specialty laminations, textured surfaces, interior printing, and metallic details can all be effective. The problem begins when several processes are added without deciding which one is actually creating the visual impact.
I normally identify the element that should receive the strongest attention.
For example, a small foil logo combined with clean printing may create a stronger premium impression than applying foil across several panels. A single embossed brand mark may be more effective than using embossing, spot UV, foil, and soft-touch finishing at the same time.
Reducing the finishing area can also matter. The cost and production difficulty of a small foil area may be very different from a large metallic background. The same applies to spot UV and other registered effects.
I therefore prefer fewer finishes used deliberately.
This does not mean removing premium details from high-end packaging. It means concentrating the budget where the customer actually sees and feels the difference.
A carefully selected finish usually contributes more than several effects competing for attention.
Optimize the Insert Instead of Removing Protection
Inserts are another area where cost can often be reduced without compromising product security.
When a project is over budget, simply removing the insert may create a larger problem if the product then moves inside the box, arrives damaged, or loses the intended presentation.
I prefer to examine whether the insert itself can be simplified.
A multi-component insert may be replaceable with one folded paperboard structure. A foam insert may sometimes be replaced by engineered paperboard or corrugated support if the product does not require the same cushioning performance. Several separate pieces may be combined into one die-cut component.
The outer box and insert should also be optimized together.
If the insert is unnecessarily large, the outer package becomes larger as well. Reducing the insert footprint can therefore lower both insert cost and box cost.
For gift sets or multi-product packaging, I also look at the spacing between products. Large decorative gaps can increase both material use and package size. A more compact layout may still feel organized and premium while using considerably less space.
The important distinction is that I simplify the insert after identifying its function. If it is needed to prevent breakage, protect a pump, stabilize a bottle, separate products, or create the opening presentation, that function must remain intact.
Standardize Box Structures Across Multiple SKUs
For brands with several products, cost reduction can come from standardization rather than from reducing the specification of each individual box.
If several SKUs have similar product dimensions, I look for opportunities to use the same outer box size, the same structural dieline, or the same basic insert platform.
The artwork can still change between products, but sharing structural specifications may reduce the number of cutting dies, development cycles, sample approvals, and production changeovers required across the range.
This strategy is particularly useful for cosmetics, supplements, fragrance collections, skincare lines, accessories, and other categories where several products are sold under one packaging system.
I do not force different products into one standard box if the result creates excessive empty space or weak product fit. Standardization only works when the dimensions and protection requirements are genuinely compatible.
However, when several SKU dimensions are already close, designing around a small number of packaging platforms can create substantial long-term efficiency.
It can also improve visual consistency because the product family shares the same proportions, opening experience, and structural logic.
Reduce Unnecessary SKU Fragmentation
Multiple artwork versions can increase packaging cost even when the box structure remains the same.
A project with 10,000 boxes under one artwork may have different production economics from a project with 10,000 boxes divided into ten designs of 1,000 pieces each.
Each version may require separate files, production control, color changes, product information checks, sorting, packing, and inventory management.
For this reason, I look carefully at whether every packaging variation really needs a completely different printed box.
Some product differentiation may be handled through labels, sleeves, stickers, variable printing, or another secondary identification method, depending on the product and brand requirements.
That does not mean I recommend removing SKU-specific packaging where product information, compliance, branding, or retail presentation requires it. The point is to avoid creating separate production versions without a commercial reason.
For large product families, reducing unnecessary variation can lower setup cost and simplify future repeat orders.
Design the Packaging for Efficient Production
A packaging concept can look excellent on screen but become expensive once the manufacturing sequence is considered.
I therefore look at whether the design works efficiently with the intended production method.
A carton that requires excessive hand assembly, unusual gluing, difficult folding, or multiple separate components may cost much more than a visually similar structure that can run through standard equipment.
The same applies to finishing registration, insert assembly, magnetic closures, windows, ribbons, and other details.
Whenever possible, I prefer to design the structure around processes that can be repeated consistently at scale.
Automation does not mean the packaging has to look generic. Many premium-looking cartons can still be designed for efficient die-cutting, gluing, wrapping, and packing.
The benefit is broader than price. A structure that fits the production process well is generally easier to reproduce across repeat orders and less dependent on extensive manual adjustment.
For a long-term packaging program, that stability can be more valuable than a small first-order saving.
Compare the Cost of Decoration With the Cost of Material
Sometimes the best cost reduction comes from changing where the premium value is created.
A project may use an expensive specialty paper plus several finishes. Another project may achieve a similar perceived value using a more conventional paper with excellent printing and one strong finishing detail.
The opposite can also be true.
A high-quality textured paper may create enough visual impact that lamination, spot UV, and several decorative processes are no longer necessary.
I therefore compare the combined effect of material and decoration rather than treating them as separate decisions.
If the surface itself already communicates the intended quality, I may simplify the printing and finishing.
If the substrate is relatively conventional, I may use print design or a focused finish to create the differentiation.
This allows the budget to be concentrated in the element that contributes most visibly to the final package.
Choose the Order Quantity Based on Real Consumption, Not Only the Lowest Unit Price
Increasing quantity can lower the factory unit price, but ordering more packaging is not automatically a cost-saving decision.
If a product has stable demand, a higher production quantity may make good economic sense because fixed setup costs are distributed across more units and manufacturing becomes more efficient.
If the product is new, frequently updated, seasonal, or still being tested, the calculation changes.
A lower unit price can be cancelled out by obsolete packaging, storage cost, damaged inventory, or cash tied up in boxes that will not be used for a long period.
I therefore compare the price break against realistic consumption.
If moving from 5,000 to 10,000 units saves only a small amount per box but creates another six or twelve months of inventory, I want to know whether that saving is worth the additional commitment.
For mature products with predictable repeat orders, higher quantities may be very efficient. For developing products, flexibility can have greater value.
Reducing packaging cost is therefore not always about buying more. It is about buying the quantity that creates the best balance between manufacturing efficiency and inventory risk.
Optimize Packing and Shipping Volume
Packaging should also be optimized for the way it leaves the packaging factory.
Folding cartons and corrugated boxes can normally be shipped flat, which makes them relatively efficient. Rigid boxes often occupy significantly more space because assembled structures cannot always be flattened.
For bulky packaging, shipment volume can become a meaningful part of the delivered cost.
I therefore look at how many finished pieces fit into each master carton, whether the packaging can be nested or supplied flat, and whether outer-carton dimensions can be improved without increasing damage risk.
For certain rigid-box projects, collapsible structures may reduce freight and storage volume, although they introduce their own structural and assembly considerations. I only use them when the economics and customer experience justify the change.
The same principle applies to paper bags and large corrugated structures.
Saving several cents in manufacturing has limited value if the structure increases freight substantially. That is why I prefer to evaluate production and logistics together rather than optimize the factory price in isolation.
Reuse Proven Tooling and Specifications on Repeat Orders
Repeat orders can create cost savings when the packaging specification remains stable.
If the existing dieline, cutting die, foil tooling, embossing tooling, material specification, and approved artwork can still be used, part of the original development cost may not need to be repeated.
This makes good specification management important.
I keep the approved structure, material, color requirements, finishing positions, insert details, and packing method as consistent as practical so the next production run does not need to be rebuilt from the beginning.
Frequent small structural changes can appear harmless but may require new dies, new samples, new setup, or additional testing.
I therefore distinguish between changes that genuinely improve the packaging and changes that simply create another development cycle.
For long-term packaging programs, consistency itself can become a cost-control strategy.
Reduce Cost Before Production, Not After the Sample Is Approved
The best time to control packaging cost is during structural and specification development.
Once the final sample has been approved, changing material, dimensions, structure, finishes, or inserts may require a new dieline, new tooling, new samples, or another approval cycle.
At that stage, a cost-saving change can create additional development cost or delay.
I therefore prefer to establish the target budget early.
If I know the acceptable packaging cost before structural development begins, I can make better decisions about box type, material, printing, finishing, inserts, and production quantity while there is still flexibility.
This is much more efficient than developing an elaborate package first and trying to remove cost after every component has already been approved.
A realistic budget does not restrict packaging development. It gives the design a commercial boundary within which the structure can be engineered properly.
What I Would Not Reduce Just to Reach a Lower Price
There are also parts of a packaging specification that I would not reduce simply because the quotation needs to come down.
I would not knowingly use a material that is too weak for the product. I would not remove necessary protection from an insert. I would not reduce corrugated strength below what the shipping environment requires. I would not accept inconsistent brand colors when color accuracy is critical. I would not skip appropriate sampling on a structure that has not been validated.
These changes can make the purchase price lower while increasing the risk of damage, rework, rejection, customer complaints, or repeat-order inconsistency.
Cost optimization only works when the packaging continues to perform its intended function.
For me, the best result is therefore not the cheapest possible box. It is a package in which unnecessary cost has been removed while the essential requirements for product fit, protection, appearance, manufacturability, and repeat production consistency remain intact.
That is the point where packaging becomes genuinely more economical rather than simply less expensive.
What Information Is Needed for an Accurate Custom Packaging Quote?
An accurate custom packaging quotation depends on the quality of the information available before pricing begins. If I receive only a reference photo, approximate box size, and quantity, I can usually provide a general budget range, but I cannot reliably calculate a production-ready price.
For a more accurate quotation, I need to understand not only what the packaging should look like, but also what product it will hold, how it will be manufactured, how many versions are required, how it will be packed, and where it needs to be delivered.
The more clearly these details are defined, the less the supplier needs to make assumptions. That matters because two suppliers can interpret an incomplete RFQ differently and return quotations that appear comparable even though they are based on different specifications.
My goal is therefore to turn the initial packaging idea into a specification that can be priced consistently.
Product Information and Packaging Purpose
I normally begin with the product rather than the box.
I want to know what the package will hold, the product dimensions, approximate weight, number of items per box, fragility, orientation, and whether the packaging is intended primarily for retail presentation, e-commerce delivery, gifting, storage, or transport.
This information helps determine whether the proposed structure is realistic.
A folding carton for a lightweight cosmetic product has very different requirements from a carton holding a glass bottle. A rigid presentation box for a perfume set requires different support from a rigid box holding apparel. A corrugated mailer for a small accessory does not need the same board specification as packaging for heavier electronics.
Product weight is particularly important because it influences board strength, bottom construction, insert design, handle requirements, and sometimes the type of packaging that should be used.
If the product itself is not available during development, I prefer to receive accurate product dimensions, photographs, drawings, or a 3D model whenever possible. For insert projects, an actual product sample is even more useful because nominal dimensions alone may not reveal curved surfaces, pumps, caps, protruding components, or areas that require additional clearance.
The more accurately I understand the product, the less likely I am to price packaging that later needs to be structurally redesigned.
Finished Packaging Dimensions
Finished dimensions are one of the most important pieces of information in any packaging quotation.
For most box projects, I need the intended length × width × depth, together with confirmation of whether the dimensions refer to the inside or outside of the package.
This distinction matters.
A rigid box built around internal product dimensions will have different outside dimensions once the greyboard, wrapping paper, insert, and lid construction are added. Corrugated packaging also has board thickness that affects the relationship between internal and external dimensions.
If the box is being developed around an existing product, I usually prefer to confirm the product dimensions first and then establish the final packaging dimensions during structural development rather than asking the buyer to estimate the box size.
Small dimensional changes can affect material consumption, sheet utilization, cutting layout, insert size, master-carton configuration, and shipping volume.
For this reason, “approximately 20 cm × 15 cm × 5 cm” may be enough for a preliminary budget, but it is not ideal for a final production quotation.
Once the size is confirmed, the quotation becomes much more reliable.
Packaging Style and Structural Requirements
The quotation also needs a clearly defined packaging structure.
“Custom box” is too broad because a straight tuck-end folding carton, auto-lock carton, magnetic rigid box, drawer box, two-piece setup box, corrugated mailer, and regular shipping carton have very different manufacturing requirements.
I therefore confirm the box style as early as possible.
If the customer already has an existing dieline, structural drawing, sample, or previous box, that can make the process much faster. If the project is new, I can work from the product dimensions, packaging purpose, reference images, opening preference, and expected protection level to determine a more suitable structure.
Structural details that appear small can affect the price.
For example, adding an auto-lock bottom, double wall, magnetic closure, ribbon pull, tear strip, adhesive strip, window, shoulder-neck component, separate sleeve, or additional compartment can change material usage, tooling, converting, and assembly.
For an accurate quotation, I therefore want the structural requirement to be specific enough that the factory is pricing an actual production method rather than a visual concept.
Material, Board Grade, and Thickness
Once the structure is clear, I need to know what material specification the quotation should be based on.
For folding cartons, this may include SBS, FBB, recycled board, kraft board, or another paperboard together with the required GSM or thickness.
For rigid boxes, I normally need the greyboard thickness and the intended wrapping-paper specification.
For corrugated packaging, the flute type, board construction, and required strength become more important than simply specifying a GSM number.
For paper bags, paper type, GSM, handle construction, and reinforcement may all affect the quotation.
If the buyer does not yet know the exact material, that does not prevent quotation. I can recommend a practical starting specification based on the product weight, structure, printing requirement, target appearance, and budget.
What I want to avoid is comparing one supplier’s quotation based on a lighter material with another supplier’s quotation based on a heavier or more premium specification.
A useful RFQ should either define the material clearly or state that the supplier should recommend a material for a specific performance requirement.
Printing, Colors, and Artwork Requirements
Printing specifications should also be included before the quotation is treated as final.
I normally confirm whether the packaging requires CMYK printing, Pantone colors, one- or two-color printing, full-color artwork, exterior-only printing, or printing on both the inside and outside.
The artwork itself can influence cost.
A simple logo on a white carton is different from full-surface dark printing. A natural kraft box with one-color flexographic printing has different production requirements from an offset-printed folding carton with photographs, gradients, and several brand colors.
If Pantone matching is important, I want that requirement identified before production pricing is finalized.
I also check whether the artwork is already complete or whether the quotation is being prepared before final artwork exists. A quotation can still be created without finished artwork, but the supplier needs enough information to estimate the expected print coverage and color requirements.
When artwork is already available, supplying the actual PDF, AI, or other production file can reduce assumptions and help identify potential technical issues earlier.
Finishing Requirements
Finishing should be specified separately from printing because each finishing process can create its own tooling, material, and production requirements.
If the project needs matte or gloss lamination, foil stamping, embossing, debossing, spot UV, soft-touch treatment, textured paper, window application, or another effect, I want to know that before the quotation is finalized.
The finishing area also matters.
A small foil logo is different from a large foil background covering several panels. Embossing a brand mark requires a different setup from embossing a large decorative pattern. Spot UV applied only to a logo may have a different cost from a design covering most of the package.
If the finishing position is not yet final, a reference image can still help establish a preliminary estimate.
However, once the artwork and finishing areas are confirmed, I can move from an approximate finishing allowance to a more accurate production cost.
Insert Material and Product Fit
If the packaging includes an insert, I treat it as part of the original quotation rather than something to add later.
I want to know the insert material, number of products, approximate product positions, required protection level, and whether the insert is primarily functional, decorative, or both.
A folded paperboard insert has a different cost from corrugated board, molded pulp, EVA, foam, or fabric-covered structures.
The number and shape of cavities also matter.
Holding one bottle in a simple paperboard insert is very different from developing a multi-product gift set with several product heights, finger-access areas, separate compartments, and presentation requirements.
Whenever possible, I prefer to design the insert around the actual product sample. This reduces the risk of quotation changes later because the initial dimensions did not reflect the real product geometry.
It also allows the outer box and insert to be sized together, which can prevent unnecessary material and empty space.
Order Quantity and Quantity per SKU
The RFQ should state the required production quantity clearly, but for multi-SKU projects I need more than the total number of boxes.
I also need to know the quantity per artwork, size, and structure.
A quotation for 10,000 identical cartons is not necessarily equivalent to 10,000 cartons divided across five SKUs of 2,000 pieces each.
If the SKUs use the same structure and dimensions, some tooling may be shared. However, different artwork, colors, finishing positions, product information, or dimensions can create separate production setups.
This is especially important for supplement, cosmetics, skincare, fragrance, food, apparel, and other categories that often contain multiple products within one packaging family.
I therefore normally ask for a quantity breakdown such as 2,000 pieces per SKU × five SKUs rather than simply “10,000 pieces total.”
When the final quantity has not yet been decided, requesting prices at several volumes—such as 1,000, 2,500, 5,000, and 10,000 units—can also help reveal where production becomes more economical.
Packing Requirements
The quotation should also clarify how the finished packaging needs to leave the factory.
For folding cartons and corrugated boxes, this usually means confirming whether the products can be supplied flat and how many pieces should be packed into each master carton.
For rigid boxes, I want to know whether the structure is assembled or collapsible and whether tissue, protective bags, separators, or other packing materials are required to protect finished surfaces.
Premium packaging may require more careful export packing because scratching, corner damage, foil abrasion, or surface marks can occur during transportation if the boxes are packed too tightly or without adequate protection.
The packing requirement affects not only factory cost but also shipment volume.
For international projects, I therefore prefer to know the approximate master-carton dimensions, pieces per carton, gross weight, and total cubic volume once production packing has been planned.
These details are particularly useful when comparing freight options.
Delivery Destination and Shipping Method
A packaging supplier cannot estimate the delivered cost accurately without knowing where the goods are going.
For an initial factory-price quotation, the destination may not be essential. For FOB, CIF, DDP, or other freight-inclusive comparisons, however, I need at least the destination country and usually the port, city, postal code, or delivery address depending on the transport method.
Packaging is often relatively lightweight but bulky, which makes shipment volume important.
This is particularly relevant for rigid boxes, paper bags, large corrugated packaging, and other structures that occupy significant space even when empty.
For courier and air shipments, carriers may use dimensional or volumetric weight rather than actual weight alone. FedEx explains this principle in its guide to dimensional weight. This is one reason I want to understand both the weight and packed dimensions of the shipment before assuming that the cheapest factory quotation will also create the lowest delivered cost.
The expected shipping method should therefore be included where possible.
A small sample shipment may move by courier. A commercial order may move by air, LCL sea freight, or full-container shipment depending on volume, urgency, destination, and budget.
Those transport choices can materially change the landed packaging cost.
Incoterm and Commercial Scope
The quotation should also identify the trade term being used.
EXW, FOB, CIF, DDP, and other Incoterms do not describe the same commercial scope. They define different points at which costs, responsibilities, and risks are allocated between seller and buyer.
I therefore do not compare an EXW quotation directly with an FOB or delivered quotation without adjusting for the difference in scope.
For international packaging orders, I prefer the quotation to state the agreed Incoterm together with the relevant named place or port. The International Chamber of Commerce provides the official framework for these rules in Incoterms 2020.
For pricing purposes, the important question is simple:
Where does the supplier’s quoted responsibility end?
Once that point is clear, I can identify which freight, customs, destination, or local delivery costs still need to be added before comparing the real landed cost.
Required Lead Time and Target Delivery Date
Timing should be discussed before quotation rather than after the purchase order has already been placed.
I normally want to know whether the buyer has a target launch date, retail deadline, promotion, trade show, seasonal campaign, or production schedule that the packaging needs to support.
The required date affects how I plan structural development, artwork approval, sampling, material preparation, bulk production, inspection, and shipping.
It is important to distinguish between sample lead time, production lead time, and total project lead time.
A statement such as “production takes 15 working days” does not mean the complete packaging project can move from concept to warehouse delivery in 15 days. Time may still be required for structural development, dieline preparation, artwork adjustment, sample production, sample shipping, customer approval, material purchasing, international freight, and customs clearance.
I explain these stages in more detail in my guide to custom packaging lead time.
For an accurate quotation, a normal production schedule is usually enough. But if the project requires unusually fast manufacturing or expedited transport, that requirement should be disclosed early because rush production, air freight, or special material arrangements can change the total cost.
Existing Samples, Reference Packaging, or Technical Files
Reference materials can make a quotation significantly more accurate.
If the customer already has an existing package, I find it useful to receive photographs, dimensions, material details, dielines, previous specifications, or ideally a physical sample.
A sample allows the supplier to examine construction, board thickness, paper quality, printing, finishing, insert design, assembly, and packing details that may not be obvious from photographs.
Reference packaging is also useful for new projects.
However, I do not assume that a reference image means the new packaging should be copied exactly. I use it to understand the desired structure, opening method, visual level, or finishing direction, and then adjust the final specification around the actual product and production requirements.
Technical files are even more useful when the project is already developed because they reduce the number of assumptions made during pricing.
What I Need Before I Treat a Quote as Final
I do not need every packaging project to be completely engineered before providing an initial estimate.
For an early budget, the product type, approximate size, packaging style, expected material level, quantity, and general printing or finishing requirement may be enough.
But before I treat the quotation as a production-ready price, I want the main specification to be stable.
That means I should be able to identify the finished dimensions, structure, material, board thickness or grade, printing, colors, finishes, insert, quantity per SKU, packing method, delivery scope, and required schedule without relying on major assumptions.
At that point, the quotation becomes much more useful.
Instead of comparing broad estimates, I can compare suppliers against the same specification, understand what is included or excluded, and identify whether a price difference comes from manufacturing efficiency rather than from missing information.
For me, an accurate custom packaging quote is therefore not created by asking the supplier for a more precise number.
It is created by giving the supplier a more precise project to price.
How to Compare Custom Packaging Quotes
Once I have received several custom packaging quotations, I do not compare them by placing the unit prices next to each other and choosing the lowest number. Before price becomes meaningful, I first need to make sure that every supplier is quoting the same packaging specification, quantity, commercial scope, and delivery basis.
A quotation can appear cheaper because the material is different, the insert is missing, tooling is excluded, packing is simpler, the shipping term is different, or the supplier has interpreted an incomplete specification in another way. If those differences are not identified first, a unit-price comparison can be misleading.
I therefore normalize the quotations before making a purchasing decision. My objective is to reach a point where the main variables are aligned and I can understand what each supplier is actually charging for the same finished packaging project.
I use the following comparison framework as a first check before reviewing each quotation in detail.
| Quote Item | What I Compare | Why It Matters |
|---|---|---|
| Order Quantity | Same total quantity and quantity per SKU | Unit price can change significantly when one order is split across multiple artwork versions or structures. |
| Finished Dimensions | Same internal or external L × W × D | Even small dimensional differences can change material usage, sheet yield, insert size, packing, and freight. |
| Box Structure | Same box style and construction | A tuck-end carton, auto-lock carton, magnetic rigid box, drawer box, and corrugated mailer require different materials and assembly. |
| Material | Same paper or board grade | General descriptions such as “paperboard,” “kraft,” or “greyboard” are not specific enough for a fair comparison. |
| Thickness / Strength | Same GSM, caliper, greyboard thickness, or corrugated performance requirement | A lower quotation may simply be based on a lighter or weaker material specification. |
| Printing | Same printing method, colors, coverage, and inside/outside printing | CMYK, Pantone matching, heavy ink coverage, and interior printing do not have the same production cost. |
| Finishes | Same process, area, and position | Foil, embossing, spot UV, lamination, and other finishes can vary substantially in scope. |
| Insert | Same material, layout, and construction | Paperboard, corrugated, molded pulp, EVA, and foam inserts have very different cost structures. |
| Tooling | Same dies, plates, and special tooling scope | One quotation may include tooling while another lists it separately. |
| Samples | Same sample type and approval purpose | A digital prototype, blank structural sample, and production-grade sample are not equivalent. |
| Packing | Same master-carton quantity and protection method | Packing affects both damage risk and shipment volume. |
| Incoterm / Delivery Basis | Same EXW, FOB, CIF, DDP, or other agreed basis | Prices cannot be compared fairly when supplier responsibility ends at different points. |
| Freight | Same destination, shipping method, packed volume, and weight basis | A lower factory price can be offset by less efficient packing or higher transportation cost. |
| Lead Time | Same starting point and production scope | One supplier may quote only manufacturing time while another includes additional approval or preparation stages. |
| Quality Standard | Same critical tolerances and acceptance requirements | Different expectations for color, fit, surface finish, strength, or assembly can create different production costs. |
| Repeat-Order Control | Same material, color, tooling, and approved sample reference | A lower first-order price may provide less value if later batches cannot reproduce the approved packaging consistently. |
Compare the Finished Packaging Specification First
I begin with the packaging itself.
The finished dimensions, box style, material, board thickness, printing, colors, surface treatment, special finishes, insert, and structural details should be aligned across all quotations before I compare unit prices.
For example, I would not treat a quotation for a 350 GSM folding carton as directly comparable with another quotation based on 400 GSM board unless I understand why the specifications differ.
The same applies to rigid boxes. A supplier quoting 1.5 mm greyboard and another quoting 2 mm greyboard may both describe the product as a “rigid box,” but the material consumption, stiffness, weight, and production cost are different.
Finishing needs the same attention. Matte lamination, soft-touch lamination, foil stamping, embossing, debossing, spot UV, and specialty paper should not be treated as interchangeable descriptions.
Even when two quotations both state “gold foil,” I want to confirm whether the foil area, number of positions, tooling requirement, and artwork are the same.
The first question I therefore ask is not:
“Which quotation is cheaper?”
It is:“Are these quotations describing the same finished package?”
If the answer is no, I correct the specification before comparing the prices.
Compare Material by Specification, Not by General Name
Material descriptions are often too broad to support a reliable price comparison.
Terms such as “white paperboard,” “kraft paper,” “greyboard,” or “corrugated board” identify a general material family, but they do not tell me enough about the actual production specification.
For folding cartons, I want to know the paperboard grade, GSM or caliper, surface characteristics, and any relevant coating.
For rigid boxes, I check the greyboard thickness together with the wrapping-paper specification.
For paper bags, I compare paper type, GSM, handle construction, and reinforcement.
Corrugated packaging requires a different approach because flute type or board thickness alone does not tell me everything about shipping performance.
Two corrugated boxes may both use E-flute or B-flute construction but still have different liner combinations, board strength, compression performance, or intended load capacity.
When the package is designed for shipping, stacking, palletization, or heavier products, I therefore compare the required performance specification rather than judging the board only by thickness.
Tests such as ECT, BCT, and Mullen tests evaluate different aspects of corrugated packaging performance, so I do not treat them as interchangeable numbers when reviewing supplier specifications.
If one supplier is quoting a stronger corrugated construction than another, the higher price may therefore reflect a real performance difference rather than simply a higher margin.
My goal is to compare equivalent material performance, not just materials with similar names.
Compare Printing and Color Requirements
Next, I check whether all suppliers are pricing the same printing requirement.
A quotation based on standard CMYK printing is not automatically comparable with one that includes Pantone color matching. Exterior-only printing should not be compared directly with exterior and interior printing. Flexographic corrugated printing also has a different cost and production structure from litho-laminated full-color printing.
I also look at print coverage.
A package with a small logo and large unprinted areas may have different production requirements from a design with full-panel dark colors, large solid backgrounds, or heavy ink coverage.
Color-control expectations also matter.
If the packaging belongs to an established brand with several SKUs, consistency between different production runs may be important. In that situation, I want to know how color standards will be approved and controlled rather than simply whether the quotation says “full-color printing.”
A lower printing price can be perfectly reasonable if the project does not require particularly tight color tolerances. The important point is that every supplier should be pricing against the same expectation.
Compare Finishing Area and Process, Not Just the Finish Name
Special finishing deserves its own comparison because it can create substantial quotation differences.
If three suppliers all quote foil stamping, I check whether they are quoting the same foil color, artwork position, coverage area, and number of stamped locations.
The same applies to embossing, debossing, spot UV, windows, lamination, soft-touch treatments, and specialty coatings.
A small foil logo on one panel is not equivalent to foil applied across several sides of a box. One embossed logo is not equivalent to a large registered embossing pattern.
For rigid packaging, I also check details such as ribbons, magnets, specialty wrapping papers, pull tabs, and closures because they can appear to be minor specification details while adding meaningful material and assembly costs.
I therefore prefer quotations that define finishing clearly rather than simply listing a collection of process names.
This makes it easier to determine whether a price difference comes from manufacturing efficiency or from a different finishing specification.
Compare Inserts as a Separate Specification
If the package contains an insert, I compare that insert independently from the outer box.
I confirm the insert material, thickness, number of cavities, product layout, assembly method, surface treatment, and whether any covering material is included.
A folded paperboard insert should not be compared directly with EVA foam simply because both hold the same product.
Even two paperboard inserts can differ considerably. One may be a single die-cut piece designed for quick folding, while another may contain several components that require individual assembly.
For multi-product gift sets, I also check whether the supplier has included all cavities, support walls, finger-access areas, dividers, or other structural details shown in the design.
An outer-box quotation can appear attractive until I discover that the insert has been excluded or priced using a simpler construction.
For that reason, I prefer the insert to be clearly identified in the quotation rather than hidden inside a generic description such as “box with insert.”
Separate Unit Price From Tooling and One-Time Charges
Once the physical specification is aligned, I separate the recurring production price from the one-time or project-level charges.
I check whether cutting dies, printing plates, foil dies, embossing tools, insert tooling, structural development, samples, and other setup charges are included or listed separately.
This matters because suppliers do not structure their quotations in the same way.
One supplier may quote:
$0.48 per box + $350 tooling
while another quotes:
$0.54 per box with standard tooling included.
At first glance, the $0.48 quotation appears cheaper. Whether it actually is cheaper depends on the order quantity and what the supplier has included.
The difference becomes even more important when I consider repeat orders.
If tooling can be reused, the economics of the second production run may be different from the first. I therefore want to know which costs are one-time, which are recurring, and which may return if the artwork, dimensions, material, or structure changes.
This allows me to compare both the first-order cost and the long-term packaging cost.
Compare the Same Quantity and SKU Breakdown
I also make sure every quotation is based on the same production quantity.
That sounds obvious, but multi-SKU projects frequently create misleading comparisons.
A supplier pricing 10,000 identical boxes is not necessarily quoting the same production economics as a supplier pricing five artwork versions at 2,000 pieces each.
If there are multiple SKUs, I compare the quantity per SKU as well as the total order quantity.
I also check whether the dimensions and structure are shared between SKUs. If several products use the same dieline but different artwork, some tooling may be shared even though printing-related preparation remains separate.
For larger packaging programs, I may request several volume levels from each supplier so I can compare how the price changes at 1,000, 2,500, 5,000, or 10,000 units.
This helps me understand not only the current quotation but also how efficiently the supplier may support the project as order volume grows.
Compare Sample Costs and What the Sample Actually Represents
Sample prices also need context.
A lower-cost digitally printed sample may be useful for checking dimensions, artwork position, general appearance, and structural fit, but it may not reproduce every bulk-production process exactly.
A production-grade sample using final materials, offset printing, foil stamping, embossing, or specialized tooling can cost considerably more.
I therefore do not compare two sample prices until I understand what each sample is intended to verify.
For early structural development, a blank sample may be enough.
For final approval on a premium rigid box or packaging with critical color and finishing requirements, a more representative production sample may be necessary.
The cheaper sample is not automatically better or worse. It may simply serve a different purpose.
What matters is whether the sample provides enough evidence to approve the relevant aspects of the packaging before bulk production begins.
Compare Packing Method and Export Protection
After the manufacturing specification, I compare how the finished packaging will be packed for shipment.
This is particularly important for premium printed surfaces, rigid boxes, large paper bags, and packaging with foil or other finishes that can be scratched or damaged during transportation.
I check the number of pieces per master carton, whether individual protection is included, carton dimensions, gross weight, and any separators, protective bags, tissue, or other packing materials being used.
A quotation with very economical export packing may reduce factory cost and shipment volume, but it still needs to protect the finished boxes adequately.
The opposite can also happen. Excessive export packing may add materials and freight without providing meaningful additional protection.
I therefore compare the packing method against the actual risk of the packaging rather than assuming that more packing is always better.
Compare Incoterms on the Same Basis
The commercial terms must also be aligned.
An EXW price cannot be compared directly with an FOB, CIF, or DDP quotation as if the numbers represented the same commercial scope.
If Supplier A quotes FOB Shenzhen while Supplier B quotes EXW, I need to account for the relevant origin-side logistics costs before comparing the two prices fairly.
If another supplier quotes DDP to the warehouse, even more transportation and import-related scope may already be included.
For this reason, I prefer to normalize the comparison around one commercial basis whenever possible.
The principle is more important than the specific Incoterm:
Every supplier should be compared at the same point in the logistics chain.
Otherwise, I may mistake a difference in freight responsibility for a difference in manufacturing price.
Compare Freight Using Actual Packed Volume Where Possible
Freight quotations should be based on the expected packed shipment rather than on the packaging unit price alone.
I want to know the master-carton dimensions, number of cartons, total gross weight, and total cubic volume.
This is particularly important for rigid boxes because they can have a relatively low actual weight while occupying substantial shipping space.
If one supplier uses a more efficient packing configuration, that can reduce freight even when the factory unit price is slightly higher.
For a large international order, I therefore compare the delivered or landed packaging cost rather than treating factory price and freight as completely separate decisions.
A $0.05 saving on the box itself is not necessarily valuable if the packaging configuration adds $0.10 per unit in transportation cost.
Compare Lead Time From the Same Starting Point
Lead times can also be misleading if suppliers calculate them differently.
One supplier may state “15 working days” from artwork approval. Another may calculate from deposit payment. A third may begin counting only after the final sample, tooling, and material availability have been confirmed.
I therefore ask what event actually starts the production lead-time clock.
I also separate structural development, sampling, bulk production, inspection, export preparation, and international shipping.
This matters particularly when a project has a fixed launch date.
A lower quotation offers limited value if the production schedule cannot support the required delivery window.
At the same time, I do not automatically select the supplier with the shortest stated lead time. I want the schedule to be realistic for the materials, printing, finishing, structure, and quantity involved.
The useful comparison is therefore not simply:
“Who promises the fastest production?”
It is:
“Which supplier provides the clearest and most realistic path from approval to delivery?”
Compare Quality Standards Before Comparing Rejection Risk
Quality is difficult to compare when a quotation only states “quality inspection included.”
I want to understand which characteristics are actually important to the project.
For folding cartons, that may include dimensions, print position, color consistency, crease quality, glue performance, surface finish, and correct assembly.
For rigid boxes, I may also pay close attention to wrapping alignment, corners, lid fit, magnet positioning, insert fit, scratches, glue marks, and consistency between units.
For corrugated shipping packaging, board performance, dimensions, slotting, gluing, print position, and stacking performance may be more important than luxury-level cosmetic appearance.
The quality standard should therefore reflect the intended function of the packaging.
I do not expect every project to use extremely tight tolerances. Over-specifying quality requirements can increase cost unnecessarily.
However, critical requirements should be clear before production. Otherwise, two suppliers may be pricing against very different interpretations of what constitutes an acceptable finished package.
Compare Repeat-Order Consistency, Not Only the First Order
For packaging that will be reordered, I also look beyond the first purchase.
I want to know whether the supplier can maintain the approved material specification, dimensions, printing color, finishing position, insert fit, and overall construction across future production runs.
This becomes increasingly important for established brands and multi-SKU packaging programs.
A small saving on the first order can lose its value if the second batch arrives with noticeably different paper, color, surface finish, stiffness, or structural fit.
Repeatability depends partly on documentation and production control.
The more clearly the supplier records the approved dieline, material, color standards, finishing specification, tooling, sample reference, and packing method, the easier it becomes to reproduce the packaging later.
For me, consistency is therefore part of the commercial value of a quotation even though it does not normally appear as a separate price line.
Build a Like-for-Like Comparison Before Making the Final Decision
By the time I finish comparing quotations, I want each supplier to be evaluated against the same core project.
The dimensions should match. The material and strength specification should be equivalent. Printing and finishing should be defined consistently. Inserts should perform the same functions. Quantity and SKU breakdown should match. Tooling and sample costs should be visible. Packing, Incoterms, freight scope, lead time, and quality expectations should be understood.
Only then does the unit-price difference become genuinely useful.
At that point, I can investigate whether one supplier is more competitive because of better manufacturing efficiency, more suitable equipment, stronger material purchasing, greater automation, or a production scale that fits the project more effectively, rather than because an important part of the project has been left out.
I therefore treat quotation comparison as a process of removing hidden differences before comparing visible prices.
The quotation with the lowest number may ultimately be the best commercial option. But I want that conclusion to come from a true like-for-like comparison rather than from a spreadsheet in which the prices look comparable while the packaging specifications are not.
How Much Should You Budget for Custom Packaging?
When I build a custom packaging budget, I do not start with one universal percentage of the product price or one target cost per box. The appropriate budget depends on the packaging type, order quantity, product value, protection requirement, number of SKUs, presentation level, and how the packaging will move through the supply chain.
A basic folding carton and a premium rigid gift box should not be expected to fit the same budget. A mature product ordered in stable 10,000-unit runs also has very different economics from a new SKU being tested at 1,000 units.
I therefore build the budget in layers. I first estimate the cost of manufacturing the packaging, then add the project costs that may sit outside the unit price, and finally check whether freight, inventory, and operational requirements make the total commercially realistic.
For me, the purpose of a packaging budget is not to predict the final quotation to the cent. It is to establish a realistic range early enough that the structure, materials, finishes, and order quantity can be developed within the project’s commercial limits.
Start With the Production Budget
The first layer is the cost of manufacturing the packaging itself.
At an early stage, I normally estimate this using three variables:
packaging type × expected unit-price range × order quantity
For example, if I am planning 5,000 folding cartons, I use the folding-carton price range from the earlier comparison table rather than starting with the cost of a rigid box or corrugated mailer.
This gives me a realistic production range before the final specification has been completed.
The same principle applies to other packaging types. A rigid box requires a substantially larger production budget because of greyboard, wrapping paper, finishing, inserts, and assembly. A corrugated mailer may sit between lightweight retail packaging and premium rigid packaging depending on size, print method, and board construction.
I treat this first number as the manufacturing budget, not the complete project budget.
That distinction prevents one of the most common planning mistakes: multiplying a quoted unit price by the quantity and assuming that the result represents everything the project will cost.
Use the Price Range to Build a Low, Target, and High Budget
Instead of budgeting around one unit price, I find it more useful to work with three planning levels.
The low budget assumes a relatively efficient structure, conventional material, straightforward printing, limited finishing, and little unnecessary complexity.
The target budget represents the specification I realistically expect the project to require.
The high budget gives me room for heavier materials, additional finishing, a more complicated insert, structural changes after sampling, or other requirements that are not fully defined at the beginning.
For example, if the expected production price is somewhere between $0.40 and $0.90 per carton, I do not automatically build the business case around $0.40.
I may instead develop the packaging around a target closer to the middle of that range and keep the lower end as an optimization opportunity rather than as an assumption.
This gives the packaging development process more flexibility and reduces the risk of creating a design that only works financially if every production variable reaches its lowest possible cost.
Separate the First-Order Budget From the Repeat-Order Budget
A first custom packaging order often requires a larger budget than a repeat production run.
The first order may include structural development, samples, cutting dies, printing plates, foil or embossing tooling, insert development, color approval, and other preparation costs that do not necessarily repeat in the same form on every order.
For that reason, I calculate two different numbers:
First-order packaging budget = production + development + tooling + samples + logistics
and Repeat-order packaging budget = recurring production + applicable repeat setup + logistics
This distinction becomes particularly important when evaluating a long-term packaging program.
A first order may initially look expensive because development and tooling are concentrated into one purchase. If the approved structure and tooling can be reused over several future orders, the economics can become more favorable over time.
I therefore avoid rejecting a packaging concept based only on its first-order effective cost without understanding how much of that cost is genuinely recurring.
Add Sampling and Tooling as a Separate Budget Category
Sampling and tooling should have their own allowance rather than being hidden inside the unit-price target.
A new folding carton may require structural development and a cutting die. Premium finishing may require foil or embossing tooling. A rigid box or fitted insert may require additional structural work and several sample iterations before the final construction is confirmed.
The amount varies too much by project for me to apply one universal percentage.
Instead, I ask what needs to be approved before bulk production.
If the packaging structure is straightforward and based on a proven format, development may be relatively simple.
If the project includes a custom insert, multiple products, magnets, complicated opening mechanisms, tight product fit, premium finishing, or several rounds of color approval, I allow more budget for development.
I consider this money part of risk reduction before bulk production, not simply an extra cost to eliminate.
Spending appropriately on structural and sample validation can prevent a much larger problem after several thousand units have been manufactured.
Leave Room Between the Target Budget and the Maximum Budget
I prefer not to design a packaging project so that the first estimated quotation already reaches the absolute maximum budget.
Early quotations are often prepared before every production detail has been finalized.
The final dimensions may change after structural testing. The insert may need additional support. The selected paper may behave differently during sampling. The artwork may add interior printing or a special finish. Master-carton packing may also affect the final logistics cost.
For that reason, I prefer to leave some commercial room between the target packaging cost and the maximum acceptable packaging cost.
This does not mean automatically increasing the supplier’s price allowance. It means avoiding a packaging concept that becomes commercially unworkable after one normal technical adjustment.
The more complicated the structure, the more useful this flexibility becomes.
For a straightforward folding carton, the uncertainty may be relatively limited once the dimensions and material are known.
For a premium rigid gift set with several products and a custom insert, I expect a wider development range until the physical sample has been approved.
Budget Differently for a New Product and an Established Product
A new product usually deserves a different packaging budget strategy from an established SKU.
For a new launch, I often value flexibility more highly than the absolute lowest unit price.
The packaging may still change after customer feedback, product testing, regulatory review, artwork development, or the first selling season. Ordering a very large quantity to reduce the unit price can therefore create unnecessary inventory risk.
In that situation, a slightly higher unit cost at a lower quantity may be commercially sensible.
For an established product with stable dimensions, proven artwork, predictable demand, and regular repeat orders, I can place more emphasis on manufacturing efficiency.
Higher quantities may allow fixed setup costs to be distributed across more units, material purchasing may improve, and production can be planned more efficiently.
The budget should therefore reflect the maturity of the product rather than applying the same purchasing strategy to every SKU.
Budget Multi-SKU Packaging at the SKU Level
One of the easiest ways to underestimate a packaging budget is to calculate only the total number of boxes while ignoring how that quantity is divided.
A project requiring 20,000 cartons under one artwork has different economics from 20,000 cartons divided across ten SKUs at 2,000 pieces each.
Even when the structure and dimensions are shared, different artwork versions may require separate prepress preparation, printing control, sorting, packing, and inventory management.
If the structures or dimensions also change between SKUs, the project may require additional dies, samples, and production setups.
For this reason, I build the budget around:
quantity per SKU + number of structures + number of artwork versions
rather than total quantity alone.
This is particularly important for supplement, skincare, cosmetics, fragrance, food, and other product families where several variations may be launched together.
If the budget becomes too high, standardizing box dimensions, inserts, or common finishing elements across the product range can sometimes improve the economics without making every SKU look identical.
Match the Packaging Budget to the Role of the Package
I also look at what the packaging is expected to accomplish.
A secondary folding carton that mainly carries branding, product information, and basic retail protection does not normally need the same budget as a gift box intended to be part of the product experience.
A corrugated shipping carton should be judged primarily on protection, stacking, handling, and logistics performance. Spending heavily on decorative finishes may create little commercial value if the carton is discarded immediately after delivery.
A luxury rigid box has a different role. If it supports premium positioning, gifting, unboxing, product organization, and long-term presentation, a higher packaging budget may be justified.
The important point is that I do not use one fixed rule such as:
“Packaging should always cost X% of the product.”
The relationship between packaging and product value varies too widely across industries.
A small luxury fragrance and a large low-value household product can have completely different packaging economics even if their retail prices are similar.
I therefore ask what commercial function the packaging performs before deciding whether the budget is too high.
Include Freight Before Approving a Packaging Concept
For internationally sourced packaging, I also want an early indication of the shipping impact before approving the final structure.
This is particularly important for rigid boxes because they can occupy substantial volume even when they are relatively lightweight.
A rigid box quoted at an attractive factory price may become less economical if the assembled structure requires a large number of cubic meters to ship.
Folding cartons and corrugated packaging are often more space-efficient because they can normally be shipped flat, but dimensions and master-carton configuration still matter.
I therefore separate:
production budget
from
delivered packaging budget
before deciding whether the project fits commercially.
At the early design stage, I may not yet have an exact freight quotation. But I can still identify whether the proposed packaging is likely to be compact and flat-packed or bulky and expensive to transport.
That early check can prevent a situation where the packaging is fully approved before anyone notices that international freight has materially changed the economics.
Consider Inventory Cost When Choosing the Budget Quantity
A packaging budget should also reflect how quickly the order will actually be consumed.
Suppose increasing the order from 5,000 to 10,000 boxes produces an attractive unit-price reduction.
That saving is valuable only if the additional 5,000 boxes are likely to be used within a commercially reasonable period.
If they remain in storage for a long time, the buyer is also carrying warehouse space, working capital, artwork-obsolescence risk, and the possibility that the product specification changes before the packaging is consumed.
For this reason, I compare the manufacturing saving against the expected inventory period.
For a fast-moving, stable SKU, a larger order may be an efficient use of budget.
For a new product or frequently changing design, I may accept a higher unit cost in exchange for lower inventory exposure.
I therefore treat the cheapest unit price and the lowest commercial risk as two different questions.
What I Do When the Packaging Budget Is Too Low
If the first quotation exceeds the available budget, I do not immediately abandon the packaging concept.
I identify which part of the specification is creating the gap.
If the structure is too expensive, I look at whether components can be simplified.
If material consumption is high, I review the dimensions and board specification.
If finishing is responsible for a large part of the cost, I consider whether one high-impact finish can replace several decorative processes.
If the insert is complicated, I review whether a simpler paperboard construction can provide the same protection.
If the unit price is being driven by a very low quantity, I compare whether a higher volume creates enough savings to justify the additional inventory.
The important point is to change the cost driver, not reduce quality randomly.
A target budget becomes much more useful when I can explain exactly why the current specification is above it.
Build the Budget Before Finalizing the Packaging Design
The most effective time to establish a packaging budget is before the structure, material, finishing, and inserts have all been finalized.
If I know that a package needs to stay around a certain target cost, I can design within that commercial boundary from the beginning.
That may influence whether I choose a folding carton or rigid box, whether the insert uses paperboard or another material, how much finishing is applied, and what production quantity makes sense.
If the budget is only introduced after the premium sample has already been approved, cost reduction becomes much more difficult. Every change risks affecting the appearance, structure, tooling, or approval process.
I therefore prefer to treat budget as one of the original packaging specifications alongside dimensions, product weight, protection, appearance, quantity, and delivery requirements.
For me, a realistic custom packaging budget should answer three different questions:
How much should I expect to spend on manufacturing?
What additional first-order and logistics costs need to be allowed for?
What is the highest total cost that still makes commercial sense for this product?
Once those three numbers are clear, packaging development becomes much easier. I can focus on building the strongest structure and presentation within the budget, rather than developing the packaging first and trying to remove cost after everything has already been decided.
Frequently Asked Questions
Custom packaging pricing becomes much easier to understand once the packaging type, quantity, dimensions, material, printing, finishes, inserts, and delivery scope are defined. I use the following questions to answer the practical pricing issues that usually remain after the main specification has been reviewed.
How Much Does Custom Packaging Typically Cost?
Custom packaging can range from well below $1 per unit for relatively simple paper packaging at suitable quantities to several dollars per unit for premium rigid boxes and more complicated structures.
As a budgeting reference, the price ranges used earlier in this guide are approximately $0.40–$1.50 for folding cartons at 1,000 units, $2.00–$8.00+ for rigid boxes, $0.80–$2.80 for corrugated mailers, $0.70–$3.00 for corrugated shipping boxes, and $0.35–$2.00 for custom paper bags.
I would not treat those numbers as fixed market prices. Dimensions, board specification, printing, finishes, inserts, quantity, packing, tooling, and delivery requirements can move the final quotation substantially within each packaging category.
How Much Do 1,000 Custom Boxes Cost?
For 1,000 units, the approximate production budget depends mainly on the box type.
Using the indicative ranges in this guide, 1,000 folding cartons may represent about $400–$1,500 in production cost, while 1,000 rigid boxes may be around $2,000–$8,000 or more. Corrugated mailers may be roughly $800–$2,800, while corrugated shipping boxes may be around $700–$3,000.
These estimates primarily represent the packaging production itself. A first order may also require samples, cutting dies, printing plates, foil or embossing tooling, insert development, export packing, freight, duties, taxes, or other project-specific costs.
I therefore use the 1,000-piece figure for early budgeting rather than as a guaranteed quotation.
Why Does Custom Packaging Cost Less at Higher Quantities?
Custom packaging normally becomes less expensive per unit at higher quantities because fixed production costs are distributed across more finished pieces.
A cutting die, printing setup, machine adjustment, or finishing tool may be required whether I produce 1,000 boxes or 10,000 boxes. When the quantity increases, the contribution of those fixed costs to each individual unit becomes smaller.
Longer production runs can also improve machine efficiency and material utilization.
However, the unit price does not continue falling indefinitely. Paperboard, corrugated board, wrapping paper, ink, inserts, finishing materials, assembly labor, and packing are still required for every finished package.
That is why I expect quantity discounts to vary by packaging type rather than applying one percentage to every project.
Is Ordering More Packaging Always the Cheapest Option?
No. Ordering more packaging often lowers the unit price, but it does not automatically create the lowest total business cost.
A larger order requires more cash, warehouse space, and confidence that the packaging will be used before the artwork, product dimensions, barcode, regulatory information, branding, or other specifications change.
For a mature SKU with stable demand, a larger production run may make excellent commercial sense.
For a new product or changing design, I may accept a higher unit price at a smaller quantity because the lower inventory exposure provides more flexibility.
I therefore compare unit-price savings with expected consumption and inventory risk before choosing the final quantity.
Why Are Rigid Boxes More Expensive Than Folding Cartons?
Rigid boxes normally cost more because their materials and manufacturing process are substantially different from folding cartons.
A folding carton is typically printed on paperboard, die-cut, creased, folded, and glued. Much of the process can be highly efficient at suitable production quantities.
A rigid box usually requires thick greyboard, separate wrapping paper, forming, wrapping, corner finishing, and additional assembly. Magnetic closures, drawer structures, shoulder-neck components, ribbons, specialty papers, foil stamping, and fitted inserts can add further materials and labor.
I therefore consider rigid packaging when its stronger structure, premium presentation, gifting value, or opening experience justifies the additional cost rather than treating it as a direct substitute for a folding carton.
What Is Normally Included in a Custom Packaging Quote?
A custom packaging quotation should normally identify the production basis clearly enough for me to understand what is being manufactured.
That usually includes the quantity, finished dimensions, box structure, material specification, printing, finishes, inserts, standard manufacturing operations, and basic packing method.
However, quotation formats differ between suppliers.
Some manufacturers include normal tooling or setup within the unit price, while others list cutting dies, printing plates, foil dies, samples, or other preparation costs separately.
I therefore check the specification and inclusions before comparing quotations. A unit price without enough information about what it includes is not yet a reliable basis for supplier comparison.
Which Packaging Costs Are Often Charged Separately?
Depending on the project and quotation format, separate charges may include structural samples, printed samples, production-grade samples, cutting dies, printing plates, foil or embossing tooling, special insert tooling, palletization, special protective packing, freight, customs-related costs, duties, taxes, or expedited production and shipping.
Separate charges are not necessarily a problem.
In fact, showing them individually can sometimes make a quotation easier to understand because I can see which costs occur once and which costs repeat with every unit.
The important point is to identify these charges before approving the project so that the first-order budget is not based only on the visible factory unit price.
How Do I Calculate the Real Packaging Cost per Unit?
For a more realistic first-order calculation, I use:
Real packaging cost per unit = total project cost ÷ number of usable packaging units
The total project cost can include the production value plus applicable samples, tooling, packing, freight, import charges, local delivery, and other costs required to receive the packaging in usable condition.
For example, if 5,000 boxes cost $2,500 to manufacture but another $1,000 is required for tooling, samples, and delivery, I would not evaluate the first order only as:
$2,500 ÷ 5,000 = $0.50 per box
The first-order project cost is $3,500, which creates an effective cost of:
$3,500 ÷ 5,000 = $0.70 per box
Repeat-order economics may later improve if some tooling and development costs do not need to be paid again.
Why Can Two Suppliers Quote Very Different Prices for the Same Box?
In many cases, they are not actually quoting exactly the same box.
One supplier may assume a lighter board, simpler printing, smaller finishing area, different insert construction, basic export packing, or fewer included services. Another may include heavier material, tighter color control, more complete tooling, stronger packing, or a broader delivery scope.
Production capability also matters. A structure that fits one factory’s equipment and automation may require more manual work or subcontracting at another factory.
When quotations differ substantially, I therefore compare the specifications first.
Once the dimensions, material, thickness, printing, finishing, insert, quantity, tooling, packing, delivery basis, and quality expectations are aligned, the remaining price difference becomes much easier to understand.
What Information Do I Need to Get an Accurate Custom Packaging Quote?
For an accurate quotation, I ideally want to know the product dimensions and weight, finished packaging size, box style, material, board thickness or strength, printing requirements, finishes, insert requirements, quantity, quantity per SKU, packing requirements, delivery destination, Incoterm, and target schedule.
Not every detail has to be finalized for an early budget estimate.
If the project is still being developed, the product dimensions, approximate box size, packaging style, expected material level, quantity, and reference images may be enough for me to establish a preliminary range.
But the quotation becomes more reliable as the specification becomes more complete.
I therefore distinguish between a budget estimate based on assumptions and a production quotation based on confirmed specifications.
How Can I Reduce Custom Packaging Cost Without Reducing Quality?
I normally reduce cost by removing unnecessary material, processing, space, or labor rather than simply selecting a cheaper material.
Right-sizing the box can reduce both paper consumption and freight volume. Matching board strength to the actual product avoids over-specification. Simplifying an insert can reduce materials and assembly. Using one carefully selected premium finish instead of several processes can preserve the visual impact while controlling cost.
For multi-SKU projects, sharing structures or common dimensions can also reduce tooling and development complexity.
What I would not reduce are the specifications needed for product fit, protection, structural performance, critical color consistency, or reliable production.
The objective is to remove unnecessary cost, not necessary quality.
Should I Choose the Supplier With the Lowest Unit Price?
I would not choose a packaging supplier from the unit price alone.
First, I make the quotations comparable by checking the dimensions, structure, material, board strength, printing, finishing, insert, quantity per SKU, tooling, sample scope, packing, Incoterm, freight basis, lead time, and critical quality requirements.
Only after those variables are aligned does the unit price become a meaningful purchasing metric.
A lower price can absolutely be the better option when it comes from efficient manufacturing, suitable equipment, better material purchasing, or greater automation.
What I want to avoid is choosing a lower price that exists only because part of the specification or commercial scope is missing.
For me, the useful comparison is therefore not simply “Which supplier quoted the lowest price?” but “Which supplier is offering the required packaging specification at the most commercially appropriate total cost?”
If you are planning a new custom packaging project or comparing quotations for an upcoming order, BorhenPack can help you turn your product requirements into a clearer, production-ready packaging specification before bulk manufacturing begins. We can review the box structure, material direction, printing and finishing requirements, insert design, order quantity, sampling plan, and delivery needs so the quotation is based on what your project actually requires. Our goal is to help you move from an initial packaging idea to a more practical sourcing decision with clearer costs, fewer assumptions, and better control over production and repeat orders.