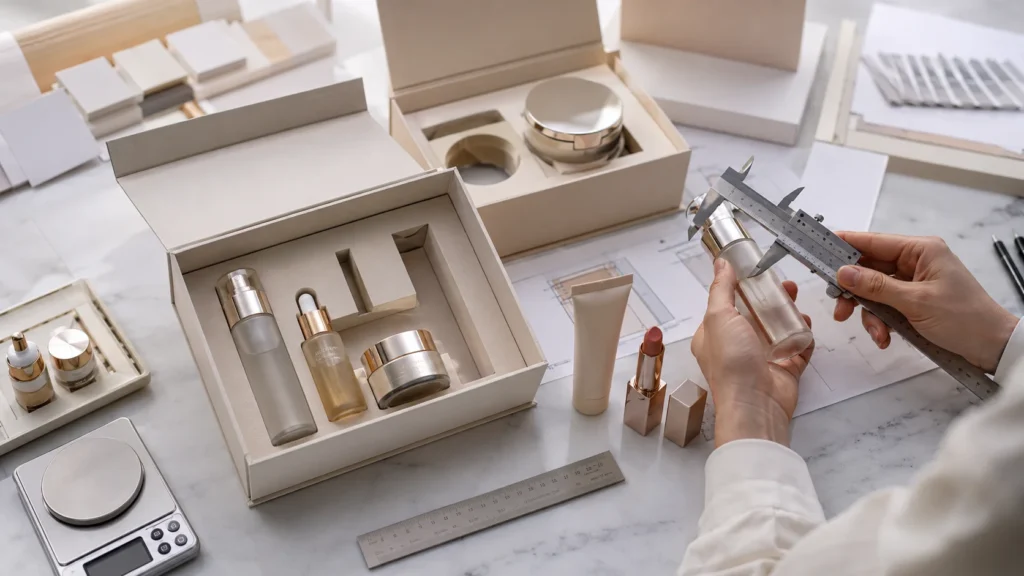

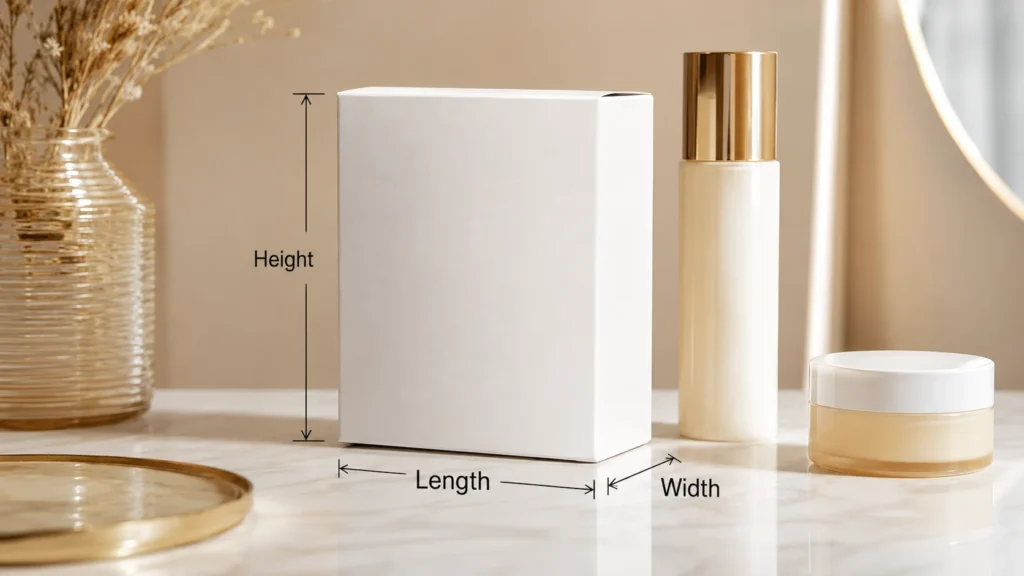
To measure skincare and makeup products for cosmetic packaging boxes, confirm the real product’s longest side, widest point, total height, weight, insert space, lid clearance, movement control, printable area, unit accuracy, and physical sample fit before production.
When I work on cosmetic packaging box size, I never see measurement as only a basic technical step. For skincare and makeup products, the box size affects product fit, protection, presentation, artwork layout, shipping efficiency, and the first impression when the package is opened. A box that is only slightly too tight can press against a pump, scratch a cap, deform a tube, or make a compact case difficult to remove. A box that is too large can make the product move during shipping, weaken the premium feeling, increase material use, and create a less controlled customer experience. This is why I always begin with careful product measurement before thinking about the final box structure.
Many cosmetic packaging problems start because the product is measured too simply. It is easy to look at a 30ml serum, 50ml cream jar, lipstick, mascara, skincare tube, foundation bottle, compact powder, or eyeshadow palette and assume the size can be estimated from the product volume or a standard box chart. In reality, volume does not decide the box size. The real outer shape does. A serum bottle may have a tall dropper, a cream jar may have a lid wider than the base, a lipstick may have a cap wider than the tube body, and a palette may have a hinge or raised logo that changes the final depth. These small details often decide whether the box works well or creates problems during sampling.
I also pay close attention to the way the product will sit inside the box. A cosmetic box is not only a shell around the product. It may need paperboard inserts, molded pulp trays, EVA foam, dividers, cushioning, lid clearance, removal space, and enough internal control to stop the product from moving. If these details are added after the box size is already decided, the final fit may become too tight, too loose, or difficult to use. I prefer to plan the product, the insert, and the box as one complete packaging system from the beginning.
Another detail I always consider is the difference between inside dimensions and outside dimensions. Inside dimensions decide whether the product can fit safely inside the box. Outside dimensions affect shelf display, shipping carton planning, material usage, visual proportion, and how much printable space is available for cosmetic labeling and artwork. If these two measurements are confused, the box may look correct from the outside but fail when the real product is placed inside. This is especially important when the packaging uses thick paperboard, rigid box structures, sleeve boxes, mailer-style boxes, or custom inserts.
I also believe a good cosmetic box size should support communication, not only protection. The box needs enough printable space for the product name, ingredients, barcode, usage instructions, warnings, batch information, product claims, shade details, and brand artwork. A very small box may look efficient, but if the text becomes crowded or difficult to read, the final packaging may feel less professional. For slim cosmetic cartons, sample-size skincare boxes, lipstick boxes, and mascara boxes, printable space should be reviewed before the dieline is approved.
This guide explains how I measure skincare and makeup products before confirming cosmetic packaging box size. I will focus on real product measurement, the longest side, widest point, total height, cap and pump details, product weight, insert space, lid clearance, movement control, labeling area, measurement units, standard size charts, common mistakes, and final sample testing. My goal is to make the sizing process easier to understand and more practical, so the final box can protect the product, present it clearly, and work smoothly before production begins.
Quick Measurement Table Before Choosing Cosmetic Packaging Box Size
| Measurement Item | What to Measure | Why It Matters |
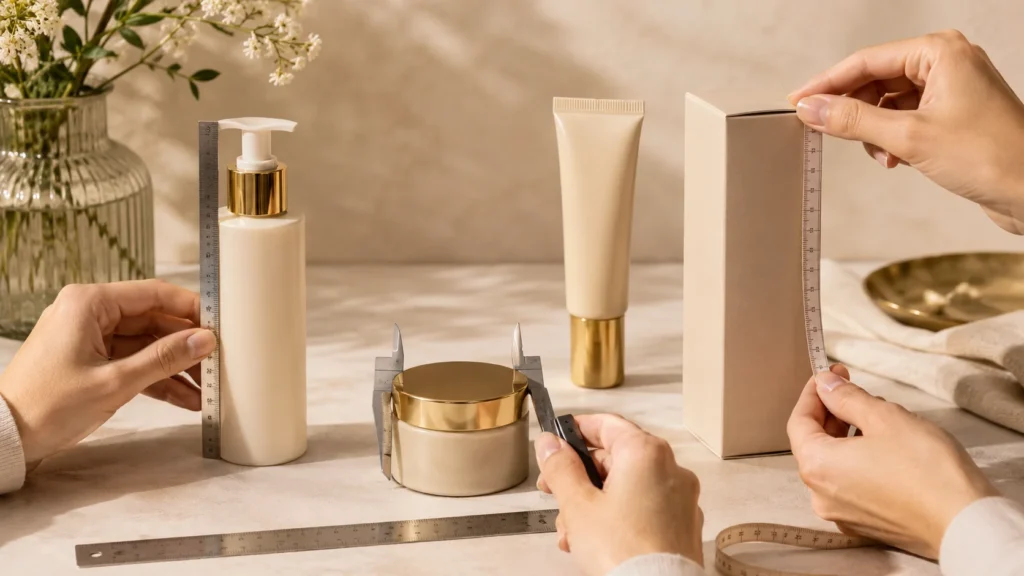
| Length | Measure the longest side of the skincare or makeup product from one end to the other. For slim products such as lipstick, mascara, eyeliner, and cosmetic tubes, this usually means measuring the full product body from top to bottom or from end to end. For palettes, compact powder cases, jars, and bottles, check the actual longest visible side instead of relying only on the product photo or label size. | Length helps decide the main direction of the cosmetic packaging box. If the length is measured too short, the product may press against the inner wall or fail to fit smoothly. If it is measured too long, the box may use unnecessary material, feel oversized, and allow the product to move inside. A correct length measurement gives the box a more accurate structure and a cleaner product presentation. |
| Width | Measure the widest side of the product, including the full diameter of round bottles, cream jars, caps, tubes, compact cases, and any raised or curved parts. For round skincare containers, measure the largest diameter rather than only the front-facing width. For tubes and bottles, check whether the cap, shoulder, bottom rim, or sealed end is wider than the main body. | Width prevents side pressure, tight fitting, and unstable product movement. If the box is too narrow, the product may rub against the paperboard, damage the label, deform the carton, or make packing difficult. If the box is too wide, the product may shift from side to side during handling or shipping, which can make the packaging feel less secure and less refined. |
| Height | Measure from the bottom of the product to the highest point. This should include pumps, droppers, spray heads, caps, raised lids, decorative tops, or any part that extends above the main body. For skincare bottles, the pump or dropper is often the true highest point. For makeup products, the cap, case edge, or compact thickness may decide the final height. | Height helps avoid lid contact and closure problems. If the height is underestimated, the box lid may press against the pump, cap, dropper, or product surface. This can create pressure marks, affect the closure, damage delicate parts, or make the packaging feel poorly fitted. The right height keeps the product protected while maintaining a balanced box shape. |
| Cap or Pump | Measure the highest and widest part of the closure, especially for serum droppers, lotion pumps, spray heads, flip caps, screw caps, foundation pumps, lipstick caps, mascara handles, and cosmetic tube caps. Also check whether the pump can rotate, extend outward, or create an uneven top shape that affects the box structure. | Caps and pumps are often more vulnerable than the product body. If the closure is ignored, the box may become too tight at the top or sides, causing pressure, scratches, leakage risk, or poor lid alignment. Measuring the cap or pump carefully helps protect the functional part of the product and keeps the packaging practical in real use. |
| Product Weight | Confirm the full product weight, especially for glass serum bottles, cream jars, foundation bottles, compact powder cases, and heavier skincare containers. The weight should be considered together with the product material, box type, insert structure, and whether the product will be shipped individually or packed in larger cartons. | Product weight helps decide box strength and insert support. A lightweight mascara or lipstick may only need simple internal control, while a heavy glass jar may require stronger paperboard, better bottom support, or a more stable insert. If weight is ignored, the box may look correct in size but feel weak during packing, stacking, retail display, or transportation. |
| Insert Space | Measure the space needed for paper inserts, molded pulp trays, EVA inserts, foam pads, dividers, inner cards, or any protective structure inside the box. The insert should be planned before the final box size is confirmed, not added after the box dimensions have already been fixed. | Insert space prevents the final box from becoming too tight. Inserts take up real internal room, so measuring only the product is not enough. A well-planned insert keeps skincare and makeup products stable, reduces shaking, improves presentation, and helps the product stay in the correct position when the customer opens the packaging. |
| Lid Clearance | Check the space between the highest point of the product and the inside of the box lid. This is especially important for pumps, droppers, caps, raised lids, glass shoulders, and decorated product surfaces. The product should not touch the lid when the box is closed. | Lid clearance helps avoid pressure marks, closure issues, scratches, and box deformation. If the clearance is too small, the product may push against the lid or make the box difficult to close. If the clearance is too large, the product may look buried inside the box. The right clearance protects the product while keeping the presentation neat and professional. |
| Removal Space | Check whether there is enough space for fingers, a thumb notch, a pull tab, or a natural lifting angle so the customer can remove the product easily. This is especially important for cream jars, compact powder, palettes, bottles held by inserts, and products placed tightly in a tray. | Removal space improves the opening experience. A box can have accurate dimensions but still feel frustrating if the product is difficult to take out. When the removal space is planned well, the customer can lift the product smoothly without shaking the box, damaging the insert, or scratching the product surface. |
| Label Space | Check whether the box has enough printable area for the product name, ingredients, barcode, usage instructions, warnings, claims, batch information, and brand design. For small lipstick boxes, mascara boxes, sample-size skincare boxes, and slim cosmetic cartons, readability should be checked before the final size is approved. | Label space keeps packaging information readable and professional. A box that is too small may save material, but it can make ingredients, claims, barcode, or instructions look crowded. Good label space supports clear product communication, cleaner artwork layout, and a better customer experience. |
Start with the Real Product, Not Only the Volume or Product Photo
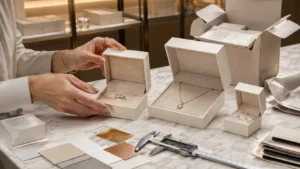
I always begin cosmetic packaging size planning with the real product because the actual product tells me much more than a volume number, a product photo, or a rough specification sheet. For skincare and makeup packaging, the correct box size depends on the true shape of the container, the highest point, the widest point, the cap or pump structure, the bottle shoulder, the base design, the wall thickness, the product weight, and the way the item needs to sit inside the box. When I start with the real product, I can understand the practical details that decide whether the packaging will fit smoothly, close properly, protect the product, and feel comfortable in the customer’s hand.
Product Volume Does Not Equal Packaging Box Size
I never use product volume as the final basis for cosmetic packaging box size because volume only tells me how much formula the container holds. It does not tell me how tall the product is, how wide the cap is, how thick the glass wall may be, how high the pump rises, how far the shoulder extends, or whether the base is wider than the product body. A 30ml serum bottle, a 50ml cream jar, and a 10ml mascara tube may all sound easy to classify by volume, but each one can require a very different box size when I measure the real container.
This difference becomes especially clear when I compare products with the same capacity. One 30ml serum bottle may be tall and slim with a long dropper cap, while another 30ml serum bottle may be shorter, wider, and made from heavy glass. One 50ml cream jar may have a wide lid that extends beyond the jar body, while another may have a straight cylindrical structure with a smaller lid. A 10ml mascara tube may look narrow in a product photo, but the handle or cap may be much wider than the tube itself. If I only rely on volume, I may create a box that looks reasonable in theory but becomes too tight, too loose, too tall, or too shallow in real use.
The Real Product Shows the True Packaging Requirements
When I measure the real product, I can see small structural details that directly affect the box dimensions. The shoulder of a bottle, the edge of a cap, the curve of a jar, the height of a pump, the thickness of a base, the sealed end of a tube, and the hinge area of a compact case can all change how much internal space the box needs. These details are easy to miss when looking only at a product description, but they often decide whether the box can close correctly and whether the product can stay stable inside the packaging.
For skincare products, this is especially important because bottles, jars, and tubes often have functional parts that extend beyond the main body. A lotion bottle may need extra height because the pump sits above the bottle neck. A serum bottle may need more top clearance because the dropper cap is usually more delicate than the glass body. A cream jar may need more width because the lid diameter is larger than the base. For makeup products, the same logic applies. A lipstick tube, mascara, eyeliner, compact powder, or eyeshadow palette may have a cap, handle, hinge, or corner structure that changes the final box size. I measure these details because packaging should fit the real object, not just the simple product category.
Product Photos Are Useful, but They Cannot Replace Measurements
I do find product photos helpful because they allow me to understand the product shape, style, and general structure. A photo can show whether the item is a bottle, jar, tube, lipstick, mascara, compact case, or palette. It can also help me see whether the product has a pump, dropper, flip cap, screw cap, rounded shoulder, square base, or slim body. However, I never treat a photo as a replacement for exact measurements because an image cannot show precise length, width, height, diameter, weight, lid clearance, or the real widest and highest points.
Photos can also create misunderstanding because the camera angle, lens distance, lighting, and product position can change how the product appears. A bottle may look narrow from the front but be much thicker from the side. A cap may look small in an image but actually be wider than the body. A tube may appear flat in a photo, while the sealed end needs more room inside the box. A compact case may look thin from above, but the side profile may reveal more thickness than expected. This is why I use photos to understand product appearance, but I use real measurements to decide packaging size.
Accurate Measurement Should Come Before the Dieline
I always prefer to confirm accurate product measurements before creating the dieline because the dieline becomes the foundation of the packaging structure. Once the dieline is made, the panel size, folding lines, glue areas, opening direction, insert position, artwork space, and final box shape are all built around that measurement. If the original product size is wrong, the entire packaging structure may need to be adjusted later, which can delay sampling and create avoidable design changes.
This matters even more for cosmetic packaging because the box needs to balance several practical needs at the same time. It should hold the product securely, leave enough clearance for caps or pumps, provide enough printable space for product information, and still look visually balanced on the shelf or in an e-commerce unboxing experience. If the box is too tight, the product may be difficult to insert or remove. If it is too loose, the product may move inside and feel unstable. If the height is wrong, the lid may press against the pump, cap, dropper, or compact surface. Accurate measurement before dieline creation helps prevent these problems before they become expensive to correct.
A Physical Sample Confirms What a Drawing Cannot Show
I see the physical packaging sample as the most practical way to confirm whether the box size truly works. A drawing can show dimensions, and a digital proof can show artwork, but neither can fully show how the product feels when it is placed inside the box. When I put the real skincare or makeup product into a physical sample, I can check the fit, closure, product movement, insert support, removal space, lid clearance, and overall presentation in a much more realistic way.
This step is especially valuable for products with pumps, droppers, glass bottles, wide jars, slim tubes, compact cases, or fragile surfaces. A box may look correct on screen, but the real product may still sit too deep, shake inside the structure, touch the lid, or feel difficult to remove. By testing the real product inside the sample before approval, I can identify whether the box needs a small adjustment in length, width, height, insert space, or lid clearance. For cosmetic packaging, this final check is not only about avoiding mistakes; it is also about making sure the package feels practical, protective, and well-considered when the customer opens it.
How to Measure Length, Width and Height Correctly
I see length, width, and height as the foundation of cosmetic packaging box sizing because these three measurements decide the basic structure of the box before any artwork, insert, material, or finish is considered. However, measuring a skincare or makeup product is not as simple as placing a ruler against the front side and recording three numbers. Cosmetic products often have caps, pumps, droppers, shoulders, curved sides, sealed tube ends, raised lids, hinges, and irregular edges that change the real space they need inside a box. When I measure length, width, and height correctly, I can judge not only whether the product will fit, but also whether the box will close smoothly, protect the product, control movement, and give the customer a clean opening experience.
Measure Length from the True Longest Side
When I measure length, I always look for the true longest side of the product in the position it will be packed. This is important because the longest side is not always the front-facing side shown in product photos. For a lipstick, mascara, eyeliner, lip gloss tube, sunscreen tube, or slim skincare bottle, the length may run from the bottom to the cap, or from one end of the product to the other if the item will lie horizontally inside the box. For a compact powder case, blush palette, or eyeshadow palette, the length is usually the longest horizontal edge when the product is placed flat.
I pay close attention to the actual edge-to-edge distance because even a small missing part can create a packaging problem later. A cap edge, rounded end, hinge side, bottom rim, or slightly raised structure may add a few millimeters to the real length. If I ignore that detail, the product may fit tightly in a drawing but become difficult to insert in a physical sample. In cosmetic packaging, this kind of small mistake can affect the dieline, insert position, box closure, and final customer experience.
I also consider how the product will sit inside the box before deciding which side should be treated as the length. A serum bottle may stand upright in a folding carton, but a mascara tube may lie horizontally in a drawer box or sleeve-style package. A palette may sit flat, while a tube may be placed with the cap facing upward or sideways. This means the same product can have different packaging length requirements depending on the final packing direction. I do not separate measurement from packaging structure because the numbers only become useful when they match the way the product will actually be packed.
Measure Width from the Widest Point, Not the Best-Looking Side
When I measure width, I turn the product and check it from multiple angles because the widest point is often not the side that looks most attractive in a product photo. Many skincare and makeup products look slim from the front but become wider from the side. A cream jar may be wider at the lid than at the base. A serum bottle may have a cap that extends beyond the glass body. A mascara tube may have a thicker handle than the tube itself. A cosmetic tube may be wider at the sealed end or cap area than in the center of the body.
This is why I never measure only the visible front width. I measure the widest diameter, the cap width, the shoulder width, the side profile, the base, and any raised or curved area that may touch the inside of the box. If the product has a round or oval shape, I look for the largest diameter rather than assuming every side is equal. If the product has a rectangular or irregular shape, I check both the front and side thickness because the packaging box must allow the largest part of the product to enter smoothly.
Width is especially important because it controls whether the product feels stable or squeezed inside the box. If the box is too narrow, the product may scrape the inner paperboard, damage the label, deform the carton, or make packing inefficient. If the box is too wide, the product may move from side to side, which can make the package feel cheap and increase the risk of damage during shipping. I prefer to measure width carefully at the beginning because correcting a width mistake after the dieline or insert has been made can require a full structural adjustment.
Measure Height from the Bottom to the Highest Point
When I measure height, I always measure from the lowest bottom point of the product to the highest point of the product, including any cap, pump, dropper, spray head, raised lid, decorative top, or uneven closure. I do not stop at the main product body because the highest point is often the part that decides whether the box can close properly. For a serum bottle, the dropper may add extra height above the glass bottle. For a lotion bottle, the pump may stand higher than the neck. For a cream jar, the lid or raised top surface may be the true highest point.
Height is closely connected to lid clearance, so I treat it very carefully. If I underestimate the product height, the inside of the box lid may press against the cap, pump, dropper, or product surface when the box is closed. This can create pressure marks, affect closure, scratch decorated surfaces, bend paperboard, or make the package feel poorly fitted. For products with functional closures, such as pumps or spray heads, incorrect height can even create leakage risk or damage the closure before the customer opens the product.
At the same time, I do not simply add too much height without thinking. A box that is much taller than the product may create empty space, weaken the presentation, and make the product look lost inside the packaging. For premium skincare and makeup packaging, the vertical proportion affects perceived quality. I want the product to feel protected, but I also want it to sit confidently in the box. The right height measurement gives enough safety space without making the packaging feel oversized.
Measure Round Bottles and Jars by Their Largest Diameter
For round skincare products such as serum bottles, facial oil bottles, toner bottles, lotion bottles, and cream jars, I measure the largest diameter carefully. A round bottle may look simple, but the real widest point can come from the cap, shoulder, label area, base ring, lid edge, or decorative outer layer. If I only measure the narrow body area, the box may become too tight at the cap or lid. This is especially common with cream jars because the lid is often wider than the jar body.
I also consider how round products behave inside a box. Unlike square products, round bottles and jars can rotate if the internal space is not controlled well. This movement can scratch labels, damage finishes, create noise during handling, or make the product feel unstable when the customer opens the package. If the product is made of glass, movement becomes even more important because impact against the inner wall can increase the risk of chips, cracks, or surface marks during transportation.
When I measure the largest diameter, I also think ahead to the insert or internal support. A round product may need a paper insert, molded pulp tray, EVA support, or inner card to hold it in position. The largest diameter helps me understand not only the box width, but also the opening size of the insert and the clearance around the product. This makes the measurement more practical than simply recording the bottle width.
Measure Flat Products by Length, Width and Thickness
For flat makeup products such as eyeshadow palettes, compact powder cases, blush palettes, contour palettes, pressed powder boxes, and mirror cases, I measure length, width, and thickness with equal attention. These products may look easy to measure because they are flat, but the side profile often contains details that affect the box depth. A hinge, magnetic closure, raised logo, rounded corner, mirror frame, or slightly curved lid can change the space needed inside the package.
Thickness is especially important for flat cosmetic products because the box should protect the product without pressing against the case surface. If the box is too shallow, the lid or inner wall may press on the palette, which can damage the surface, affect closure, or create stress during shipping. If the box is too deep, the palette may sit too low and become harder to remove. For products with pressed powder, eyeshadow pans, or delicate inner components, movement control is also important because vibration and impact can cause cracking even if the outside case looks strong.
When I measure flat products, I also check the corners because corners are often the most vulnerable points during shipping and handling. A palette that fits tightly in the center may still need small clearance around the edges to avoid pressure damage. I prefer to measure the full outer edge, including any rounded corners, hinge areas, or raised parts, so the final packaging protects the product rather than simply covering it.
Measure Tubes by the Body, Cap and Sealed End
For cosmetic tubes, I never measure only the center body because tubes often change shape from one end to the other. A sunscreen tube, hand cream tube, concealer tube, lip gloss tube, or cleanser tube may be wider at the cap, flatter at the sealed end, and softer in the middle. The widest point may not be the place that looks most obvious. If the tube is filled, the body may also expand slightly compared with an empty sample or flat artwork mockup.
I measure the full tube length, body width, cap diameter, cap height, and sealed end width before deciding the box dimensions. The sealed end is easy to ignore, but it can create a tight fit if the box is designed too closely around the tube body. The cap is also important because it may be round, square, flip-top, ribbed, or wider than the tube itself. If the cap is not measured correctly, the tube may fit at the body but become stuck at the closure.
Tubes also need thoughtful clearance because they are flexible. A very tight box can squeeze the tube, deform the product shape, or make the package difficult to insert during packing. A very loose box can allow the tube to slide, rotate, or arrive in an uneven position. I try to measure tubes in their filled condition whenever possible because the filled product shows the real shape that customers will receive.
Check the Product in Its Real Packing Position
After measuring length, width, and height separately, I always check the product in the position it will actually be packed. This step is important because measurement numbers alone do not tell the full packaging story. A serum bottle standing upright creates a different box structure from the same bottle lying flat. A lipstick placed vertically creates a different height requirement from a lipstick placed horizontally. A palette sitting flat needs different depth control from a palette displayed at an angle or held by an insert.
The real packing position affects box length, width, height, insert layout, lid clearance, and removal space. If the product will stand upright, I focus more on vertical stability and top clearance. If it will lie horizontally, I pay more attention to side movement and end protection. If it will sit inside a tray, I check how much space the tray takes and whether the product can be lifted out easily. This is why I always connect measurement with the final packaging experience.
I also check whether the product will be packed alone or with other elements such as a leaflet, spatula, brush, refill, sleeve, or protective card. These additional items can change the usable internal space and may require a slight adjustment to the box structure. A box that fits the product alone may become too tight once an instruction leaflet or insert is added. Measuring in the real packing position helps me see the whole packaging system instead of only the product outline.
Confirm the Measurements Before Moving to the Dieline
Before moving into the dieline stage, I like to confirm the measurements one more time because the dieline is built around these numbers. Once the dieline is created, the artwork panels, folding lines, glue areas, insert placement, barcode position, and label space all depend on the confirmed box size. If the length, width, or height is wrong, the problem can affect much more than product fit. It can also affect artwork layout, production efficiency, packaging cost, and sample approval.
This is why I treat measurement as a practical quality-control step, not just a technical task. Correct measurements help prevent avoidable sampling mistakes, reduce material waste, improve product protection, and create a packaging experience that feels intentional. For skincare and makeup products, good measurement is the first sign that the packaging has been planned around the real product instead of guessed from a photo, volume number, or standard size chart.
Measure the Widest and Highest Points, Not Just the Product Body
I always measure cosmetic products by their full outer shape, not only by the clean and easy-to-see product body. This is one of the most important habits in cosmetic packaging size planning because the body of a bottle, jar, tube, or makeup case is often not the part that controls the final box size. The real packaging risk usually comes from the small parts that people forget to measure, such as a cap edge, pump head, dropper top, jar lid, bottle shoulder, bottom rim, tube seal, mascara handle, compact hinge, or raised decorative surface. When I measure the widest and highest points first, I can judge whether the product will fit safely, whether the box can close properly, and whether the final packaging will feel smooth and practical when the real product is placed inside.
The Visible Product Body Is Only the Starting Point
When I look at a skincare or makeup product, the product body is usually the easiest part to measure because it looks clean, straight, and simple. A serum bottle body may look slim. A cream jar wall may look round and balanced. A cosmetic tube body may look flat and easy to fit. A lipstick or mascara body may look like a simple cylinder. However, I do not stop there because the body is only one part of the full product shape. In packaging, the box must hold the complete product, not only the most convenient part to measure.
This is where many sizing mistakes begin. A bottle body may measure correctly, but the cap may be wider than the bottle. A jar body may look compact, but the lid may extend beyond the wall. A tube may look narrow in the middle, but the sealed end may be wider. A pump bottle may seem easy to pack until the pump height or pump direction is checked. If I only measure the product body, I may create a box that looks accurate in a drawing but becomes too tight when the real product is inserted. That is why I treat the body measurement as a starting reference, not the final answer.
The Widest Point Decides Whether the Product Can Enter the Box Smoothly
I pay very close attention to the widest point because this measurement decides whether the product can slide into the box without pressure. A cosmetic packaging box can have a beautiful structure and artwork, but if the internal width does not match the widest part of the product, the product will rub, squeeze, tilt, or get stuck during packing. This is not only a size issue. It can affect the product label, the printed surface, the box shape, the insert position, and the customer’s first impression when opening the package.
For round skincare products, I measure the largest diameter across the bottle, cap, lid, shoulder, and base. I do not assume that a round product has the same width everywhere. A serum bottle may be widest at the shoulder. A cream jar may be widest at the lid. A foundation bottle may be widest at the base or pump collar. For makeup products, I check the cap, handle, hinge, outer frame, rounded corners, and raised parts. A mascara handle may be thicker than the tube body. A compact case may have a hinge area that extends slightly. These details may add only a small amount of width, but in packaging production, a small missed width can make the sample feel wrong.
The Highest Point Decides Whether the Box Lid Can Close Properly
I measure the highest point with the same care because this measurement controls lid clearance. The highest point is not always the top of the product body. It may be the dropper cap on a serum bottle, the pump head on a lotion bottle, the spray head on a mist bottle, the raised lid of a cream jar, the cap of a lipstick, the handle of a mascara, or the hinge area of a compact case. If I ignore this highest point, the box depth may look correct on the dieline but fail during real sample testing.
When the box is too shallow, the product may press against the inside of the lid. This can create pressure marks on the product, damage a pump, scratch a cap, deform the paperboard, or make the box difficult to close. For skincare products with pumps, droppers, and spray heads, this can be especially risky because these functional parts are often more delicate than the bottle body. For makeup products, pressure on a compact case, palette lid, lipstick cap, or mascara handle can make the packaging feel tight and poorly planned. I always measure the product from the lowest bottom point to the true highest point because the lid should protect the product, not push against it.
Caps and Closures Often Change the Final Box Size
I give special attention to caps and closures because they often change the box size more than the product body does. Many cosmetic products are designed with caps, pumps, droppers, spray heads, flip tops, screw caps, magnetic lids, or decorative closures that look attractive but create additional packaging requirements. A closure may be taller, wider, glossier, more fragile, or more irregular than the main container. If I do not measure it carefully, the box may fit the product body but fail at the top.
For example, a dropper cap may need extra height and side protection because it can be easily scratched or pressed. A lotion pump may need enough vertical space so the pump does not touch the lid. A spray head may have an uneven shape that requires more clearance than a flat cap. A lipstick cap may be slightly wider than the base, which means the box should be sized around the cap instead of the lower tube. A mascara handle may create the actual widest point of the product. I measure these closure areas carefully because they are often the first parts to suffer when the box size is too tight.
Bottle Shoulders and Bottom Rims Are Easy to Overlook
I also check bottle shoulders and bottom rims because they are small details that can quietly change the product’s true outline. A bottle shoulder may extend outward near the top, even if the middle body looks straight. A thick glass base may be slightly wider than the body. A bottom rim may create a raised edge that affects how the product sits inside an insert. These areas are easy to miss because they do not always stand out in product photos, but they can affect the final fit inside the packaging.
This matters especially for glass serum bottles, foundation bottles, toner bottles, and facial oil bottles. Glass packaging often has thicker walls, heavier bases, and more defined shoulders than plastic packaging. If I measure only the straight middle section of the bottle, the box may become too narrow at the shoulder or base. The product may then scrape against the inner wall, tilt inside the insert, or become difficult to remove. By checking the shoulder and bottom rim, I can understand the full structure of the container and avoid creating a box that only fits part of the product.
Jar Lids Can Be Wider Than the Jar Body
Cream jars and balm jars need careful measurement because the lid is often wider than the container body. When I measure a jar, I do not only measure the lower cup or the label area. I check the full lid diameter, the lid height, the base diameter, and the overall height after the lid is closed. In many skincare projects, the jar body looks compact, but the lid edge extends outward slightly. That small difference can decide the box width and the insert opening size.
If the lid is ignored, the product may fit at the base but become tight at the top. This can cause friction when the jar is inserted, create pressure on the lid edge, or make the product difficult to remove. It can also affect presentation because a jar that sits too tightly may not feel premium when the customer opens the box. I prefer to measure the jar as a complete closed product because that is the condition in which it will be packed, shipped, displayed, and received.
Tube Seals May Be Wider Than the Tube Body
For cosmetic tubes, I always check the sealed end because it is one of the most commonly missed measurement points. A tube may look slim and flexible in the center, but the sealed end can be wider, flatter, or slightly uneven. The cap may also be wider than the tube body, especially for flip-top caps, round caps, ribbed caps, or decorative caps. If I only measure the soft middle section of the tube, the final box may be too tight at either end.
This is important for sunscreen tubes, hand cream tubes, cleanser tubes, lip gloss tubes, concealer tubes, and other flexible cosmetic packaging. A filled tube may also expand more than an empty sample, which means the real product may need more space than the early mockup suggests. I prefer to measure the filled tube whenever possible because it shows the shape the customer will actually receive. A correct tube measurement should consider the cap, the body, the sealed end, and the natural shape after filling.
Raised Details and Decorative Surfaces Need Protection Space
I also look for raised details on the product surface because they can affect both measurement and protection. Some cosmetic products have raised logos, textured caps, embossed lids, metallic collars, decorative bands, special coatings, or glossy surfaces that should not be pressed tightly against the box or insert. These details may not always increase the measurement by much, but they can change how much clearance is needed.
For premium skincare and makeup packaging, the surface condition matters. A cap with a metallic finish can scratch if it rubs against the inner paperboard. A glossy jar lid can show marks if the lid presses against it. A compact case with a raised logo may need a little more top clearance to avoid pressure. When I measure the widest and highest points, I also think about surface protection. The goal is not only to make the product fit, but to keep the product looking clean when the customer opens the package.
The Widest and Highest Points Affect Insert Design
The widest and highest points also affect the insert, not only the outer box. If a product uses a paper insert, molded pulp tray, EVA insert, foam pad, or divider, the insert must match the true product outline. If I design the insert opening based only on the product body, the cap, lid, shoulder, tube seal, or bottom rim may not sit correctly. The product may tilt, become difficult to place, or create pressure at the wrong point.
For example, a serum bottle insert may need to support the bottle body while leaving enough room around the dropper cap. A cream jar insert may need a circular opening based on the widest lid diameter, not the smaller base. A mascara insert may need enough length and width to stop sliding without squeezing the handle. A compact palette insert may need edge support without pressing on the hinge. By measuring the full outline first, I can understand how the product should be held inside the packaging instead of forcing the insert to fit an incomplete measurement.
A Box Can Look Correct in a Drawing but Fail with the Real Product
I always remind readers that a dieline or digital drawing can only work with the information it receives. If the widest and highest points are missing, the drawing may still look clean and professional, but the physical sample can fail. The product may not slide into the box smoothly, the lid may not close fully, the insert may press against the closure, or the product may sit at an awkward angle. These are frustrating problems because they often appear only after time and money have already been spent on sampling.
This is why I do not judge box size only by digital measurements. I like to place the real product inside the sample, close the lid, open it again, check the top clearance, observe side movement, and see whether the product can be removed naturally. This practical check tells me whether the measurements work in real life. For cosmetic packaging, the box should not only fit the numbers. It should fit the product’s shape, movement, surface, and user experience.
Measuring the Full Product Outline Creates a More Reliable Box
When I measure the widest and highest points carefully, I create a more reliable foundation for the packaging box. The product is less likely to be squeezed, scratched, tilted, or difficult to remove. The lid is more likely to close smoothly. The insert is easier to design. The box feels more intentional because it has been built around the real object rather than a simplified body measurement.
For me, this step is not just a technical habit. It is a way to prevent avoidable packaging mistakes before they reach the sample or production stage. Skincare and makeup products often have delicate closures, glossy surfaces, glass containers, soft tubes, slim shapes, and small functional details. A good box respects all of these details. When I measure the full outline, especially the widest and highest points, I can make packaging that protects the product, presents it properly, and feels natural when the customer opens it.
How to Measure Skincare Products for Box Size
When I measure skincare products for packaging box size, I never treat the product as a simple bottle, jar, or tube. Skincare packaging often has more structural details than it first appears, especially when the product includes glass containers, pumps, droppers, thick caps, heavy bases, wide lids, flexible tube bodies, or delicate surface finishes. These details directly affect the final box length, width, height, insert space, lid clearance, product stability, and opening experience. For me, the goal is not only to make sure the product can fit inside the box, but to make sure it fits safely, looks balanced, stays protected, and feels natural when the customer opens the packaging.
Measure Serum Bottles by the Full Height, Not Only the Glass Body
When I measure serum bottles, I always measure the full height from the bottom of the bottle to the very top of the cap, dropper, or closure. I do not stop at the glass body because the dropper area is often the highest and most sensitive part of the product. A serum bottle may look simple when viewed from the front, but the dropper cap, rubber bulb, collar ring, shoulder curve, and bottom glass thickness can all change the final box size.
This matters because the top of the serum bottle usually needs protection rather than pressure. If the box height is calculated only from the glass body, the dropper cap may touch the inside of the lid when the box is closed. That can create scratches, pressure marks, poor closure, or a sample that feels too tight during real testing. I always want enough top clearance so the box protects the dropper instead of pushing against it.
I also measure the widest diameter of the bottle and the cap separately. Many serum bottles have a narrow glass body but a wider cap or shoulder. Some bottles have thick glass bases that look elegant but add extra width and weight. If I only measure the straight middle section, the box may fit around the body but become too tight at the cap, shoulder, or base. This is why I treat the serum bottle as a complete object from bottom to top, not only as a container with a stated volume such as 15ml, 30ml, or 50ml.
Check the Dropper Cap, Collar and Shoulder Area Carefully
For dropper bottles, I pay special attention to the transition area between the bottle neck and the cap. This area often includes a collar, shoulder curve, glass thickness, or decorative ring that may be wider than expected. It is easy to overlook because most people focus on the main bottle body, but the shoulder and cap area often decide whether the product can slide smoothly into the box or insert.
When a dropper bottle uses an insert, I also think about how the insert holds the bottle. The insert should support the bottle body while avoiding direct pressure on the dropper cap. If the insert opening is too tight around the shoulder, the bottle may be difficult to place. If the opening is too loose, the bottle may shake, tilt, or rotate during shipping. I prefer to measure the bottle body, cap diameter, shoulder width, and total height together so the insert and box work as one packaging system.
I also consider the surface of the cap. Some serum caps use metallic coatings, glossy finishes, matte coatings, or printed decoration. These surfaces can show scratches if they rub against paperboard or insert edges. Because of that, I do not only ask whether the cap fits. I also ask whether the cap can stay clean and protected after packing, shipping, and customer handling.
Measure Lotion and Pump Bottles with the Pump Fully Included
When I measure lotion bottles and pump bottles, I always include the pump in the total product height. The pump is part of the real product during packaging, so it cannot be ignored or treated as extra space later. A bottle body may be rectangular, round, oval, or square, but the pump can add vertical height, side extension, and an uneven top shape. If I do not measure the pump correctly, the final box may close poorly or press on the pump head.
I also check whether the pump can rotate, lock, or extend outward. Some pump heads stay aligned with the bottle body, while others can turn sideways during handling. If the pump head points outward, it may require more internal width than the bottle itself. This affects not only box size but also insert layout. If the packaging uses an insert, the insert may need to guide the bottle direction so the pump does not face the wrong side inside the box.
For pump bottles, I also think about the risk of accidental pressure. If the lid or insert presses on the pump, the product may leak, the pump may shift, or the customer may receive packaging that feels poorly controlled. Even when leakage does not happen, pressure on the pump can still damage the user experience. A skincare box should make the pump feel protected and stable, not squeezed into the structure.
Measure Pump Direction and Product Stability Together
I do not measure pump bottles only as vertical objects. I also observe how stable the bottle is when standing and how the pump direction affects the box structure. A tall lotion bottle with a narrow base may need more stable support inside the box than a short bottle with a wide base. If the bottle is heavy or made from glass, the bottom support becomes even more important.
When the pump direction is fixed, I measure the product in that fixed position. When the pump can rotate, I consider the widest possible direction or decide how the product should be positioned during packing. This helps prevent a situation where the bottle fits only when the pump faces one direction but becomes too tight when the pump turns slightly. Real packing is not always as perfect as a digital drawing, so I prefer to leave practical space based on how the product will behave during assembly.
I also look at whether the pump head sits higher than the cap collar and whether the nozzle extends beyond the bottle profile. These details can affect lid clearance and side clearance at the same time. For me, a good pump bottle measurement should answer three questions clearly: how tall the product is with the pump, how wide it becomes when the pump is considered, and how stable it will be inside the final packaging.
Measure Cream Jars by the Widest Lid Diameter
When I measure cream jars, I always start with the lid because the lid is often wider than the jar body. Many skincare jars look compact when viewed from the side, but the lid edge may extend outward by a few millimeters. If the box is designed around the body diameter only, the jar may become tight at the top when placed inside the packaging. This can cause friction, difficult removal, or pressure on the lid surface.
I measure the widest lid diameter, total closed height, base diameter, and any raised or rounded edges. The jar should be measured with the lid fully closed because that is the real condition for packing, shipping, and retail presentation. If the jar has a thick base, I also measure the base carefully because some jars are wider or heavier at the bottom than they appear in a product photo.
Cream jars often need a different measurement mindset from bottles. A jar is usually shorter and wider, so the box must control side movement and allow easy removal. If the box is too tight, the customer may struggle to take the jar out, especially if the jar has a glossy lid or smooth surface. If the box is too loose, the jar may move inside and make the packaging feel less premium. I try to find a balance between stable holding, enough finger space, and a clean visual presentation.
Consider Jar Weight, Base Support and Removal Space
Cream jars often feel heavier than their size suggests, especially when they use thick glass, double-wall plastic, or dense skincare formulas. That is why I measure and evaluate weight together with diameter and height. A heavy jar may require stronger paperboard, a more stable insert, or better bottom support. If the box is only designed around the outer size and weight is ignored, the packaging may fit the jar but still feel weak when lifted or stacked.
I also check how the jar will be removed from the box. A jar that fits too tightly may look clean in a sample photo, but it can create a poor customer experience when someone tries to lift it out. If the box uses a tray or insert, I think about whether the jar needs a thumb notch, pull space, or a slightly raised base. The customer should not need to shake the box or dig into the insert to remove the product.
The lid surface is another detail I consider. Many cream jars use metallic lids, matte lids, glossy lids, or printed tops. These surfaces can be marked if the lid touches the inner top of the box or rubs against an insert edge. When I measure a cream jar, I want the size to protect the lid visually as well as physically.
Measure Cosmetic Tubes by the Cap, Body and Tail Seal
When I measure cosmetic tubes, I do not only measure the center body because tubes are rarely the same width from top to bottom. A skincare tube may have a round cap, a flip-top cap, a tapered body, a soft filled middle, and a flat sealed tail end. The widest point may be the cap, the shoulder near the cap, the filled body, or the tail seal. If I only measure the smooth middle area, the final box can become too tight at one end and too loose at another.
I measure the full tube length, cap diameter, body width, body thickness, and tail seal width. The tail seal is especially important because it is often flatter and wider than the tube body. It may also be slightly uneven because of the sealing process. If this area is ignored, the tube may press against the side of the box or become difficult to insert during packing.
I also prefer to measure the filled tube rather than an empty tube whenever possible. A filled tube can expand slightly and show the real shape customers will receive. An empty tube may look flatter, slimmer, and easier to pack, but that measurement can be misleading. For sunscreen, cleanser, hand cream, face mask, and moisturizer tubes, the filled shape is the measurement that matters most.
Avoid Designing Tube Boxes Too Tightly
Tubes are flexible, so some people assume they can be squeezed into a smaller box. I do not recommend this approach because a tight box can deform the tube, create pressure on the cap, make the product look poorly packed, or make assembly difficult. A tube should have controlled space, not forced space. The box should keep the tube straight and stable while still allowing the product to sit naturally inside.
I also consider whether the tube will lie flat, stand upright, or sit inside an insert. If the tube lies flat, I check length and side movement. If it stands upright, I focus more on cap diameter, top clearance, and bottom stability. If it sits in an insert, I make sure the insert holds the tube without crushing the soft body. The packing position changes how I interpret the measurements, so I never measure a tube without thinking about how it will actually be placed inside the box.
For soft tubes, I also think about pressure during shipping and stacking. If many boxes are packed together, the tube should not be squeezed by a tight internal structure. A well-sized tube box protects the product shape, keeps the cap area clean, and gives the customer a better first impression when the package is opened.
Measure Toner, Mist and Tall Skincare Bottles with Extra Attention to Balance
For toner bottles, facial mist bottles, essence bottles, and other tall skincare containers, I pay attention not only to height but also to balance. Tall bottles can look elegant, but they can also tilt or shift inside the box if the internal support is weak. I measure the full height, widest diameter, cap or spray head width, base diameter, and product weight so I can understand how stable the bottle will be inside the packaging.
If the bottle is tall and narrow, the box may need an insert or internal support to prevent movement. If the bottle is heavy at the bottom, the packaging should support the base properly. If the cap or spray head is wider than the body, the box should allow enough space at the top without letting the bottle shake. These details matter because tall bottles can create pressure on both the top and bottom of the box during shipping.
I also think about shelf presentation. A tall bottle in a box that is too wide may look unstable and less refined. A tall bottle in a box that is too tight may be difficult to insert and remove. The right measurement helps create a box that feels secure, proportionate, and practical.
Measure Skincare Products with Insert Space in Mind
When I measure skincare products, I always ask whether the final box will include an insert, tray, divider, cushion, or inner support. The product measurement alone is not enough if another structure will sit inside the box. Paper inserts, molded pulp trays, EVA inserts, foam pads, and dividers all take up internal space. If I measure only the product and forget the insert, the final box can become too tight even when the product measurement is accurate.
The insert also changes how the product should be supported. A serum bottle may need a neck and base support. A cream jar may need a circular tray opening. A pump bottle may need an insert that keeps the pump in the right direction. A tube may need a shape that holds the cap and body without squeezing the flexible material. I think about the product and insert together because the box must fit the whole internal structure, not only the product.
Good insert planning also improves presentation. When the customer opens the box, the product should appear centered, stable, and easy to remove. If the insert is too tight, the product feels trapped. If the insert is too loose, the product may move and weaken the brand impression. Measuring skincare products with insert space in mind helps prevent both problems.
Check Lid Clearance and Top Protection Before Finalizing Height
For skincare packaging, lid clearance is one of the most important final checks. I always make sure the highest point of the product does not touch the inside of the box lid. This is especially important for droppers, pumps, spray heads, jar lids, metallic caps, glossy finishes, and raised surfaces. If the product touches the lid, the packaging may close poorly, create pressure marks, scratch the product, or damage the functional closure.
At the same time, I do not want to create unnecessary empty height. If the box is too tall, the product may look small, hidden, or poorly matched to the packaging. A skincare box should feel protective but still visually balanced. The product should sit with enough room to stay safe, but not so much room that it feels disconnected from the box.
I usually think of lid clearance as a balance between safety and presentation. The customer may not know the exact measurement, but they will feel whether the box opens smoothly, whether the product sits neatly, and whether the packaging feels intentional. A good height measurement protects the product while keeping the presentation clean.
Recheck Skincare Measurements with the Real Packing Direction
After measuring the product itself, I always recheck the measurements in the real packing direction. A serum bottle standing upright needs different clearance from a serum bottle lying flat. A tube placed horizontally needs different length control from a tube placed vertically. A jar sitting in a tray needs different removal space from a jar placed directly in a folding carton. The same product can require different box dimensions depending on how it will be packed.
This step helps me avoid a common mistake: measuring the product correctly but applying the measurements in the wrong direction. Length, width, and height only become useful when they match the actual packaging structure. I look at how the product enters the box, how it sits after packing, how the lid closes, and how the customer will remove it.
For skincare products, this practical check is especially valuable because many containers are heavy, smooth, round, or delicate. A measurement that works in theory may still need adjustment when the real product is placed in the final position. I prefer to catch those details before the dieline or sample is approved.
Final Skincare Measurement Should Reflect Real Use, Not Just Numbers
When I finish measuring a skincare product, I want the numbers to reflect real use, not just a technical record. The box should fit the product, protect the closure, support the weight, control movement, leave enough lid clearance, allow easy removal, and present the product well. If any of these details are ignored, the packaging may pass a basic size check but fail in the customer’s hand.
This is why I measure skincare products with patience. A small cap edge, a slightly wider lid, a filled tube shape, a rotating pump, or a heavy glass base can all affect the final result. Good packaging size planning starts with respecting those details. When I measure the full skincare product carefully, the box has a much better chance of feeling accurate, protective, and professionally made.
How to Measure Makeup Products for Box Size
I measure makeup products with a different level of attention because they often have slimmer shapes, decorative surfaces, delicate edges, pressed formulas, small caps, glossy finishes, and long narrow bodies that can move easily inside a box. Unlike some skincare containers that mainly need vertical clearance and weight support, makeup products often need better movement control, corner protection, surface protection, and removal space. When I measure lipstick, mascara, eyeliner, foundation bottles, compact powder, blush, and eyeshadow palettes, I do not only check whether the product can fit inside the packaging. I also consider whether the box can stop sliding, protect fragile parts, avoid rubbing marks, support the product during shipping, and create a clean opening experience for the customer.
Measure Lipstick by Full Closed Height and True Outer Diameter
When I measure lipstick for box size, I always measure the product in its fully closed condition because that is how it will be packed, shipped, displayed, and opened by the customer. I measure from the bottom of the lipstick base to the top of the cap, and I also measure the widest diameter across the cap, base, and any decorative ring or outer shell. Lipstick packaging is often slim, so even a small difference in diameter can decide whether the product slides into the box smoothly or becomes tight at one point.
I pay close attention to the cap because the cap is often wider than the lipstick body. Some lipstick tubes have a decorative metallic band, magnetic closure, thicker base, square outer shell, or slightly raised edge that changes the real outer size. If I only measure the middle tube body, the box may fit the center but press against the cap or base. This can make packing difficult and may create small scratches on glossy, metallic, or matte surfaces. For lipstick, I want the box to feel precise and elegant, but I do not want the product to feel forced into the structure.
I also think about how the lipstick will be removed from the box. A lipstick box can look neat when the product is inside, but if the fit is too tight, the customer may need to shake the box or pull the product awkwardly. That weakens the premium feeling. When I measure lipstick, I consider the full product height, cap diameter, base width, surface finish, and removal comfort together so the final box feels controlled but not restrictive.
Measure Lipstick Based on Its Final Packing Direction
I always check whether the lipstick will stand upright, lie horizontally, or sit inside an insert before finalizing the box size. The same lipstick can require a different box structure depending on its packing direction. If it stands upright in a folding carton, the full closed height becomes the main measurement, and lid clearance becomes important. If it lies horizontally in a drawer box or sleeve box, the length, end protection, and side movement become more important.
This packing direction also affects the way the product feels when the customer opens the box. A lipstick placed vertically should not sink too deep or press against the top. A lipstick placed horizontally should not roll from side to side or hit the ends during shipping. If an insert is used, I check whether the insert holds the lipstick at the right point without rubbing the cap or decorative surface. For a small product like lipstick, the difference between a careful fit and a poor fit can be very noticeable.
Measure Mascara by Full Length and the Widest Handle Area
When I measure mascara, I measure the full length from one end to the other, including the cap, handle, tube body, rounded ends, and any raised decoration. Mascara products are usually long and narrow, which makes them easy to misjudge. The tube body may look slim, but the handle or cap can be thicker than the rest of the product. If I only measure the body, the box may become too tight at the handle area or too loose along the tube body.
I also measure the widest part of the cap or handle because this is often the area that controls the actual box width. Some mascara tubes have tapered caps, thick handles, curved bodies, metallic collars, or textured grips. These details may not look significant in a photo, but they can affect how the product sits inside the box. If the box is too narrow, the cap may rub against the paperboard. If the box is too wide, the mascara can rotate or shift during shipping.
For mascara, I care a lot about movement control. A long narrow product can slide inside the box even if the size looks correct when the box is lying flat. During shipping, handling, or carton packing, the product may move from end to end and create small impacts. This can scratch the product surface, damage the inside of the carton, or make the packaging feel loose when opened. I measure mascara with both fit and movement in mind because the box should hold the product securely without squeezing it.
Measure Eyeliner and Slim Makeup Products with Sliding Risk in Mind
When I measure eyeliner, brow pencil, lip liner, lip gloss, or other slim makeup products, I treat sliding as one of the main risks. These products are often long, narrow, smooth, and lightweight, so they can move easily inside a box if the internal length or width is not controlled well. I measure the full product length, the widest cap or end piece, the body diameter, and any raised grip area or decorative band.
I also check whether the product is round, square, oval, or irregular. Round eyeliner tubes or lip gloss tubes can roll if the box has too much space. Square or angular products may need corner clearance so the edges do not press into the carton. If the product has a glossy surface, printed logo, metallic cap, or soft-touch coating, I also think about whether sliding could create rubbing marks. A slim product may not seem fragile, but its surface can still be damaged if the box allows too much movement.
When I plan box size for these products, I avoid two extremes. I do not make the box so tight that the cap scrapes the inner wall, and I do not make it so loose that the product shifts every time the box is moved. I want the product to slide into the box smoothly during packing, stay controlled during shipping, and come out naturally when the customer opens it.
Measure Foundation Bottles by Height, Shoulder Width, Pump Height and Weight
When I measure foundation bottles, I measure them more like technical containers because they often combine makeup presentation with skincare-style packaging risks. A foundation bottle may include a glass body, pump, cap, shoulder, collar, thick base, rounded corner, or rectangular side profile. I measure the full height from the base to the highest point, including the pump or cap, because the top structure often decides whether the box can close properly.
I also measure the shoulder width and side thickness. Foundation bottles can look narrow from the front but become thicker from the side. Some bottles have wide shoulders, heavy bases, or decorative collars that extend beyond the label area. If I only measure the front face or the printed label area, the box may become too tight around the shoulder or base. This can create friction, make packing slow, or cause the product to sit unevenly inside the carton.
Weight is another detail I always consider for foundation bottles. A glass foundation bottle may be much heavier than a lipstick, mascara, or plastic concealer tube. If the product is heavy, the box may need stronger paperboard, better bottom support, or a more stable insert. Size alone does not tell me whether the box will feel secure. I measure the bottle shape and evaluate the weight together because the package must protect both the appearance and the physical load of the product.
Protect the Pump, Cap and Glass Surface of Foundation Packaging
For foundation packaging, I always check the areas most likely to be damaged during packing and shipping. If the product has a pump, I make sure the pump height and pump direction are included in the measurement. If the pump can rotate, I consider the widest possible position or how the product should be placed inside the box. If the box or insert presses on the pump, the product may leak, shift, or arrive with a poor impression.
If the foundation bottle is made of glass, I also think about impact and surface protection. A loose box can allow the bottle to hit the inner walls, while a tight box can press against the corners or cap. Both situations are risky. A foundation bottle with a glossy surface, frosted glass, metallic cap, or printed decoration needs enough clearance to avoid rubbing, but it also needs enough control to prevent movement. This balance is why I never measure foundation bottles as simple rectangular objects. I measure their real height, shoulder, pump, base, weight, and surface sensitivity as one complete packaging requirement.
Measure Compact Powder by the Closed Case Size and Hinge Area
When I measure compact powder, I measure the full closed case, including length, width, thickness, hinge area, clasp area, raised logo, rounded corners, and any decorative top surface. Compact powder packaging may look flat and simple from above, but the side profile can contain important details. A hinge can make one side slightly thicker. A clasp can create a small raised area. A curved lid or decorative logo can affect the depth needed inside the box.
I pay special attention to thickness because compact cases can be damaged if the box presses too tightly from the top or bottom. If the box depth is too shallow, the compact may press against the lid or inner panel. If the box depth is too deep, the product may sit low and become difficult to remove. A good compact powder box should protect the case, prevent movement, and allow the customer to lift the product easily.
I also think about the pressed powder inside the compact. Even if the outer case feels solid, repeated movement or impact can transfer shock to the powder. If the box is too loose, the compact may slide and hit the corners during shipping. If the box is too tight, the case may receive pressure. This is why I measure compact powder not only as an outer case, but as a product that needs controlled movement and gentle protection.
Measure Blush Cases and Small Palettes with Corner Protection in Mind
When I measure blush cases and smaller makeup palettes, I pay close attention to the corners and edges. These products are usually flat, but they are not risk-free. A blush case may have rounded corners, a raised lid, a hinge, a small clasp, or a clear window. A small palette may have a magnetic closure, mirror, or decorative surface. I measure the length, width, thickness, hinge area, and any raised or extended part before deciding the box size.
Corner protection is important because flat makeup products can be damaged when they move inside a box. If the box does not control movement, the product may hit the corners repeatedly during shipping or handling. This can damage the case, loosen the hinge, scratch the surface, or affect the powder inside. I want the box to hold the product securely while still leaving enough clearance so the corners are not under pressure.
I also consider whether the product will sit directly inside the box or inside a tray. A tray can improve stability and presentation, but it also takes up internal space. If I forget to include the tray thickness, the final box may become too tight. When measuring blush and small palettes, I connect the product size with the intended internal support so the box works in real use.
Measure Eyeshadow Palettes by Length, Width, Thickness and Surface Details
When I measure eyeshadow palettes, I measure the full length, full width, and total thickness of the closed palette. I do not measure only the flat center area because palettes often include hinges, magnetic closures, raised logos, rounded corners, outer frames, mirrors, and decorative lid surfaces. These details may slightly change the actual space the palette needs inside the box.
Eyeshadow palettes also need careful pressure control. A palette that is too tightly packed may experience stress on the lid, corners, or hinge. A palette that is too loosely packed may slide inside the box and transfer impact to the pressed powder pans. Because eyeshadow formulas can crack from vibration or shock, the box should control movement without squeezing the product. I measure the palette as both a flat object and a fragile makeup product.
For larger palettes, I also think about how the product will be removed. If the palette sits deep in a tray without enough finger space, the customer may struggle to lift it out. If the box uses a sleeve, the palette should slide smoothly without rubbing the surface. A good palette box should feel protective, but also easy and pleasant to open.
Check Thickness and Top Clearance for Flat Makeup Products
For flat makeup products, I treat thickness as a critical measurement. It may be tempting to focus mostly on length and width because these products look wide and flat, but thickness controls the box depth and top clearance. Compact powder, blush cases, contour palettes, and eyeshadow palettes may have raised surfaces, hinges, mirrors, magnetic areas, or decorative lids that increase the real thickness.
If I underestimate thickness, the box may press against the product surface or make the lid difficult to close. If I overestimate thickness too much, the product may feel buried inside the box. I want the product to sit with enough room for protection but not so much empty space that the presentation feels weak. This balance is especially important for makeup because the customer often notices how neatly the product sits when the box is opened.
Surface protection is also part of this measurement. Some makeup cases use glossy plastic, metallic printing, soft-touch coating, clear windows, or raised logos. These surfaces can show scratches or pressure marks if they rub against the inner carton or insert. When I measure thickness, I also think about whether the surface needs extra clearance.
Measure Makeup Products with Insert and Removal Space in Mind
When I measure makeup products, I always think about whether the final packaging will include an insert, tray, divider, sleeve, inner card, or protective platform. Inserts can help control movement, especially for lipstick, mascara, foundation bottles, compact cases, and palettes. However, inserts also take up internal space, so they must be considered before the box size is finalized.
I also consider removal space because makeup products are often small, smooth, or flat. A lipstick can be hard to pull out if it sits too tightly. A mascara can slide too far into a narrow carton. A compact powder or palette can be difficult to lift if there is no thumb notch, gap, or lifting angle. A box can be dimensionally correct but still feel inconvenient if the customer cannot remove the product naturally.
For me, good makeup packaging is not only about a tight fit. It is about controlled fit. The product should stay in place, avoid damage, and come out smoothly when the customer opens the box. This is why I measure the product, the insert, and the removal experience together.
Recheck Makeup Measurements in the Final Packing Position
After I measure the product, I recheck the measurements in the position the makeup item will actually be packed. A lipstick placed upright creates different size needs from a lipstick placed horizontally. A mascara lying flat needs end control. A foundation bottle standing upright needs top clearance and bottom support. A palette sitting flat needs corner protection and lifting space. The same product may need different dimensions depending on the final packaging structure.
This final packing position helps me decide how the measurements should be applied. Length, width, and height are not just abstract numbers. They become practical only when they match the product’s actual direction inside the box. I check how the product enters the box, how it rests inside, whether it moves, whether the lid closes, and whether the customer can remove it without effort.
This step often reveals small problems that are not obvious in a measurement sheet. A product may fit on paper but slide in real movement. A palette may sit flat but be hard to lift. A foundation bottle may stand upright but touch the lid. By checking the final packing position, I can make the box size more accurate and more user-friendly.
Final Makeup Measurement Should Balance Fit, Movement and Presentation
When I finish measuring makeup products, I want the final box size to balance fit, movement control, surface protection, and presentation. A good makeup box should not squeeze the product, but it should not allow unnecessary movement either. It should protect the cap, handle, hinge, pump, corners, pressed powders, and decorative surfaces. It should also make the product look clean and intentional when the customer opens the packaging.
This is why I measure each makeup product according to its real shape and risk. Lipstick needs careful cap and diameter control. Mascara and eyeliner need sliding control. Foundation bottles need height, shoulder, pump, and weight support. Compact powder, blush, and eyeshadow palettes need thickness, hinge, corner, and surface protection. When these details are measured carefully, the final box does more than hold the product. It supports the product’s value, protects the customer experience, and helps the packaging feel professionally planned from the inside out.
Understand Inside Dimensions and Outside Dimensions
I always make a clear distinction between inside dimensions and outside dimensions before I judge whether a cosmetic packaging box size is correct. These two measurements look closely related, but they serve very different purposes. Inside dimensions tell me whether the real skincare or makeup product can fit inside the box safely, with enough room for inserts, lid clearance, movement control, and easy removal. Outside dimensions tell me how the finished box will look, how much space it will occupy on a shelf, how it will fit into a shipping carton, how much material it may use, and whether the visual proportion feels right for the product. When these two measurements are confused, a box can look perfect from the outside but still fail when the real product is placed inside.
Inside Dimensions Decide the Real Product Fit
When I talk about inside dimensions, I am talking about the usable space inside the finished box. This is the space that actually holds the product, so it must be judged according to the real product shape, not just the box’s outer appearance. For skincare and makeup products, this internal space must allow for the product body, the widest point, the highest point, the cap, pump, dropper, lid, shoulder, bottom rim, tube seal, compact hinge, insert structure, and enough clearance for the product to be packed and removed smoothly.
I pay close attention to inside dimensions because they decide whether the product can fit without being squeezed. A serum bottle may look slim from the front, but if the dropper cap is wider than the glass body, the internal width must be based on the cap, not only the bottle body. A cream jar may fit at the base but become tight at the lid if the widest lid diameter is ignored. A lipstick tube may fit through most of the box, but a decorative cap or thicker base may rub against the inner wall. A palette may look flat, but the hinge or raised lid may need additional depth. These details all belong to the inside dimension discussion because they affect the real fit.
Outside Dimensions Shape the Finished Packaging Appearance
When I talk about outside dimensions, I am looking at the full external size of the finished packaging box. This is the size the customer sees, holds, photographs, stores, displays, and receives. Outside dimensions affect visual proportion, shelf presence, material usage, shipping volume, carton planning, and the overall impression of the product. A box can fit the product correctly inside, but if the outside dimension feels too large or too small, the packaging may still look unbalanced.
For beauty products, outside proportion is especially important because packaging is part of the product experience. A small lipstick in a box that is too wide may feel inexpensive or poorly controlled. A premium serum bottle in a box that is too narrow may look compressed and less elegant. A compact powder case in a box that is too deep may feel hidden instead of presented. A foundation bottle in an oversized carton may increase shipping volume and make the product look less refined. I use outside dimensions to judge whether the box feels visually suitable for the product, not only whether it can contain it.
Buyers Often Think in Outside Size First
I often notice that buyers naturally think in outside dimensions first because outside size is easier to imagine. They may have a reference box in hand, a shelf display requirement, a shipping carton limit, or a product photo that makes them think the final box should look a certain way. This is completely understandable because outside dimensions are what the brand and customer can see immediately. However, outside size alone cannot confirm whether the product will fit correctly.
Packaging production needs inside dimensions before the structure can be considered accurate. If a buyer says the box should be 2 inches wide from the outside, I still need to know whether that outside width leaves enough usable internal space after board thickness, folding panels, glue areas, and inserts are included. If the product itself is already close to the outside size, the internal space will almost certainly be too small. This is why I always confirm whether a measurement refers to product size, inside box size, outside box size, insert opening, or shipping carton size before moving forward.
Board Thickness Changes the Inside Space
Board thickness is one of the main reasons inside dimensions and outside dimensions are not the same. Every packaging material has thickness, whether it is paperboard for a folding carton, greyboard for a rigid box, corrugated board for a mailer box, or specialty paper laminated onto a thicker structure. That thickness takes up space. From the outside, two boxes may appear similar in size, but their usable internal space can be very different if one uses thin paperboard and the other uses thick rigid board.
This matters a lot for cosmetic packaging because many beauty products require a close and clean fit. A lightweight mascara carton made from thinner paperboard may leave more usable internal space than a rigid box with the same outside size. A glass cream jar packed inside a rigid setup box may need a larger outside size because the greyboard wall and wrapped paper reduce the usable space. A mailer-style box may need extra room because corrugated board is thicker and the folding structure occupies more space. When I calculate size, I never assume the outside number automatically tells me the inside fit.
Folding Structure Can Reduce Usable Room
A packaging box is not just a simple empty cube. It has folding lines, tuck flaps, dust flaps, glue seams, lock tabs, side panels, double-wall areas, wrapped edges, sleeves, trays, and sometimes reinforced corners. These structural parts can reduce the usable internal space or create areas where the product may touch the packaging. This is why a box can measure correctly from the outside but still feel tight in one corner or one direction.
For example, a folding carton for a lipstick or mascara may have top and bottom flaps that affect vertical clearance when the product is packed tightly. A glued side seam may create a slightly thicker area inside the box. A sleeve box needs enough space for the inner tray to slide smoothly into the outer sleeve, so the external structure affects the final usable fit. A rigid box has thicker walls and wrapped edges, which can change the internal size more than a buyer expects. I always look at the structure before confirming the final dimensions because the way the box is built changes the way the product fits.
Glue Areas and Overlaps Should Not Be Ignored
Glue areas and overlaps are easy to overlook because they are not always visible in a simple size discussion. However, they can affect the internal space and the way the product sits inside the packaging. In a folding carton, the side seam may create a slightly raised area. In a rigid box, wrapped paper and corner construction can create small internal changes. In a sleeve or drawer structure, the overlap between the sleeve and tray can affect sliding resistance and usable space.
I do not treat these details as minor because cosmetic products often have delicate finishes and close-fitting structures. A glossy lipstick tube, metallic cap, glass foundation bottle, or printed compact case can show scratches if it rubs against an internal seam or tight corner. If the product is heavy, a weak glue area may also affect box stability. When I think about inside dimensions, I include these hidden structural details because the product does not interact with a perfect digital rectangle; it interacts with a real assembled box.
Inserts Change the Meaning of Inside Dimensions
I always think about inserts before confirming inside dimensions because inserts take up real internal space. A box may have enough room for the product alone, but once a paper insert, molded pulp tray, EVA insert, foam pad, divider, or inner platform is added, the usable space becomes smaller. If the insert is planned after the box size is fixed, the final structure may become too tight or difficult to assemble.
In cosmetic packaging, inserts are often necessary because they hold the product in position and improve presentation. A serum bottle may need a support structure around the body while keeping the dropper free from pressure. A cream jar may need a circular tray based on the widest lid diameter, not the smaller base. A mascara or eyeliner may need internal control to prevent sliding. A foundation bottle may need support because of its weight. A palette may need corner protection and lifting space. When I calculate inside dimensions, I treat the product and insert as one complete internal system.
Inside Dimensions Must Include Practical Clearance
Inside dimensions should not be the exact same size as the product. I always allow practical clearance because the product needs to be packed, removed, and protected in real use. If the internal space is exactly equal to the product measurement, the box may become too tight after material thickness, folding tolerance, lamination, insert placement, or production variation is considered. Cosmetic packaging needs enough room to work in the real world, not only in a measurement file.
This clearance should be controlled, not excessive. Too little clearance can cause pressure, scratches, difficult insertion, poor closure, and a frustrating opening experience. Too much clearance can allow the product to move, rattle, rotate, or feel less premium. I usually think of clearance as the space that allows the product to feel secure but not trapped. For skincare and makeup products, this balance is important because the customer often judges quality from the way the product sits inside the box.
Outside Dimensions Affect Shipping Carton Planning
Outside dimensions are also important because they affect how finished boxes are packed into larger shipping cartons. A small change in box length, width, or height can affect how many units fit in one carton, how much empty space remains, how stable the carton stack is, and whether shipping costs increase. This is especially important for e-commerce brands, wholesale orders, and international shipments where packaging volume can influence logistics costs.
I do not look at outside dimensions only from a visual perspective. I also think about packing efficiency. A cosmetic box that is slightly oversized may seem harmless for one unit, but across hundreds or thousands of units, the extra space can increase material use, carton size, storage volume, and shipping cost. On the other hand, making the outside box too small can reduce protection or limit printable area. A good outside dimension should balance product fit, visual presentation, and logistics efficiency.
Outside Dimensions Affect Shelf Display and Brand Perception
Outside dimensions also influence how the product appears in retail or online presentation. For retail shelves, the box needs enough visual presence without wasting space. For product photography, the box proportion should support the product’s perceived value. For e-commerce, the box should feel protective and attractive when the customer receives it. If the outside size is poorly matched to the product, the packaging can weaken the product impression even when the product itself is good.
I pay attention to this because cosmetic products are highly visual. A narrow lipstick box should feel slim and refined. A skincare serum box should feel stable and elegant. A foundation box should feel protective and structured. A palette box should feel flat, clean, and easy to handle. The outside dimensions help create this feeling. They turn the technical box size into a brand and customer experience.
Different Box Styles Create Different Internal Space
The same product may need different dimensions depending on the box style. A folding carton, rigid box, sleeve box, drawer box, mailer-style box, and corrugated box all create internal space differently. This is why I do not use one fixed box size for every structure. The product may stay exactly the same, but the final inside and outside dimensions can change when the packaging style changes.
A folding carton is usually more compact because the paperboard is thinner and the structure is efficient. A rigid box usually needs more outside size because the greyboard is thicker and the wrapped edges take up space. A sleeve box needs enough clearance between the inner tray and the outer sleeve so it can slide smoothly. A drawer box needs room for the drawer movement and sometimes thumb access or ribbon space. A mailer-style box may need extra internal room for folding panels and protection. I always match the dimension logic to the structure instead of assuming one size can work for every box type.
A Folding Carton Usually Needs a Different Size Logic
When I measure for a folding carton, I often think about efficiency, clean folding, and product fit. Folding cartons are commonly used for lipstick, mascara, eyeliner, skincare tubes, serum bottles, and lightweight cosmetic products. Because the material is thinner than rigid board, the outside size can stay closer to the inside size. However, folding cartons still have flaps, glue seams, tuck closures, and folding tolerance that must be considered.
A folding carton that is too tight can be difficult to assemble and may deform when the product is inserted. A folding carton that is too loose can make the product move and feel less secure. I also consider whether the carton needs enough panel space for ingredients, barcode, usage instructions, claims, and brand design. For small makeup items, this can be a real challenge because the box may be physically small, but the printed information still needs to be readable.
A Rigid Box Needs More Allowance for Material Thickness
When I measure for a rigid box, I pay more attention to wall thickness, wrapped edges, tray depth, and product removal. Rigid boxes often create a more premium presentation, but they also use thicker board, which means the outside dimensions must usually be larger to create the same inside space. A product that fits inside a folding carton may need a bigger external size if it is placed inside a rigid box with an insert or tray.
This is especially relevant for premium skincare jars, serum bottles, foundation bottles, or cosmetic sets that need stronger presentation. The thicker wall gives structure and value, but it also reduces internal room. If the product measurement is close to the internal space, the box may become difficult to use. I always check whether the product can be removed naturally, whether the insert leaves enough clearance, and whether the lid closes without pressing on the product.
A Sleeve Box Needs Space for Sliding Movement
When I measure for a sleeve box, I think about sliding movement as well as product fit. A sleeve structure usually includes an outer sleeve and an inner tray. The product may fit inside the tray, but the tray also needs to slide into the sleeve smoothly. This means the outside dimensions of the tray and the inside dimensions of the sleeve must be planned carefully.
If the fit between the tray and sleeve is too tight, the customer may struggle to open the box. If it is too loose, the tray may slide out too easily or feel unstable. The product inside also needs to remain controlled during this movement. For makeup palettes, lip products, or skincare tubes, a sleeve box can look elegant, but only if the internal and external dimensions are coordinated well. I do not measure the product alone; I measure the product, tray, sleeve, and opening experience together.
A Mailer-Style Box Needs Room for Protection
When I measure for a mailer-style box, I think more about shipping protection and folding structure. Mailer-style packaging often uses corrugated board or stronger paper structures, which means board thickness and folding panels can take up more space. The outside size also affects shipping cost and carton planning, while the inside size must hold the product securely during transport.
For cosmetic products shipped directly to customers, the box may need extra room for protective inserts, paper cushioning, dividers, or product cards. A glass foundation bottle, skincare jar, or serum bottle may need more protection than a lipstick or mascara. If the mailer is too small, the product may be squeezed. If it is too large, the product may move during shipping. I measure mailer-style packaging with the real shipping journey in mind, not only the product size.
The Same Product Can Need Different Dimensions in Different Boxes
I often explain that the same product can need different box dimensions depending on the final packaging structure. A 30ml serum bottle packed directly into a folding carton may need one set of inside and outside dimensions. The same bottle placed inside a rigid box with an EVA insert may need a larger outside size. The same product shipped in a mailer-style box may need extra room for cushioning or corrugated protection. The product has not changed, but the box structure changes the dimension logic.
This is why I do not rely on a single standard size too quickly. A standard size chart can give a rough starting point, but it cannot tell me how the product will behave inside a specific box style. The correct size comes from the product shape, material thickness, structure, insert, clearance, presentation goal, and shipping method working together. When I understand all of these elements, the box size becomes much more reliable.
Dimension Communication Should Be Clear Before Dieline Design
Before I move into dieline design, I want every dimension to be clearly identified. I need to know which numbers are product dimensions, which are inside box dimensions, which are outside box dimensions, and whether any insert or shipping carton size is involved. This clarity prevents confusion later because once the dieline is created, the artwork panels, folding lines, glue areas, label space, and sample structure are all based on those numbers.
If inside and outside dimensions are confused at the dieline stage, the mistake can affect much more than fit. The product may not sit correctly, the artwork may need to be adjusted, the insert may not work, and the sample may require revision. For cosmetic packaging, where size, artwork, labeling, and product protection are closely connected, clear dimension communication saves time and reduces avoidable errors.
A Physical Sample Confirms the Difference in Real Use
Even when the numbers are carefully calculated, I still trust the physical sample as the final confirmation. A sample shows how inside dimensions and outside dimensions work together in real use. I can place the product inside, close the box, check whether the lid touches the product, test whether the insert holds correctly, feel whether the product is easy to remove, and judge whether the outside proportion looks right.
This physical check often reveals details that measurements alone cannot show. The inside space may technically fit, but the product may feel too tight to remove. The outside size may look correct in a drawing, but the box may feel too bulky in hand. The insert may work in theory, but take more room than expected. The lid may close, but press slightly on a pump or cap. By testing the sample with the real product, I can confirm both function and presentation before the size becomes the production standard.
Clear Inside and Outside Dimensions Make the Box More Reliable
For me, understanding inside and outside dimensions is one of the most important steps in cosmetic packaging size planning. Inside dimensions protect the product fit, while outside dimensions shape display, shipping, material use, and visual proportion. Board thickness, folding structure, glue areas, inserts, and box style all affect the final result, so I never judge box size from one number alone.
When I separate these dimensions clearly, I can make better decisions before dieline design, sample approval, and production. The product has a better chance of fitting safely, the packaging has a better chance of looking balanced, and the customer has a better chance of receiving a box that feels carefully planned. A good cosmetic packaging box should work from the inside out, and that starts with understanding exactly which dimensions are being measured.
Add Clearance for Inserts, Protection and Easy Removal
I always think of clearance as the space that allows a cosmetic packaging box to work in real life, not just in a drawing. When a skincare or makeup product will be packed with an insert, tray, divider, cushion, or protective structure, I never measure the product alone and assume the box size is finished. The product needs space, but the insert also needs space. The lid needs space to close without pressure. The customer needs space to remove the product without struggling. The packaging also needs enough room to protect the surface, control movement, and maintain a clean presentation. For me, the right clearance is not about making the box as small as possible. It is about finding a controlled balance between protection, presentation, packing efficiency, and customer comfort.
I Measure the Product and Insert as One Complete System
When I know an insert will be used, I do not treat the product and the insert as two separate decisions. I measure them together because the final inside space of the box must hold both parts at the same time. A serum bottle may fit inside a box by itself, but once I add a paperboard insert to hold the bottle upright, the available internal space changes. A cream jar may look simple to pack, but if it sits inside a molded pulp tray, the tray wall and tray depth must be included in the box size. A foundation bottle may need EVA support, while a palette may need edge protection, and each of these internal structures changes the real space the product can use.
This is one of the easiest places for a box size mistake to happen. If I decide the box size first and then add the insert later, the product may become too tight, the insert may bend, the lid may not close smoothly, or the product may be difficult to remove. I prefer to plan the product, insert, lid clearance, and removal space together from the beginning because cosmetic packaging works as a complete structure. The box does not only hold the product; it holds the product in a specific position, with a specific protection method, and with a specific opening experience.
Inserts Occupy More Space Than They Appear to Use
I always remind myself that an insert may look thin or simple, but it still takes up real internal space. Paperboard inserts have folds, tabs, locking areas, support panels, and edges. Molded pulp trays have wall thickness, shaped cavities, curved support areas, and depth. EVA foam and foam pads have thickness and product openings. Dividers create internal walls. Paper cushioning fills empty areas and changes how the product moves. These details may seem small in a flat design file, but once they are assembled inside the box, they can reduce the usable room more than expected.
This matters a lot for cosmetic packaging because skincare and makeup products often need a fairly accurate fit. A glass serum bottle may need a stable insert around the body, but the dropper cap should not be pressed. A cream jar may need a tray that supports the base, but the lid should not scrape against the tray opening. A lipstick or mascara may need a narrow insert to stop rolling, but the surface should not rub. A compact powder or palette may need edge control, but the corners should not receive pressure. If I do not calculate the insert space early, the box may look correct outside but feel crowded inside.
Paperboard Inserts Need Folding Tolerance and Product Clearance
When I use a paperboard insert, I pay close attention to how the insert folds and locks inside the box. A paperboard insert is not just a flat card with an opening. After folding, it has layers, support walls, tabs, and sometimes small locking structures that occupy space. If I only measure the product and create the box around that product size, the folded insert may make the final fit too tight. This can cause the product to rub against the opening, bend the insert edge, or make packing slower during assembly.
For lightweight cosmetic products such as lipstick, mascara, eyeliner, small tubes, and some skincare bottles, paperboard inserts can be a practical and clean solution. However, the opening must be based on the real widest point of the product, not only the body. If the lipstick cap is wider than the base, the insert should not be sized around the base alone. If a mascara handle is thicker than the tube body, the insert should consider the handle. If a serum bottle has a wider shoulder, the insert should guide the bottle without pressing on that shoulder. I want the insert to hold the product confidently, but I do not want it to create friction or force.
Molded Pulp Trays Need Depth, Wall Space and Release Space
When I measure for molded pulp trays, I think about depth and product release as much as fit. Molded pulp is often chosen for protective or more responsible packaging, but it is not a thin invisible layer. It has its own wall thickness, texture, molded shape, and cavity depth. If the box size is already tight and the molded tray is added afterward, the final packaging can become too shallow or too narrow. The product may fit into the tray but touch the lid, or the tray may fit into the box but leave no comfortable removal space.
For jars, bottles, tubes, and mixed skincare products, molded pulp trays can hold products well when the shape is planned correctly. However, the cavity should not grip the product so tightly that the customer has to pull hard to remove it. A glass jar with a smooth surface can be difficult to lift if the tray opening is too deep. A serum bottle can tilt if the tray does not support the body at the right point. A tube can become squeezed if the cavity follows the tube shape too aggressively. I measure the product, tray cavity, tray wall, box depth, and lifting space together because molded pulp protection only works well when the customer can also use the package comfortably.
EVA Foam and Foam Pads Need Precision Without Making the Product Feel Trapped
When I work with EVA foam or foam pads, I know the fit can look very clean and premium, but I also know it can become too tight if the product opening is not measured carefully. EVA foam can hold glass bottles, jars, foundation bottles, palettes, and higher-value cosmetic products very securely. However, if the foam opening is based on the product body and forgets the cap, lid, shoulder, base, or raised surface, the product may sit unevenly or become difficult to remove.
I also think about the customer’s hand when I measure foam clearance. A product that looks perfectly fixed in foam may still create a poor experience if the customer cannot lift it out naturally. For a heavy cream jar, I may need enough finger access around the sides. For a glass serum bottle, I may need a gentle opening that supports the body without squeezing the cap. For a compact or palette, I may need a small lifting angle so the product does not sit too flat and too deep. I want EVA or foam to make the product feel protected, not locked away.
Dividers and Paper Cushioning Should Be Planned Before the Box Size Is Fixed
When a box holds more than one skincare or makeup product, I pay extra attention to dividers and paper cushioning because they change the internal layout completely. Dividers can prevent bottles, jars, tubes, and palettes from touching each other, but they also create internal walls that take up space. Paper cushioning can reduce movement and protect surfaces, but it also changes how the product sits inside the box. If these protective elements are added after the box size is fixed, the internal space may become crowded or uneven.
This is especially important for multi-product skincare sets, e-commerce cosmetic packaging, and packaging that combines products with different shapes. A round jar, a tall serum bottle, and a soft tube do not behave the same way inside a box. The jar may need stable base support, the bottle may need upright control, and the tube may need gentle side space. If the dividers are too loose, the products may still collide. If the dividers are too thick, the box may become too tight. I prefer to map the full internal arrangement early so the products look organized, stay separated, and remain easy to remove.
Too Little Clearance Can Damage the Product or Slow Down Packing
I avoid designing cosmetic packaging with almost no clearance because a box that is too tight can create problems long before the customer sees it. During packing, the product may be hard to insert, the insert may bend, the paperboard may deform, or the worker may need to adjust each unit by hand. During shipping, a tight box may press against a pump, cap, dropper, jar lid, compact surface, or tube seal. During opening, the customer may feel that the product is stuck rather than carefully presented.
This kind of tightness can also damage surfaces. A glossy lipstick cap may show fine scratches. A metallic serum cap may rub against the insert edge. A matte foundation bottle may develop pressure marks. A compact powder case may be squeezed at the hinge. A tube may be flattened or bent by a narrow carton. When I allow the right amount of clearance, I am not making the box loose or wasteful. I am giving the product enough practical space to be packed, shipped, and opened without unnecessary pressure.
Too Much Clearance Can Make the Product Feel Loose and Less Premium
At the same time, I do not add clearance without control. Too much empty space can make the product move inside the box, and movement can weaken both protection and perceived value. A serum bottle that shakes inside a carton feels less secure. A cream jar that moves inside a tray feels less premium. A lipstick that rattles in a slim box feels poorly matched. A palette that slides inside a carton may receive corner impact during shipping. In beauty packaging, the customer may not measure the empty space, but they will feel whether the product is stable when they open the box.
This is why I think of clearance as controlled space, not extra space. The product should not be squeezed, but it should also not be free to move. It should sit naturally, remain in position, and feel intentional. A good cosmetic box gives the product a stable place to rest. It protects the product while still creating a neat visual presentation. When I judge clearance, I always ask whether the product feels secure, whether it looks centered, and whether the customer can remove it easily without feeling that the package is either too tight or too empty.
Easy Removal Is Part of the Measurement, Not an Afterthought
I always include removal space in the box size discussion because a package is not finished until the customer can open it comfortably. A product may fit inside the box and stay protected, but if it is difficult to take out, the packaging still has a usability problem. This is common with cream jars, compact powder, palettes, glass bottles, and products placed deep inside trays. A tight insert may look clean in a product photo, but it may force the customer to shake the box, press the insert, or pull awkwardly.
Removal space can come from a small gap around the product, a thumb notch, a lifting angle, a pull tab, a ribbon, or a tray height that lets the product rise slightly above the insert surface. I do not choose one method blindly; I look at the product shape and surface first. A smooth glass jar may need more finger access. A slim lipstick may need enough top space to grip the cap. A flat palette may need a notch or lifting space because it can be hard to pick up from a flat tray. When the product is easy to remove, the packaging feels more thoughtful and more professional.
Clearance Should Protect Delicate Closures and Decorative Surfaces
For cosmetic packaging, I use clearance to protect not only the product shape but also the product surface. Many skincare and makeup products have delicate closures, glossy caps, metallic collars, soft-touch coatings, printed logos, frosted glass, clear windows, raised decorations, or coated lids. These surfaces can show scratches, rubbing marks, fingerprints, or pressure marks if they touch the insert, lid, or inner wall too closely. A box may technically fit, but if the surface arrives marked, the customer experience is still damaged.
This is why I check where the product may contact the packaging. A dropper cap should not scrape against a paper insert opening. A lipstick tube should not rub tightly against the carton wall. A foundation bottle should not hit the side panel during shipping. A compact case should not press against the lid. A cream jar lid should not touch the inside top of the box. I want the clearance to protect the product’s appearance as much as its physical structure, because beauty packaging is judged visually from the first moment the customer opens it.
Clearance Needs Change by Product Type
I do not use the same clearance logic for every product because skincare and makeup products behave differently inside a box. A glass serum bottle needs stable support and top protection around the dropper. A pump bottle needs lid clearance and enough room for the pump direction. A cream jar needs base support, lid clearance, and removal space. A lipstick needs a slim fit that does not scratch the cap. A mascara or eyeliner needs movement control because long narrow products can slide. A foundation bottle needs extra attention to weight and shoulder width. A compact powder or palette needs corner protection and enough lifting space.
This product-specific thinking helps me avoid making the box too generic. Standard clearance may work in a rough calculation, but cosmetic packaging often needs more careful judgment. A heavy product needs different support from a lightweight product. A glossy product needs different protection from a matte paper-wrapped item. A flexible tube needs different space from a rigid glass jar. When I adjust clearance based on the real product, the final box feels more accurate and more reliable.
The Smallest Box Is Not Always the Best Box
I understand why many people want a smaller box. A compact box can reduce material use, improve shipping efficiency, and look clean. However, the smallest possible box is not always the best box for cosmetic products. If the box is too small, it may create pressure, damage the product, reduce label space, make packing difficult, or weaken the opening experience. A box that saves a little space but creates product damage or sample revisions is not truly efficient.
At the same time, a box should not be oversized without reason. Oversized packaging can waste material, increase shipping volume, reduce product stability, and make the product feel less valuable. The best box size is not the smallest or the largest. It is the size that gives the product enough room to be protected, displayed, packed, shipped, and removed comfortably. I always try to find this practical middle point because cosmetic packaging should support both function and feeling.
I Test Clearance Through Real Handling, Not Only Measurement
Before I consider clearance final, I like to test the package with the real product and insert together. I place the product into the insert, close the box, open it again, tilt the box, gently move it, and check whether the product stays in position. I also observe whether the lid touches the product, whether the insert holds without squeezing, whether the product surface rubs, and whether removal feels natural. These simple physical checks often reveal issues that measurements alone cannot show.
A product may fit on paper but feel too tight when inserted. The lid may close but lightly press the cap. The insert may hold the product well but make removal difficult. The box may look neat but allow movement when tilted. By testing the clearance in real handling, I can adjust the box size, insert opening, protection space, or removal method before production. This makes the packaging more dependable because it has been checked in the same way the customer will actually experience it.
The Right Clearance Makes the Box Feel Thoughtfully Designed
When clearance is planned correctly, the packaging feels more thoughtful. The product sits securely without looking trapped. The insert supports the product without scratching it. The lid closes smoothly without pressure. The customer can remove the product naturally. The box feels protective, balanced, and intentional. These are small details, but they are exactly the details that make cosmetic packaging feel professional.
For me, clearance is not just empty space inside a box. It is the space that allows the package to protect the product, show the product well, and respect the customer’s experience. When I measure for inserts, protection, and easy removal from the beginning, I can prevent many common packaging problems before they reach the sample or production stage. A good cosmetic packaging box is not only measured around the product; it is measured around the way the product will be packed, protected, opened, and used.
Check Lid Clearance Before Finalizing Box Depth
I always check lid clearance before I finalize the depth of a cosmetic packaging box because the top space inside the box is one of the most important details for both product protection and presentation. A box may look correct from the outside, and the product may even fit inside the base area, but if the highest point of the product touches the inside of the lid, the packaging is not truly correct. For skincare and makeup products, this detail matters even more because pumps, droppers, caps, raised jar lids, glass bottles, metallic closures, glossy surfaces, soft-touch finishes, and decorated product tops can all be damaged or marked by pressure. When I confirm lid clearance carefully, I am not only checking whether the box can close. I am checking whether the product can sit safely, whether the lid can close naturally, whether the box depth feels balanced, and whether the customer will experience the packaging as thoughtful rather than forced.
Lid Clearance Is the Space That Protects the Product from the Top
When I talk about lid clearance, I mean the space between the highest point of the product and the inside surface of the box lid after the product is placed in its final position. This space may look small, but it has a very practical purpose. It prevents the product from touching, pressing, rubbing, or pushing against the top panel of the box. Without this space, the product may technically fit inside the box, but the fit can still be wrong because the lid is applying pressure from above.
I always identify the true highest point before I judge the box depth. For a serum bottle, the highest point is usually the dropper cap, not the glass body. For a lotion bottle, it may be the pump head. For a mist bottle, it may be the spray nozzle. For a cream jar, it may be a raised lid or decorative top surface. For a compact powder or eyeshadow palette, it may be the hinge, raised logo, or slightly curved lid. Once I understand this highest point, I can decide whether the box depth gives the product enough top space to stay protected.
A Product Should Not Touch the Inside of the Lid When the Box Is Closed
I do not consider a box depth safe if the product touches the inside of the lid. Even light contact can create problems after packing, shipping, stacking, or repeated handling. A product may not show damage immediately, but pressure from the lid can slowly create scratches, rubbing marks, dents, surface impressions, or closure problems. In cosmetic packaging, these small details matter because customers often judge the quality of the product from the first moment they open the box.
When I test lid clearance, I do not only look at whether the lid can close. I pay attention to how it closes. If the lid needs pressure to shut, if the top panel bends slightly, if the box springs back, or if I feel resistance when closing it, I treat that as a warning sign. A well-sized cosmetic box should close smoothly and naturally. The lid should protect the product, not become a pressure point.
Pumps Need More Clearance Than Their Shape Suggests
Pump bottles need extra attention because the pump is a functional part, not just a decorative top. A pump may look small, but it can create height, side extension, and pressure risk at the same time. If the box depth is too shallow, the lid may press against the pump head when the box is closed. This can affect the pump position, create leakage risk, mark the cap surface, or make the packaging feel poorly planned.
I also check whether the pump can rotate or extend outward. Some pumps stay locked in one direction, while others can shift slightly during handling or packing. If the pump turns after the box size has been measured, the highest or widest point may change. This is why I prefer to measure the pump in the real packing position and then test the sample with the actual product. A pump should sit comfortably inside the box with enough top clearance and side awareness, especially if the product will be shipped or stacked.
Droppers Should Be Protected, Not Pressed
For serum bottles and facial oil bottles, I pay very close attention to droppers because they are often one of the most delicate parts of the product. A dropper cap may include a rubber bulb, plastic or metallic collar, decorative finish, and glass pipette inside the bottle. If the box depth is too shallow, the top of the dropper may press against the lid, and this pressure can create scratches, cap marks, poor closure, or a feeling that the bottle is being squeezed into the package.
I also think about how the dropper looks when the customer opens the box. Many serum products rely on the dropper to communicate a premium skincare feeling. If the cap is scratched, pressed, or too close to the lid, the product may look less refined. For me, good lid clearance around a dropper is not wasted space. It is a small protective zone that helps the product arrive clean, functional, and visually consistent with the brand’s intended quality.
Caps, Raised Lids and Decorative Tops Need Visual Protection
Cosmetic products often have caps and top surfaces that are designed to be seen. A cream jar may have a glossy lid, a metallic lid, a raised logo, or a printed top. A lipstick cap may have a shiny coating or decorative band. A foundation bottle may have a metallic pump collar or a matte cap. A compact case may have a raised logo or smooth reflective surface. These details can be easily marked if the product touches the inside of the lid.
I always consider visual protection when I check box depth. The question is not only whether the product can survive inside the box. The product should still look clean and new when the customer opens it. If a glossy lid rubs against the inner paperboard, it may show fine marks. If a metallic cap touches the top panel, it may scratch. If a raised logo presses into the lid, it may leave an impression or create friction. Proper lid clearance helps protect the visible beauty of the product, which is especially important for skincare and makeup packaging.
Glass Bottles Need Lid Clearance and Movement Control Together
Glass bottles require a careful balance because they need both protection from pressure and control against movement. A glass serum bottle, foundation bottle, toner bottle, or facial oil bottle may have a heavy base, a narrow neck, a defined shoulder, and a delicate cap or pump. If the box depth is too shallow, the product may press against the lid. If the box is too deep or too loose, the bottle may move upward, tilt, or hit the inner top panel during handling.
This is why I check lid clearance together with the insert or inner support. The insert should hold the bottle in a stable position, while the top clearance prevents pressure from above. If the insert is too low, the product may look buried. If the insert is too high, the lid may touch the cap. If the insert is too loose, the bottle may shift and reduce the clearance during shipping. For glass skincare and makeup products, box depth should be planned as part of the whole internal structure, not as a single number.
A Shallow Box Can Damage the Product and Deform the Packaging
When box depth is too shallow, several problems can happen at once. The product may press upward against the lid. The lid may bulge or fail to close cleanly. The carton may deform around the highest point. The insert may be pushed downward. The closure may receive pressure. In a physical sample, this can appear as a tight closing feeling, visible stress on the top panel, or marks on the product surface after the box is opened.
This issue is especially common when the product has a pump, dropper, raised lid, compact hinge, or thick cap. The box may seem fine if the body of the product fits, but the real problem appears at the top. I always see a shallow box as a warning sign because it may create both functional and visual damage. A cosmetic box should not rely on the product being squeezed into position. It should give the product enough space to sit naturally while still looking controlled.
A Deep Box Can Make the Product Look Hidden or Less Valuable
I also avoid making the box too deep without a clear purpose. Too much depth can make the product look small, buried, or disconnected from the packaging. A cream jar placed too low in a deep box may be hard to remove. A compact powder case that sits far below the opening may feel less accessible. A lipstick inside a very deep carton may lose the slim, elegant proportion that makes the product feel refined. A serum bottle in an overly tall box may create unnecessary empty space above the cap.
Presentation matters because cosmetic packaging is part of how the customer evaluates the product. A deep box may seem safer at first, but if the depth is not supported by an insert, tray, or design purpose, it can weaken the product’s perceived value. I want the product to feel protected, but I also want it to be visible, reachable, and well-positioned. The best box depth does not hide the product. It frames the product.
Box Depth Affects the First Opening Moment
When the customer opens a cosmetic box, the product position creates an immediate impression. If the product is pressed too close to the lid, the package can feel tight or uncomfortable. If the product sits too low, the box can feel empty or oversized. If the product is at the right depth, the opening experience feels smooth, clean, and intentional. This first impression is difficult to explain with measurements alone, but it is easy to feel when holding the sample.
I like to think of box depth as part of the customer experience, not just a structural requirement. The lid should open without resistance. The product should appear in a balanced position. The customer should be able to understand where the product is and how to remove it. This is especially important for premium skincare, foundation, compact powder, and palette packaging, where the opening moment often shapes the customer’s perception of quality.
Inserts Can Raise the Product and Reduce Lid Clearance
I always check lid clearance after the insert has been placed inside the box because the insert changes the product’s final height position. A product may have enough clearance when placed directly in an empty box, but once it sits on a molded pulp tray, EVA insert, paperboard platform, foam pad, or folded support, it may rise closer to the lid. If the insert height is not considered, the box can become too shallow even though the original product measurement was correct.
The insert can also change the angle of the product. A serum bottle may lean slightly if the insert opening is too loose. A tube may lift at one end if the tray shape is uneven. A palette may sit higher at the hinge side. These small position changes can reduce clearance at one point and create pressure against the lid. That is why I never approve lid clearance based on product measurement alone. I check the real product, real insert, and real box together.
Box Depth Should Support Easy Removal
Box depth also affects how easily the customer can remove the product. If the product sits too low, it may be difficult to reach. If it sits too high, it may touch the lid or feel unstable. For cream jars, compact powders, eyeshadow palettes, and glass bottles, removal space is especially important because these products may have smooth surfaces or heavier weight. The customer should not need to shake the box, push the insert, or pull awkwardly to take the product out.
When I check depth, I also look at finger access, lifting angle, tray height, and whether a thumb notch or pull tab may be needed. A box can have perfect lid clearance but still feel inconvenient if the product is hard to remove. Good depth planning should protect the product from above while still allowing the customer to lift it naturally. This is where technical measurement and human experience meet.
Lid Clearance Should Be Checked After Closing and Reopening the Sample
I like to test lid clearance by closing and reopening the physical sample several times with the real product inside. This simple action tells me more than a drawing can. I check whether the lid closes smoothly, whether the top panel feels flat, whether the product touches the inner lid, whether the insert moves, whether the product shifts upward, and whether any mark appears on the cap, pump, lid, or product surface.
Sometimes the first closing looks fine, but after repeating the action, I can feel slight resistance or see a small contact mark. This usually means the clearance is too tight or the insert is placing the product too high. I would rather identify this during sample checking than discover it during bulk production. For cosmetic packaging, repeated handling is a useful test because the box must work not only once, but throughout packing, shipping, display, and customer opening.
Shipping and Stacking Can Change the Effect of Lid Clearance
I also think about what happens after the box leaves the sample table. During shipping, boxes may be stacked, tilted, compressed, or moved repeatedly. If the lid clearance is already very tight, even minor pressure from stacking can push the lid toward the product. A pump, cap, dropper, jar lid, or compact surface that barely clears the lid during sample testing may still receive pressure during transport.
This does not mean the box should be oversized. It means the clearance should be realistic. The product should have enough top space to remain safe under normal handling conditions, and the insert should prevent the product from moving upward. If the product is heavy, fragile, or made from glass, I pay even more attention to this. A good cosmetic box should protect the product not only when it is sitting on a desk, but also when it is packed in cartons and handled through the supply chain.
The Right Depth Balances Safety, Proportion and Cost
When I finalize box depth, I balance safety, proportion, and cost together. More depth can add protection, but too much depth can increase material use, shipping volume, and empty space. Less depth can make the box look compact, but too little depth can create pressure and damage. The best depth is the one that allows the product to sit safely, keeps the package visually balanced, supports the insert, and avoids unnecessary waste.
I do not choose depth by guessing or by copying a standard size. I choose it by measuring the highest product point, checking the insert height, confirming lid clearance, reviewing the product’s surface sensitivity, and testing the physical sample. This process helps me create a box that feels efficient without feeling tight, and protective without feeling oversized.
Proper Lid Clearance Makes the Packaging Feel More Professional
For me, lid clearance is one of those details that customers may not name, but they can feel immediately. When the clearance is right, the lid closes smoothly, the product surface stays clean, the closure is protected, the box keeps its shape, and the product appears in a balanced position. When the clearance is wrong, the package can feel tight, shallow, empty, or poorly planned.
This is why I check lid clearance before finalizing box depth. It protects pumps, droppers, caps, raised lids, glass bottles, decorated surfaces, and the overall opening experience. It also helps prevent pressure marks, lid deformation, poor closure, and weak presentation. A cosmetic packaging box should not only contain the product. It should protect it from every direction, including from above, while presenting it in a way that feels careful, clean, and professional.
Consider Product Movement During Handling and Shipping
I always remind myself that a cosmetic packaging box is not only tested when it sits still on a table. After the product is packed, the box will be picked up, tilted, stacked, placed into cartons, shipped, stored, displayed, opened, and sometimes repacked by the customer. This is why correct box size is not only about whether the product can fit inside the box once. The product also needs to stay stable during real movement. If a skincare or makeup product moves too much, it can damage labels, caps, pumps, droppers, glass surfaces, powder palettes, inserts, and the printed packaging itself. If the fit is too tight, the product may suffer pressure, become hard to remove, or create stress during transportation. For me, a good cosmetic box size should control movement without squeezing the product, because stability is one of the clearest signs that the packaging has been measured and planned properly.
A Product That Fits Still Needs to Stay Stable
When I place a product inside a sample box, I do not stop my evaluation just because the product fits. A product can fit inside the box and still be unstable. It may slide forward when the box is tilted, rotate when the carton is moved, rise toward the lid during handling, or shift out of position after the package is opened and closed. This is especially common with slim makeup products, round skincare bottles, smooth glass containers, and flat palettes. The product may look perfect in a photo, but movement can reveal problems that a still image cannot show.
I like to think of product fit in two layers. The first layer is basic size fit, which means the product can enter the box and the lid can close. The second layer is movement control, which means the product stays in the right position when the box is handled. A cosmetic box should pass both layers. If it only passes the first one, the product may still arrive scratched, tilted, rattling, or poorly presented. That is why I always check stability after checking size.
Loose Fit Can Make the Product Shake Inside the Box
When the internal space is too loose, the product can shake inside the box during packing, shipping, or customer handling. This movement may seem small at first, but repeated movement can create visible damage. A serum bottle may rub against the carton wall. A lipstick tube may hit the ends of the box. A mascara may slide from side to side. A cream jar may rotate inside the tray. A compact palette may move toward the corners. Over time, these small contacts can scratch surfaces, weaken inserts, damage labels, or make the box feel less protective.
I also pay attention to the sound and feeling of movement. If I hold a closed cosmetic box and hear the product rattling, I immediately know the packaging may feel less premium to the customer. Beauty packaging should feel controlled in the hand. Even when the product is not broken, a loose internal fit can make the customer feel that the box was not designed specifically for the product. A stable fit gives confidence before the box is even opened.
Product Movement Can Damage Labels and Printed Surfaces
I treat labels and printed surfaces as part of the product experience, not as secondary details. Many skincare bottles and makeup products have printed labels, metallic logos, soft-touch coatings, glossy caps, matte finishes, frosted glass, clear windows, or decorative bands. If the product moves inside the box, these surfaces may rub against paperboard, insert edges, molded pulp texture, EVA openings, or inner flaps. Even a small amount of repeated friction can create scratches, scuff marks, dull areas, or label edge damage.
This is especially important for products that rely on a clean visual impression. A serum bottle with a scratched label can look careless. A lipstick cap with rubbing marks can reduce the premium feeling. A foundation bottle with frosted glass may show surface wear if it repeatedly touches the inner wall. A compact case with a glossy top may lose its clean appearance after sliding inside the package. When I check movement, I am also checking whether the product will still look new and well cared for when the customer opens it.
Caps, Pumps and Droppers Need Movement Protection
I pay close attention to caps, pumps, and droppers because they are often the most exposed and vulnerable parts of skincare and makeup products. A pump head can be pressed if the product moves upward. A dropper cap can rub against the lid or insert opening. A spray head can shift or scratch. A lipstick cap can receive pressure from the side. A mascara handle can hit the end of a narrow carton. These parts are small, but they can decide whether the customer feels the product is well protected.
For skincare products, the closure is also functional. If a pump is pressed or tilted during shipping, it may create leakage risk or affect the first-use experience. If a dropper cap is scratched, the product may still work, but the premium impression is damaged. If a cap keeps rubbing against the box, the surface may look worn before the product reaches the customer. I want the product body to stay stable enough that the closure does not become the first contact point during movement.
Glass Bottles Need Controlled Space, Not Just More Space
When I measure packaging for glass skincare and makeup products, I never assume that more empty space automatically means better protection. A glass serum bottle, facial oil bottle, foundation bottle, toner bottle, or mist bottle needs enough clearance to avoid pressure, but it also needs enough internal control to prevent impact. If the box is too loose, the glass bottle may hit the inner wall, bottom panel, lid, or corners during shipping. If the box is too tight, the shoulder, cap, base, or label area may receive direct pressure.
Glass products can create more force when they move because they are often heavier than plastic tubes or slim makeup items. A small shift from a heavy glass bottle can damage the insert or create impact against the carton wall. I usually consider bottle weight, base shape, shoulder width, closure height, and insert support together. The ideal fit holds the bottle in a stable position, protects the visible surface, and avoids direct pressure on fragile areas. For glass cosmetic packaging, movement control is not optional; it is part of basic product protection.
Powder Palettes and Compacts Need Protection from Repeated Impact
For compact powder, blush, pressed powder, contour palettes, and eyeshadow palettes, I pay attention to movement because these products can be damaged internally even if the outside case looks fine. Pressed powder can crack from repeated vibration, corner impact, or sudden movement inside the box. A palette may slide toward one side of the carton, hit the corner, and transfer that impact to the powder inside. The damage may not appear on the outer packaging first, but it can appear when the customer opens the product.
This is why I measure flat makeup products with corner protection in mind. The box should not allow the palette or compact to move diagonally or strike the corners repeatedly. At the same time, the fit should not be so tight that the case is under pressure. I look for a balance where the product is held securely, the corners are protected, and the product can still be removed smoothly. For powder-based makeup, movement control protects not only the case but also the formula inside.
Tight Fit Can Create Pressure During Transport
I do not try to solve every movement problem by making the box extremely tight. A tight fit may reduce shaking, but it can create pressure problems. During transport, boxes may be stacked, compressed, tilted, or exposed to vibration. If the product is already tightly pressed inside the packaging, this outside pressure can make the situation worse. A pump may be pushed, a tube may be squeezed, a cream jar lid may receive pressure marks, a compact case may press against the top panel, or a glass bottle shoulder may rub against the insert.
A tight fit can also make packing inefficient. If each product must be pushed into the box with force, the insert may bend, the carton may deform, or the product surface may be scratched during assembly. The customer may also struggle to remove the product later. I prefer controlled clearance because it reduces movement without creating pressure. The right box size should make the product feel secure, not trapped.
Long and Narrow Products Need End-to-End Control
Long and narrow makeup products such as mascara, eyeliner, lip gloss, brow gel, and slim cosmetic tubes need special movement control because they can slide easily from end to end. These products may fit well in a long carton, but if the internal length is too generous, the product can move every time the box is tilted. This repeated sliding can damage the ends of the box, scratch the cap, or make the package feel loose when held.
When I measure these products, I pay attention to both full length and end clearance. I also check the widest part of the handle, cap, or tube body because a long product may be narrow in the middle but wider at one end. If an insert is used, it should control the product without rubbing the finish. If no insert is used, the box size must be more precise. A long product should not move freely like it is inside an oversized sleeve. It should feel guided and controlled.
Round Bottles and Jars Can Rotate Inside the Box
Round skincare products can create a different movement problem because they may rotate inside the packaging. A serum bottle, facial oil bottle, toner bottle, or cream jar can turn if the box or insert does not hold it properly. Rotation may not sound serious, but it can rub the label, scratch the cap, shift the product position, or make the product look misaligned when the customer opens the box.
For round products, I look at diameter, weight, base shape, and insert support together. A round bottle may need a shaped insert to stop rotation. A cream jar may need a tray that supports the base and controls the lid diameter. A round glass bottle may need side support so it does not roll or lean. I want the product to stay in its intended position because alignment is part of presentation. When a customer opens the package, the product should look placed, not randomly settled after shipping.
Flexible Tubes Need Space Without Being Squeezed
Cosmetic tubes have their own movement risk because they are flexible. A skincare tube, sunscreen tube, hand cream tube, cleanser tube, concealer tube, or lip gloss tube can bend, flatten, or expand slightly after filling. If the box is too loose, the tube may shift, curve, or arrive in a crooked position. If the box is too tight, the tube may be squeezed, the cap may press against the carton, or the sealed end may rub against the inner wall.
I measure tubes with both flexibility and filled shape in mind. An empty tube sample may look slim, but a filled tube can be thicker and more rounded. The sealed end may be wider than the middle body. The cap may be firmer and wider than the tube itself. A good tube box should keep the product straight and clean without compressing it. I want the tube to feel supported, but still natural in shape when the customer takes it out.
Movement During Packing Can Reveal Sizing Problems
I also think about what happens during the packing process itself. A box may look correct after one careful placement, but in real packing, products are inserted repeatedly and efficiently. If the product moves too much while being packed, workers may need to adjust every unit by hand. If the fit is too tight, the product may require force to enter the box. If the insert is too fragile, it may bend during assembly. These issues can slow down packing and increase the chance of inconsistent presentation.
When I test a sample, I do not place the product inside only once. I remove it and place it back again. I want to know whether the product naturally finds the correct position, whether the insert holds consistently, and whether the box closes without adjustment. This repacking test helps me understand whether the box size is practical, not just attractive in a sample photo.
Movement During Shipping Is Different from Movement on a Table
A product may seem stable when the sample box is placed flat on a table, but shipping conditions are different. During shipping, boxes may be stacked, tilted, turned, compressed, and vibrated. A product that does not move much on a table may shift inside the box after repeated handling. This is why I do not trust a static fit test alone. I check how the package behaves when it is moved.
For e-commerce cosmetics, this becomes even more important because a single product may go through more direct handling before reaching the customer. For retail or wholesale packaging, cartons may be stacked and moved in bulk. In both cases, the product needs to remain controlled inside the box. I consider shipping movement when I decide whether the product needs a tighter internal fit, an insert, cushioning, dividers, or a different box structure.
Gentle Tilting Helps Me Find Side Movement
One of the easiest ways I check movement is by gently tilting the sample box with the real product inside. I tilt it forward, backward, and sideways, then open the box to see whether the product stayed in position. If the product has shifted, leaned, rotated, or moved toward one end, I know the internal fit may need adjustment. This test is simple, but it often reveals movement that is not visible when the sample is sitting still.
Tilting is especially useful for round bottles, slim makeup tubes, cream jars, and palettes. A round bottle may lean inside the insert. A mascara may slide toward one end. A jar may rotate slightly. A palette may shift toward a corner. These movements may seem small, but they can become real packaging risks during shipping. When I notice movement during tilting, I think about whether the box needs better internal support, more precise clearance, or a revised insert shape.
Gentle Shaking Reveals Hidden Empty Space
I also gently shake the sample to check whether there is hidden empty space inside the box. I do not shake aggressively; I only want to understand whether the product rattles, taps, slides, or hits the internal structure under normal handling. If I hear a clear sound or feel the product moving, it usually means the box or insert is not controlling the product well enough.
This matters because customers can feel movement immediately. A cosmetic product that rattles in the box may create doubt before the customer even sees the product. It may suggest that the packaging is generic, oversized, or not protective enough. A stable box feels quiet and controlled in the hand. That quiet stability is part of a better packaging experience.
Opening and Closing the Box Shows Whether the Product Stays Presented
I always open and close the sample box several times because movement can happen during the opening process too. A drawer box may shift the product when the drawer is pulled. A sleeve box may move the inner tray. A folding carton may allow a slim product to slide when the top flap opens. A rigid box may reveal whether the product sits too deep, too high, or too loosely inside the insert.
The product should remain properly presented when the box is opened. If the product shifts out of place, tilts, or moves away from the intended position, the opening moment can feel less refined. For beauty packaging, this matters because presentation is part of the perceived product value. I want the customer to open the box and see the product positioned clearly, not displaced by movement during handling.
Repacking the Product Tests Real Usability
I like to remove the product and place it back into the sample because repacking shows whether the box works naturally. If the product only fits when placed at a perfect angle, the design may not be practical. If the insert bends when the product is inserted again, the fit may be too tight. If the product is hard to remove, the customer may become frustrated. If the product shifts every time it is repacked, the internal layout may not be stable enough.
This test is especially useful for products with trays, inserts, and tight-fitting cartons. A serum bottle should slide into the insert without scraping the cap. A cream jar should sit in the tray without being forced. A lipstick should come out smoothly without shaking the box. A palette should be easy to lift without damaging the insert. Repacking helps me judge whether the box size supports both production handling and customer use.
Movement Testing Should Always Use the Real Product
I prefer to test movement with the real product instead of a similar object or empty mockup. The real product has its own weight, surface, balance, closure, shape, and filled condition. A glass foundation bottle behaves differently from a plastic bottle. A filled tube behaves differently from an empty tube. A compact powder case behaves differently from a paper sample. If I test with the wrong object, I may miss the exact movement risk.
The real product also shows surface interaction. A metallic cap may scratch. A label may rub. A matte surface may mark. A glass bottle may hit the insert differently because of its weight. These details cannot be fully understood from drawings or substitute samples. Testing with the real product gives me a more honest view of how the packaging will perform after production.
Stable Packaging Protects the Product and the Brand Impression
For me, movement control is not only about preventing damage. It also protects the customer’s impression of the brand. When a customer receives a box that feels stable, quiet, and well controlled, the packaging feels more intentional. When the product rattles, shifts, or arrives out of place, the packaging feels less thoughtful, even if the printing and material are attractive. Stability is one of those details customers may not describe, but they can feel immediately.
Good movement control also protects the packaging itself. A moving product can bend inserts, mark the inner carton, weaken tray edges, or create scuffs inside the box. A stable product keeps both the product and the package in better condition. When I plan cosmetic box size, I want the final package to feel controlled from the outside and look clean on the inside.
The Right Fit Controls Movement Without Creating Pressure
The best cosmetic packaging fit is not too loose and not too tight. If the product is too loose, it can shake, rotate, slide, and suffer impact. If it is too tight, it can become difficult to pack, hard to remove, or damaged by pressure. The right fit gives the product enough clearance to avoid squeezing, enough support to prevent movement, and enough space for a smooth opening experience.
I always judge this balance through real handling. I tilt the sample, shake it gently, open and close it, remove the product, repack it, and check the surfaces afterward. These actions help me decide whether the box size, insert, and clearance are working together. When movement is controlled properly, the cosmetic packaging feels more protective, more premium, and more practical.
Movement Testing Confirms Whether the Box Size Truly Works
Before I treat a cosmetic packaging box size as final, I want to know that it works beyond the measurement sheet. The product should fit, but it should also stay stable when the box is moved, packed, shipped, opened, and repacked. It should not rattle, rub, press against the lid, damage the insert, or become difficult to remove. It should feel secure without feeling trapped.
This is why I consider product movement during handling and shipping as a key part of size confirmation. It helps me understand whether the internal space is realistic, whether the insert is effective, whether the clearance is balanced, and whether the customer experience will feel smooth. A cosmetic box that controls movement well does more than hold the product. It protects the product’s surface, function, presentation, and perceived value from the moment it is packed to the moment it is opened.
Leave Enough Printable Space for Cosmetic Labeling and Artwork
I always consider printable space before I finalize cosmetic packaging box size because a box is not only a container for the product. It is also the place where the brand explains what the product is, how it should be used, what it contains, what the customer should notice, and why the product is worth trusting. When a box becomes too small, the product may still fit inside, but the outside panels may not have enough room for the product name, ingredients, barcode, usage instructions, warnings, batch information, product claims, and brand artwork. For skincare and makeup packaging, this is especially important because the product often touches the skin, lips, eyes, or face, so customers naturally expect clear and readable information. I do not treat printable space as an afterthought. I see it as part of the packaging size decision because good cosmetic packaging should protect the product inside and communicate clearly on the outside.
Box Size Decides How Much Information Can Be Printed Clearly
When I measure a cosmetic packaging box, I always think about how much information the box needs to carry. A box may be structurally correct, but if the panels are too narrow or too short, the design may become crowded very quickly. Cosmetic packaging often needs to show the product name, brand name, shade name, product type, net content, ingredient list, barcode, directions for use, caution statements, batch information, product claims, and sometimes recycling or certification details. These elements all need space, and they should not be squeezed into the layout only after the box size has already been approved.
This is why I do not judge box size only by product fit. A small box may look efficient and may reduce material use, but if the text becomes too small or the layout becomes too dense, the final packaging can feel less professional. Customers may struggle to read the information, and the artwork may lose the clean visual rhythm that beauty packaging needs. In my view, a good cosmetic box size should give enough space for both structure and communication. The product should fit inside the box, and the information should fit naturally on the panels.
The Front Panel Needs Room for Product Identity
I always pay close attention to the front panel because it creates the first impression. The front panel usually needs to carry the brand name, product name, product type, shade or variant, and sometimes a short claim or product benefit. If the box is too small, these details may compete with each other, and the customer may not immediately understand what the product is. A clean front panel helps the product feel more confident, while a crowded front panel can make even a good product look less refined.
This is especially important for lipstick boxes, mascara boxes, foundation cartons, serum boxes, and small skincare boxes. A lipstick box may be slim and elegant, but the front panel can be extremely narrow. A mascara carton may have enough height but very limited width for typography. A serum box may need a calm, premium front layout, but if the panel is too tight, the design may feel compressed. When I check box size, I ask whether the front panel has enough breathing room for the main message. The customer should not need to search for the product name or struggle to understand the product category.
The Back Panel Often Carries the Heaviest Information Load
The back panel is usually where the most detailed information appears, so I treat it carefully when planning box size. For many skincare and makeup products, the back panel may need to include ingredients, usage instructions, warnings, manufacturer information, storage notes, barcode, batch details, and other practical information. This panel can become crowded very quickly, especially if the box is narrow or if the brand sells in markets that require more product information.
I do not want the back panel to become a wall of tiny text. Even when the design looks clean from the front, poor back-panel readability can weaken the overall packaging quality. Customers often turn the box around to understand ingredients, usage, shade details, product benefits, or cautions. If the text is too small, too close to the fold, or packed into a narrow panel, the packaging may feel difficult to trust. I prefer to consider the information load before the dieline is finalized, because once the panel size is fixed, the designer may have very little room to improve readability.
Ingredient Lists Need Enough Space to Stay Readable
I pay special attention to ingredient lists because cosmetic buyers often look for this information before deciding whether a product is suitable for them. Skincare customers may check active ingredients, fragrance, oils, acids, allergens, or sensitive-skin concerns. Makeup customers may check formula details, pigments, or product claims. If the ingredient list is forced into a very small area, it may become difficult to read and may make the packaging look less careful.
This is especially important for small skincare boxes, sample-size cartons, mascara boxes, and lipstick boxes. These products may have physically small packaging, but the required information does not always become smaller with the box. A mini serum or trial cream may still need an ingredient list, usage instructions, and product details. If I reduce the box size too much, the design may need to use very small type, tight line spacing, or awkward panel placement. I always prefer to check whether the ingredient information can remain readable before calling the box size final.
Usage Instructions Should Be Easy to Find and Understand
Usage instructions also need proper space because cosmetic packaging should help the customer use the product correctly. A cleanser, serum, cream, sunscreen, foundation, mascara, or lip product may need simple directions, but those directions still need to be clear. If the box is too small, the instructions may be shortened too much, placed in an uncomfortable position, or printed in a font size that is hard to read.
I think this matters because packaging is part of the customer’s first learning experience with the product. When instructions are clear, the product feels easier to understand and more professionally presented. When instructions are hidden, crowded, or difficult to read, the customer may feel uncertain. I do not want the box to only look attractive. I want it to help the customer understand how the product should be used, especially for skincare products where application order, frequency, and precautions can matter.
Barcode Placement Needs a Clean and Practical Area
I always leave practical space for the barcode because it is not something that can be placed randomly at the end of the artwork process. A barcode needs a flat, clear area that is not too close to a fold, seam, curved edge, glue area, or heavy decorative pattern. If the box is too small, the barcode may be pushed into a narrow side panel or placed too close to a crease, which can affect scanning and make the layout look crowded.
For retail packaging, barcode placement is part of real product use. The box may need to be scanned in stores, warehouses, fulfillment centers, or inventory systems. Even for e-commerce products, a clean barcode area helps with handling and product management. I usually think about the barcode early because it takes up more usable space than many people expect. If the box size is too compact, the barcode can compete with ingredients, claims, and brand artwork, which makes the whole layout feel forced.
Batch Information and Production Codes Need Planned Space
Batch information, production codes, expiration dates, or other traceability details also need space. These details may be printed, stamped, ink-jetted, labeled, or added during production, so the box should have a suitable area for them. If the box panels are already crowded with artwork and text, these practical details may be added in a place that looks awkward or is difficult to read.
I like to think about this before the artwork is completed. A small blank area can make batch coding look clean and intentional. If there is no planned space, the code may end up too close to a fold, hidden near the bottom flap, or placed over a dark background where it is hard to see. For cosmetic packaging, traceability details may not be the most beautiful part of the design, but they are part of a professional packaging system. A well-sized box makes room for them without damaging the overall visual layout.
Claims Need Space Without Overcrowding the Design
Cosmetic packaging often includes product claims, and I always check whether the box has enough space to present them clearly. A skincare product may mention hydration, brightening, soothing, oil control, fragrance-free, vegan, cruelty-free, recyclable, or suitable for certain skin types. A makeup product may mention long wear, waterproof, smudge-proof, lightweight texture, high pigment, matte finish, glossy finish, or clean formula positioning. These claims can help customers understand the product, but they need to be arranged carefully.
If the box is too small, claims can become scattered, crowded, or visually noisy. Too many claims on a small panel can make the design feel less premium and less trustworthy. I prefer to leave enough printable space so the most important claims can be placed with hierarchy. The customer should understand the key message quickly instead of reading a crowded block of tiny text. For me, good packaging size gives the brand enough room to speak clearly, not loudly.
Warnings and Caution Text Should Not Be Treated as Leftover Copy
Warnings and caution text are easy to overlook during early box sizing, but I do not treat them as leftover copy. Some cosmetic products may need caution statements related to eye contact, patch testing, sun exposure, external use, storage, children, or product-specific usage. These details should be readable and placed in a sensible area. If the box is too small, warning text may be squeezed into a corner or printed so small that it loses practical value.
I keep this section educational rather than legal-heavy because exact requirements depend on product type and market. However, from a packaging size perspective, the principle is simple: important customer information needs enough space to be read. A box that is too compact may look efficient, but if it cannot carry warning or usage information clearly, the design may create communication problems. I prefer to consider these details before finalizing the box size, not after the artwork becomes crowded.
Brand Artwork Needs Space to Look Intentional
I always believe that brand artwork needs breathing room. A logo, color block, pattern, illustration, product image, texture, foil area, embossing position, or special finish needs space around it to look intentional. If the box panels are too small, even a beautiful design can become compressed. The logo may be too close to the edge. The product name may be too close to the fold. The pattern may compete with the text. The artwork may feel like it was forced into the box instead of designed for it.
This matters especially for beauty packaging because visual feeling is part of product value. A premium skincare box often needs calm spacing and clear hierarchy. A makeup box may need strong color identity, shade information, and visual energy, but still needs order. A minimalist design needs even more accurate spacing because every detail is visible. When I measure a box, I think about the visual rhythm of the finished packaging. A box size that gives artwork enough room usually creates a more polished result.
Slim Cosmetic Cartons Need Careful Panel Planning
Slim cosmetic cartons are some of the hardest formats for printable space. Lipstick boxes, mascara boxes, eyeliner boxes, brow pencil boxes, lip gloss boxes, and narrow tube cartons may look elegant and efficient, but they leave very limited panel width. The front panel may only have room for the brand name and product name. The side panels may need to carry shade, ingredients, claims, barcode, and usage information. The back panel may become crowded quickly if the product has detailed copy.
When I work with slim cartons, I pay attention to panel planning before the size is approved. I do not assume that because the product fits, the artwork will also fit. A few millimeters of extra width or height can sometimes make a big difference in readability. If the box becomes too narrow, the designer may need to reduce font size, rotate text, or split information awkwardly across panels. I prefer to avoid that by checking printable space early.
Sample-Size Skincare Boxes Need More Planning Than They Seem
Sample-size skincare boxes can be surprisingly difficult because the packaging is small but the information needs may still be large. A mini serum, trial cream, travel-size cleanser, sample lotion, or small skincare tube may need product name, ingredient information, usage directions, warnings, barcode, batch code, and brand artwork. The product may be small, but the customer still needs to understand what it is and how to use it.
I do not like to make sample-size boxes so small that the packaging becomes difficult to read. Sampling is often the first time a customer experiences a product, so the packaging should still feel helpful and trustworthy. If the box is too small, the customer may see a crowded design instead of a clear introduction to the product. I prefer to balance compact size with readable communication, because a sample package should support trial and confidence, not confusion.
Folding Lines and Glue Areas Reduce Real Printable Space
When I review printable space, I do not count every part of the flat dieline as equally useful. Folding lines, glue areas, tuck flaps, dust flaps, seams, lock tabs, and edges can reduce the area available for important information. A box panel may look large in total size, but after folding, some areas may be less suitable for small text, barcode placement, or key artwork. If important copy is placed too close to a crease, it may become harder to read or look less clean after assembly.
This is why I think about the assembled box, not only the flat artwork file. A barcode should not be placed where scanning may be affected by a fold or curve. Ingredient text should not be placed too close to a glue seam. A logo should not sit on a crease unless the design intentionally allows it. When the box is small, these structural areas become even more important because there is less space to recover from poor placement. Good printable space planning respects the physical structure of the box.
Small Boxes Can Save Material but May Reduce Communication Quality
I understand the value of a smaller box. It can reduce material use, save shipping space, and create a compact product impression. However, I do not see the smallest possible box as automatically the best choice. If a smaller box makes the ingredients unreadable, squeezes the barcode, weakens the front panel, or forces the artwork into a crowded layout, the packaging may lose more value than it saves.
For cosmetic packaging, information quality and visual clarity are part of the customer experience. A box that looks efficient but feels confusing can reduce trust. A box that gives slightly more room for readable information may feel more professional and easier to use. I try to find the point where the box remains efficient but still communicates clearly. That balance is more useful than simply reducing size as much as possible.
Printable Space Should Be Checked Before the Dieline Is Approved
I always prefer to check printable space before the dieline is approved because the dieline defines the real panels the designer must use. Once the dieline is fixed, the artwork must follow the available panel sizes, folding lines, glue areas, and structure. If the box is too small or the panels are poorly balanced, the designer may have to compromise by shrinking text, moving important information to narrow panels, or crowding the layout.
Before approval, I like to think through the product identity, ingredient volume, barcode placement, claims, warnings, batch information, and main brand artwork. This does not mean the full artwork must be finished before the dieline, but the information load should be understood. A box size should support the expected content. When structure and communication are planned together, the final packaging usually looks more natural and more professional.
Readability Supports Trust in Cosmetic Packaging
I see readability as part of trust. Cosmetic customers often want to know what they are applying to their skin, lips, eyes, or face. If the product information is clear, the package feels more transparent and reliable. If the information is crowded or difficult to read, the customer may feel less confident, even if the product itself is good. This is why printable space matters so much in cosmetic packaging.
A readable box does not need to look plain or overly technical. It can still be beautiful, branded, and premium. The key is to give each type of information the right place and enough room. Product name, ingredients, barcode, usage instructions, warnings, batch code, claims, and artwork should work together instead of fighting for space. When the box size supports readability, the design can feel both attractive and useful.
Enough Printable Space Makes the Packaging Feel Complete
For me, enough printable space makes cosmetic packaging feel complete. The product fits inside, the structure protects it, the artwork has room to breathe, and the customer can read the information without effort. This balance is especially important for lipstick boxes, mascara boxes, sample-size skincare boxes, slim cosmetic cartons, and any packaging where the panel area is limited.
I always remind myself that the outside of the box is part of the product experience. It introduces the product, explains it, supports the brand, and helps the customer feel confident. When I leave enough printable space for labeling and artwork, I am not adding unnecessary size. I am making sure the packaging can communicate clearly while still looking clean and professional. A well-measured cosmetic box should not only hold the product well; it should also give the brand enough room to speak with clarity and care.
Use Inches and Millimeters Carefully
I always treat measurement units as a serious part of cosmetic packaging development because box size is only useful when everyone understands the numbers in the same way. In many international packaging projects, buyers may measure products in inches, while factories, dieline engineers, printing teams, and sample makers often work in millimeters. This difference may look simple, but if it is not handled carefully, it can create wrong dielines, wrong insert openings, poor lid clearance, tight product fit, oversized cartons, or samples that do not match the buyer’s expectations. For cosmetic packaging, where products are often small, detailed, delicate, and close-fitting, a small unit mistake can become a real production problem. That is why I always confirm the unit, the measurement type, and the purpose of each number before I move into box design or sample approval.
Measurement Units Should Be Clear from the First Conversation
When I receive product dimensions from a buyer, I never assume whether the numbers are inches or millimeters. A size such as 5.2 × 2.1 × 1.4 may look clear, but it is not complete unless the unit is stated. If those numbers are inches, the product is much larger than if those numbers are millimeters. Even when the product photo gives me a rough idea, I still prefer to confirm the unit because packaging production cannot rely on guessing.
This is especially important for skincare and makeup products because many of them require close structural control. A lipstick carton may only need a small amount of clearance around the cap. A mascara box may need accurate length control to prevent sliding. A serum bottle box may need enough height for the dropper. A cream jar box may need enough width for the widest lid diameter. If the measurement unit is wrong from the beginning, every later decision can also become wrong. The box may be too small, the insert may not fit, the lid may not close, or the product may move too much inside the package.
I like to make unit communication very direct. If a buyer measures in inches, I want the file or message to clearly say inches. If the measurement is in millimeters, I want that written clearly as well. I do not want the unit to appear only once at the top of a long document and then disappear from the following measurements. In real packaging communication, information is often copied into emails, dielines, quotations, sample notes, and artwork files. When the unit is repeated clearly, it reduces the chance of confusion.
International Buyers and Factories Often Work in Different Systems
Many international buyers are more comfortable using inches because their product specifications, retail shelving, warehouse planning, or shipping carton references may be based on inch measurements. This is common for buyers in markets such as the United States, and it can also happen when a brand uses product development documents from local suppliers. On the factory side, millimeters are often more practical because packaging production needs finer precision for paperboard thickness, folding lines, cutting, insert openings, and sample correction.
I do not see either system as wrong. Inches are useful for buyers who need to understand size in their familiar market language. Millimeters are useful for production teams that need more precise control. The problem appears when both systems are used without a clear reference. If the buyer approves one number in inches, the designer converts it roughly, and the factory adjusts it again in millimeters, the final size may drift away from the original product requirement.
For this reason, I prefer to decide which unit will control production. In most packaging production discussions, I use millimeters as the final production reference because it allows more accurate dieline and insert development. At the same time, I can keep inch values as a buyer-friendly reference. This helps both sides understand the size without forcing one side to guess what the other side means.
Millimeters Usually Give Better Control for Packaging Production
When I work on cosmetic packaging box size, I usually rely on millimeters for the final structure because millimeters allow more detailed adjustment. Cosmetic boxes often need small changes that are difficult to express cleanly in rounded inch values. A box may need a slight increase in width to avoid pressure on a lipstick cap. A tray opening may need a small change to hold a cream jar more securely. A serum box may need extra height so the dropper does not touch the inside of the lid. These small decisions are easier to manage in millimeters.
Packaging production involves cutting, creasing, folding, gluing, wrapping, inserting, and assembling. These processes depend on accurate physical dimensions. If the unit is too rough, the dieline may not reflect the real needs of the product. A small difference around a cap, pump, jar lid, or compact hinge can affect the final sample. Millimeters help me communicate these details with more control.
However, I still respect the buyer’s inch measurements because they often come from the real product in hand. If a buyer measures a foundation bottle as 4.72 inches high, that measurement is valuable. I simply want to convert it carefully and then confirm the final millimeter value before the dieline is made. The original inch value helps the buyer understand the product size, while the millimeter value helps production build the box accurately.
Inch-to-Millimeter Conversion Should Not Be Treated Casually
I always check inch-to-millimeter conversion carefully because conversion mistakes can be surprisingly easy to make. One inch equals 25.4 millimeters, and this number should be used consistently. Problems often happen when measurements are rounded too early, copied incorrectly, or converted by different people in different ways. A product height measured as 4.68 inches may become 4.7 inches in one file, 119 millimeters in another file, and 120 millimeters in a third file. Each number may seem close, but for a tight cosmetic box, the difference can matter.
The risk becomes higher when the product has a cap, pump, dropper, or raised surface. If the highest point is rounded down, the box depth may become too shallow. If the widest point is rounded down, the insert opening may become too tight. If the length of a slim mascara or eyeliner is rounded too generously, the product may slide inside the box. Conversion should preserve the true product size before any clearance or tolerance is added.
I prefer to convert measurements carefully and then check them against the real product again. If a skincare bottle is measured in inches, I convert it into millimeters and compare the converted size with the product’s actual shape. I also check whether the conversion includes the cap, pump, shoulder, base, and filled product condition. Conversion is not only a math step. It is part of confirming that the packaging team is working from the correct physical information.
Rounding Can Create Hidden Size Errors
Rounding looks harmless, but it can create hidden errors when several dimensions are involved. If length, width, height, insert opening, board thickness, and clearance are all rounded separately, the total effect can become noticeable. A single rounded number may not cause a problem, but repeated rounding can make the final box tighter or looser than expected.
For example, a product width may be measured as 1.18 inches. If someone rounds it down to 1.1 inches before conversion, the millimeter value becomes too small. If someone rounds it up too much, the box may become larger than necessary. Both choices can affect the final packaging. A lipstick cap may rub against the carton wall if the width is reduced too much. A compact powder case may move if the width is increased without a clear reason.
I prefer to keep the original measurement as accurate as possible and then decide rounding intentionally. If production needs a clean millimeter value, I want that value to be chosen after considering product fit, insert space, lid clearance, and normal production tolerance. Rounding should support packaging accuracy, not replace it.
Do Not Mix Inches and Millimeters Without a Clear Reference
I try to avoid mixing inches and millimeters in the same measurement record unless both values are clearly labeled. Confusion happens when product size is written in inches, box size is written in millimeters, and insert size is written without a unit. It also happens when one person says the product is 3 inches high, another person writes 76 millimeters, and a third person adjusts the dieline without explaining which number is now controlling the final sample.
In a cosmetic packaging project, many people may touch the measurement information. The buyer may send product size. The designer may prepare artwork. The engineer may create the dieline. The sample team may make the box. The sales team may confirm details with the buyer. The production team may use the final structure for bulk manufacturing. If the unit is not clear at each step, the risk of misunderstanding increases.
I prefer to keep one main production unit and one reference unit if needed. For example, the production record can use millimeters, while the buyer-facing discussion can also show inches for easy understanding. This way, everyone knows which number controls the dieline and sample. Clear unit discipline makes international packaging projects much smoother.
Confirm Whether the Number Refers to Product Size
I always confirm whether the measurement refers to the product itself because product size is not the same as box size. Product size tells me the physical length, width, height, diameter, thickness, or weight of the cosmetic item. It does not include insert space, clearance, board thickness, lid clearance, removal space, or shipping protection. If product size is mistaken for box size, the final package may become too tight.
For a serum bottle, product size should include the full height from the bottom to the top of the dropper or cap. For a lotion bottle, it should include the pump. For a cream jar, it should include the widest lid diameter and total closed height. For a lipstick, it should include the closed tube, cap, base, and any decorative band. For a compact powder or palette, it should include hinge, clasp, raised logo, and real thickness. These are product dimensions, but they are only the starting point for box design.
After I confirm product size, I still need to decide how much extra space the box requires. The packaging may need inserts, cushioning, printable panels, lid clearance, and practical tolerance. This is why I do not want buyers to send product size and assume the factory can directly use it as final box size. Product size answers what the product is. Box size answers how the product will be packed.
Confirm Whether the Number Refers to Inside Box Size
Inside box size refers to the usable internal space after the box is assembled. This is one of the most important measurements for cosmetic packaging because it determines whether the product can actually fit inside the structure. Inside size must account for the product, insert, clearance, and lid space. If someone sends an inside dimension, I want it clearly identified as inside size, not product size or outside size.
This matters because the inside size is what the product experiences. A box may look large from the outside, but thick paperboard, folded panels, glued seams, wrapped edges, or inserts can reduce the internal space. A rigid box may have much less usable space than its outside size suggests. A folding carton may have a smaller difference between inside and outside size, but glue seams and tuck flaps still matter. A mailer-style box may use thicker corrugated board and internal folds that affect product placement.
When I confirm inside size, I also check whether the number includes the insert or only the empty box. This detail is very important. An empty inside size may be large enough, but the usable space after inserting a molded pulp tray, EVA foam, paperboard insert, or divider may be smaller. For accurate cosmetic packaging, inside size should be connected to the full internal structure, not just the empty box cavity.
Confirm Whether the Number Refers to Outside Box Size
Outside box size refers to the full external dimensions of the finished box. Buyers often think in outside size because this is what they see, hold, display, photograph, and ship. Outside size affects shelf display, shipping carton planning, storage, material use, and visual proportion. It is useful information, but it should not be confused with the space available for the product inside.
For example, a buyer may want a cosmetic box that is 2 inches wide from the outside because it needs to fit a display tray. However, the inside width will be smaller after paperboard thickness and structure are considered. If the product itself is close to 2 inches wide, the box may not work. This is why I always compare outside size with product size and inside size before approving the structure.
Different packaging styles create different relationships between inside and outside dimensions. A folding carton has thinner material, so the difference may be small. A rigid box has thicker greyboard and wrapped edges, so the outside size may need to be larger. A sleeve box has an inner tray and outer sleeve, so there are multiple layers to consider. A corrugated mailer-style box has thicker board and folding panels, so internal planning is different again. Outside size is important, but it cannot replace inside size confirmation.
Confirm Whether the Number Refers to Insert Opening
Insert opening size is another measurement that should be clearly labeled. This number is different from product size, inside box size, and outside box size. The insert opening controls how the product sits inside the tray, paperboard insert, EVA foam, molded pulp cavity, or divider structure. If this number is wrong, the product may be too tight, too loose, tilted, hard to remove, or poorly protected.
For cosmetic packaging, insert openings often need more care than the outside box itself. A serum bottle opening should support the body without pressing the dropper. A cream jar tray should be based on the widest lid or the correct support point, depending on how the jar sits. A lipstick opening should consider the cap diameter and surface finish. A palette insert should support the edges without pressing the hinge. If the insert opening is measured in one unit and the product is measured in another, conversion must be checked carefully.
I like to label insert measurements clearly because they often become the source of sample problems. A box may be correct, but the product still fails because the insert was too tight or too loose. When the unit and measurement type are clear, it becomes much easier to correct the sample accurately.
Confirm Whether the Number Refers to Shipping Carton Size
Sometimes buyers also provide shipping carton size or retail display size, and this should not be confused with product packaging box size. Shipping carton dimensions affect how many units can fit into one outer carton, how the boxes are stacked, and how shipping volume is calculated. These numbers are important for logistics, but they do not directly tell me whether the cosmetic product fits inside the individual box.
I like to separate product size, inner packaging size, and outer carton size clearly. The individual cosmetic box protects and presents the product. The shipping carton protects multiple units during transport. If the buyer has a shipping carton limit, I can consider it when planning the outside dimensions of the individual box. However, I still need to make sure the product fit, insert space, lid clearance, and printable area are correct. Logistics efficiency is important, but it should not create a box that damages the product or makes the label unreadable.
Dieline Design Depends on Accurate Unit Communication
The dieline is where measurement mistakes become physical packaging problems. A dieline controls the panels, folding lines, flaps, glue areas, insert position, artwork panels, and final box structure. If the unit is wrong when the dieline is created, the sample will not match the product. Even if the artwork looks attractive, the structure may fail.
A unit mistake can make a lipstick carton too narrow, a mascara box too long, a cream jar box too shallow, or a serum box too short for the dropper. It can also affect the placement of ingredients, barcode, logo, claims, and warning text because the artwork panels are based on the dieline size. When the dieline is wrong, both fit and design can be affected.
I prefer to confirm units before the dieline starts rather than trying to correct them after a sample is made. This saves time and reduces revision costs. Clear measurements at the beginning make the dieline more reliable, the sample more accurate, and the production process easier to control.
Artwork Layout Also Depends on Correct Measurements
Correct units do not only affect structure. They also affect artwork. If the box panels are created with the wrong measurement system, the artwork may be stretched, compressed, misaligned, or placed too close to folding lines. A barcode may end up too small or too close to a seam. Ingredient text may become unreadable. A logo may sit too near the edge. A foil stamping area may not align with the intended panel.
For cosmetic packaging, artwork and structure are closely connected. The product name, brand identity, ingredients, usage instructions, barcode, batch information, claims, and warnings all depend on panel size. If the measurement unit is unclear, the designer may create artwork based on a panel that does not match the real box. This can create problems during proofing and production. I always want the dieline measurement and artwork measurement to match exactly.
Packaging Production Has Normal Small Tolerances
Even when all measurements are correct, I still remember that packaging production can have small tolerances. Paper packaging is a physical product made through cutting, creasing, folding, gluing, wrapping, laminating, and sometimes manual assembly. Paperboard thickness can vary slightly. Folding pressure can affect final shape. Glue position can create small differences. Lamination can change stiffness. Manual assembly can create minor variation between units. These small differences are normal in packaging production.
This is why I do not design cosmetic boxes with no practical allowance. If the product fit is too exact, even a small production variation can make the product hard to insert or remove. A cream jar may become too tight in a tray. A lipstick cap may rub against the inner wall. A compact case may press against the lid. A serum bottle may not sit smoothly in the insert. Tolerance does not mean the box should be loose; it means the box should have enough realistic clearance to work consistently across production.
Paperboard Thickness Can Change the Final Internal Space
Paperboard thickness has a direct effect on the difference between inside and outside dimensions. Thicker material reduces internal space. This is easy to understand, but it is often forgotten when buyers compare box sizes. A rigid box with thick greyboard and wrapped paper may have a much larger outside size than its inside usable space. A folding carton made from thinner paperboard may keep the outside and inside dimensions closer. A corrugated mailer-style box may need extra allowance because the board is thicker and the folds occupy more space.
When I calculate box size, I always consider material thickness in the final unit. If the production team works in millimeters, the board thickness should also be considered in millimeters. If the buyer only thinks in outside inches, the internal loss caused by material thickness may not be obvious. This is one reason why clear unit communication matters so much. It helps everyone understand how the finished box size relates to the product fit.
Folding, Creasing and Gluing Can Affect the Real Fit
Folding and gluing are normal parts of packaging production, but they can slightly affect the real internal fit. A crease has a physical behavior. A folded flap takes space. A glue seam can make one side slightly thicker. A tuck closure can affect top or bottom clearance. A lock tab can change how the box closes. These details are small, but they matter when cosmetic products require close sizing.
For slim cosmetic cartons, the effect can be noticeable. A mascara or eyeliner box with very little internal tolerance may feel tight if the glue seam slightly reduces the usable space. A lipstick box may deform if the product is forced past a tight folded area. A small skincare sample box may lose useful panel space if the structure needs adjustment. I prefer to plan for these physical realities before production instead of assuming the assembled box will behave exactly like the flat dieline.
Lamination and Surface Finishes Can Influence the Final Structure
Lamination and surface finishes can also affect the finished packaging. Matte lamination, gloss lamination, soft-touch lamination, foil stamping, embossing, debossing, spot UV, and special coatings may not always change the size dramatically, but they can influence stiffness, folding feel, surface tension, and how the box closes. If the fit is already very tight, these finishing effects can become more noticeable.
For cosmetic packaging, finishes are often important because they support brand perception. A soft-touch skincare box may feel more premium. A foil-stamped lipstick box may look more refined. An embossed logo on a compact carton may create a tactile effect. However, finishes should be considered together with size and tolerance. A beautifully finished box still needs to fold correctly, close smoothly, protect the product, and allow easy removal. Measurement units, material thickness, and finishing choices all need to work together.
Manual Assembly Can Create Slight Differences Between Samples and Bulk Production
Some cosmetic packaging structures involve manual assembly, especially rigid boxes, drawer boxes, sleeve boxes, insert placement, EVA foam fitting, molded pulp tray placement, and premium presentation packaging. Manual assembly can create small differences in how the tray sits, how the insert aligns, how the lid closes, or how the product position feels. A perfect sample may be made very carefully, but bulk production needs the structure to work across many units.
This is why I do not want a design that only works when everything is perfectly aligned by hand. The product should fit comfortably within normal assembly variation. The insert should not require excessive force. The lid should not depend on exact pressure to close. The product should not become stuck if the tray sits slightly differently. When I allow practical tolerance, the packaging has a better chance of performing consistently from sample to mass production.
Tolerance Should Be Balanced with Product Stability
Tolerance does not mean making the box too loose. I always balance tolerance with product stability. If I add too much allowance, the product may shake, rotate, slide, or feel less premium. If I add too little allowance, the product may be squeezed, hard to remove, or sensitive to production variation. The correct tolerance depends on product shape, material, box style, insert type, and shipping method.
A glass serum bottle may need stable support and controlled top clearance. A lipstick may need a slim fit with surface protection. A mascara may need end-to-end control. A cream jar may need enough room around the lid and enough base support. A palette may need corner protection without being pressed. Each product requires a different tolerance strategy. I do not use one fixed rule blindly. I use measurement, sample testing, and product behavior together.
A Shared Measurement Record Helps Prevent Confusion
I like to keep a clear measurement record for packaging projects because it prevents many avoidable mistakes. In that record, I want to see the product size, unit, inside box size, outside box size, insert opening, material thickness, lid clearance, and any conversion notes. I also want to know which number is used for production. This kind of record helps the buyer, designer, engineer, and factory team work from the same reference.
Without a shared record, information can become scattered across emails, messages, drawings, quotations, and sample comments. One person may update the product size, while another person continues using the old dimension. One file may show inches, while another uses millimeters. One comment may refer to outside size, while another refers to inside size. A clear measurement record is not complicated, but it helps keep the project controlled.
Physical Samples Confirm Whether the Numbers Work in Real Life
Even after all units and conversions are checked, I still rely on physical samples to confirm whether the packaging works in real life. A sample shows whether the product fits, whether the lid closes, whether the insert holds properly, whether there is enough clearance, whether the product moves, and whether the customer can remove it easily. Numbers are essential, but cosmetic packaging must also be tested by hand.
If the sample feels too tight, I can check whether the issue comes from unit conversion, inside dimension, material thickness, insert design, or production tolerance. If the sample feels too loose, I can check whether too much clearance was added or whether the insert needs adjustment. The physical sample helps turn measurement into practical judgment. It gives me confidence before the approved size becomes the production standard.
Careful Unit Control Makes Packaging More Reliable
For me, using inches and millimeters carefully is one of the most basic but most valuable habits in cosmetic packaging development. Clear units help prevent wrong box sizes, incorrect dielines, poor insert fit, artwork mismatch, and sample revisions. They also help international buyers and factories communicate more smoothly because everyone knows which number means what.
I always want the measurement to answer three questions clearly. What unit is being used? What does the number refer to? How will normal production tolerance affect the final package? When these questions are answered before the dieline and sample stage, the packaging project becomes more reliable. The product fits better, the insert works better, the box closes more smoothly, and the final packaging feels more professional. Careful measurement units may seem like a small detail, but in cosmetic packaging, small details often decide whether the final box works beautifully or creates avoidable problems.
Do Not Rely Only on Standard Cosmetic Box Size Charts
I understand why many buyers search for standard cosmetic box size charts before starting a packaging project. A size chart feels quick, simple, and reassuring, especially when the buyer is trying to estimate the right box size for a serum bottle, cream jar, lipstick, mascara, compact powder, skincare tube, or makeup palette. It can help create a first impression of what size range may be suitable, and it can make the early discussion with a packaging supplier easier. However, I never treat a standard size chart as the final production answer. Cosmetic packaging is too detailed for that. Skincare and makeup products may have similar names or similar capacities, but their actual containers, closures, weights, inserts, surface finishes, and shipping risks can be completely different. For me, a standard chart is only a starting point. The final box size must come from real product measurement, packaging structure planning, and physical sample testing.
Standard Size Charts Can Help at the Early Planning Stage
When I use a standard cosmetic box size chart, I use it mainly to understand the general size direction. It can help me estimate whether the product may need a slim carton, a tall bottle box, a square jar box, a flat palette carton, or a wider structure with insert support. For a buyer who is still comparing packaging options, this kind of chart can be useful because it gives a rough reference before the real product is measured.
At this early stage, a size chart can also help buyers speak more clearly with suppliers. Instead of saying only “I need a box for a serum” or “I need packaging for lipstick,” the buyer can compare the product with a common box size and start the conversation from a more specific place. This saves time in the first discussion. However, I always remind myself that this is only a rough direction. A chart does not know the exact product height, cap diameter, bottle shoulder, pump direction, insert thickness, paperboard material, or final shipping method. Those details must still be confirmed before production.
A Standard Size Is Not a Production Size
I never approve a production box size only because it matches a standard chart. A production size needs to work with the actual product, actual material, actual box structure, actual insert, actual artwork, and actual sample. A chart may show a common range, but it cannot decide the final inside dimensions, outside dimensions, lid clearance, insert opening, or printable panel space. These decisions require more detailed checking.
This is where many packaging mistakes begin. A buyer may find a standard box size that looks close to the product and assume it will work. In the first moment, the size may seem reasonable. But after the real product is placed inside the sample, the cap may be too close to the lid, the jar may rub against the side wall, the insert may take up more space than expected, or the product may shake during movement. A standard size may be close, but close is not always safe enough for cosmetic packaging.
Cosmetic Products with Similar Names Can Have Very Different Shapes
One reason I do not rely only on standard size charts is that cosmetic product names can be misleading. Two products may both be called serum bottles, but one may be tall and slim with a long dropper, while another may be shorter and wider with a thick cap. Two products may both be 50ml cream jars, but one may have a wide lid, one may have a heavy glass base, and one may have a raised decorative top. Two mascara products may both look long and narrow, but one may have a thick handle, while another may have a tapered cap or irregular tube shape.
When I measure cosmetic packaging, I care about the real outer shape more than the product category name. The box does not pack the word “serum” or “lipstick.” It packs the physical product. The cap, lid, shoulder, base, hinge, handle, pump, dropper, label, and surface finish all become part of the size decision. A standard chart cannot see these details, so I never let the chart replace real measurement.
Product Volume Does Not Decide the Final Box Size
I often see buyers start with product volume because it feels like a clear number. They may say the product is a 30ml serum, a 50ml cream, a 100ml lotion, or a 10ml mascara. This information is useful, but it does not decide the box size. Product volume only tells me how much formula the container holds. It does not tell me the height of the bottle, the diameter of the lid, the thickness of the glass, the shape of the shoulder, the size of the pump, or the depth needed for an insert.
A 30ml serum bottle can be tall and narrow, short and wide, square, round, frosted, glass, plastic, dropper-style, pump-style, or screw-cap style. Each version may need a different box. A 50ml cream jar can have a lid that is much wider than the base, or it can have a thick wall that changes the true outer diameter. A standard chart may estimate a common size, but the real product can easily fall outside that range. This is why I use volume only as background information and always measure the actual container before confirming the box.
Closure Design Can Change the Box More Than Buyers Expect
Closure design is one of the biggest reasons standard cosmetic box size charts can be inaccurate. Pumps, droppers, spray heads, screw caps, flip caps, magnetic caps, lipstick caps, mascara handles, compact hinges, and raised jar lids can all change the space needed inside the box. The closure is often the highest or widest point of the product, even though many people first measure only the main product body.
For a serum bottle, the dropper may add height and need extra top protection. For a lotion bottle, the pump may need clearance so it does not press against the lid. For a cream jar, the lid may be wider than the jar body and may control the box width. For lipstick, the cap may be wider than the base. For mascara, the handle may be thicker than the tube. If I choose a standard box size without checking these closure details, the final box may become too shallow, too narrow, or too tight in the wrong place.
Product Weight Can Make a Standard Box Less Suitable
Standard size charts usually focus on length, width, and height, but I also consider product weight. A box that fits the product dimensionally may still be unsuitable if the product is heavy. This matters for glass serum bottles, foundation bottles, cream jars, facial oil bottles, and premium skincare containers. A heavy product may need stronger paperboard, better bottom support, a more stable insert, or a different box style.
For example, a lightweight plastic tube and a heavy glass jar may have similar outside dimensions, but they should not always use the same packaging structure. The glass jar may put more stress on the bottom panel during handling and shipping. It may also move with more force if the box is loose. If I rely only on a standard chart, I may choose a size that looks correct but does not support the product weight. Good cosmetic packaging needs to fit the product and carry it safely.
Insert Needs Can Completely Change the Final Size
I never decide a cosmetic box size without asking whether an insert will be used. A standard chart may assume the product is placed directly inside the box, but many skincare and makeup products need paperboard inserts, molded pulp trays, EVA foam, foam pads, dividers, or paper cushioning. Once an insert is added, the usable internal space changes. The insert has thickness, shape, folds, cavities, openings, and support points that must be included in the size calculation.
A serum bottle may need an insert to keep it upright and prevent rotation. A cream jar may need a tray that supports the base and controls the lid. A foundation bottle may need extra support because of its weight. A palette may need corner protection. A lipstick or mascara may need a narrow insert to prevent sliding. A standard size chart cannot know which insert the brand will use. That is why I treat the insert as part of the final sizing decision, not something to add after the box size is chosen.
A Standard Chart Cannot Judge Lid Clearance
Lid clearance is another detail a standard chart cannot fully decide. A chart may show a common box height, but it may not tell me whether the product’s highest point will touch the inside of the lid after the product is packed. This is especially important for pumps, droppers, raised jar lids, decorated caps, glass bottles, compact hinges, and products with sensitive top surfaces.
If the box depth is too shallow, the product may press against the lid. A pump may be pushed, a dropper cap may rub, a jar lid may receive pressure marks, or a compact surface may touch the top panel. Even if the box closes, the fit may still be wrong because the product is under pressure. I always check lid clearance with the real product and insert together. A standard height may look close, but only a physical sample can show whether the top space is safe.
A Standard Chart Cannot Judge Product Movement
Correct box size is not only about whether the product fits. The product also needs to stay stable when the box is moved, packed, shipped, opened, and repacked. A standard size chart cannot show whether a product will shake, slide, rotate, tilt, rattle, or hit the inner walls during handling. Movement control is one of the main reasons I test a physical sample instead of relying only on chart numbers.
A mascara may fit inside a standard slim carton but still slide from end to end. A round serum bottle may rotate if the insert is not shaped correctly. A cream jar may shift inside a tray if the cavity is too loose. A compact powder case may hit the box corners during shipping. An eyeshadow palette may move diagonally and increase the risk of powder damage. These movement problems are not visible in a size chart. They only become clear when I place the real product inside the sample and test how it behaves.
Standard Sizes May Not Leave Enough Printable Space
I also think about printable space before accepting a standard size. A box may fit the product, but the outside panels may not be large enough for product name, ingredients, barcode, usage instructions, warnings, batch information, product claims, and brand artwork. This is especially important for lipstick boxes, mascara boxes, sample-size skincare boxes, and slim cosmetic cartons where every panel is limited.
A standard slim carton may look efficient, but once the designer adds the ingredient list, barcode, shade name, usage information, and claims, the layout may become crowded. The text may become too small, the barcode may be hard to place, and the front panel may lose breathing room. Cosmetic packaging should communicate clearly, not only hold the product. When I review a standard size, I always ask whether the box has enough printable area for the information the brand needs to show.
Box Style Changes the Meaning of Standard Size
A standard size does not mean the same thing across different box styles. A folding carton, rigid box, sleeve box, drawer box, and mailer-style box all use space differently. A folding carton is usually thinner and more compact, while a rigid box uses thicker board and wrapped edges. A sleeve box needs enough space for the inner tray to slide inside the outer sleeve. A mailer-style box may need more room for folding panels, cushioning, and shipping protection.
This means the same product may need different dimensions depending on the box structure. A serum bottle packed in a folding carton may need one size. The same bottle placed in a rigid box with an insert may need a larger outside size. The same product shipped in a mailer-style box may need additional protective space. A standard chart may not explain these structural differences. I always match the size to the actual box style before confirming it.
Material Thickness Can Change the Final Internal Space
Material thickness also affects whether a standard size will work. A box with the same outside dimensions can have different inside space depending on whether it uses thin paperboard, thick greyboard, corrugated board, or wrapped specialty paper. This matters because inside dimensions decide whether the product fits, while outside dimensions influence display and shipping.
If I choose a standard outside size without checking material thickness, the inside space may be smaller than expected. A rigid box may feel premium, but the thick board reduces the usable internal area. A corrugated mailer box may need more outside size because the board is thicker and the folding panels take space. A folding carton may have less difference between inside and outside dimensions, but glue seams and flaps still matter. A standard chart cannot replace material-based size calculation.
Slim Cosmetic Products Need More Accuracy Than Charts Usually Provide
Slim products such as lipstick, mascara, eyeliner, brow pencil, lip gloss, and narrow tubes may look simple, but they often need very accurate sizing. These products can slide if the box is too long, scratch if the box is too narrow, rotate if the inner space is too wide, or feel difficult to remove if the fit is too tight. Standard charts may give a common slim carton size, but they cannot judge the cap shape, handle thickness, surface finish, or final packing direction.
For these products, I measure the full closed length, widest cap or handle, body diameter, sealed end, and surface sensitivity. I also test whether the product slides when the box is tilted. A few millimeters can make the difference between a carton that feels neat and one that feels loose or forced. That is why I do not trust a standard slim size until I have checked the real product.
Skincare Bottles Need Custom Checking Around Closures and Shoulders
Skincare bottles often require custom checking because their shapes vary so much. A serum bottle may have a tall dropper, a thick glass base, a wide shoulder, or a decorative collar. A lotion bottle may have a pump that rotates. A mist bottle may have a spray cap that adds height. A facial oil bottle may be small but heavy because of glass thickness. A standard size chart may not account for these differences.
When I measure skincare bottles, I always look at the full product outline. I measure the total height, widest diameter, cap or pump area, shoulder shape, base thickness, and product weight. I also think about whether the label or printed decoration needs protection from rubbing. The standard chart may give me a starting point, but the real container decides the final box size.
Cream Jars Need More Than Diameter and Height
Cream jars may look easy to measure, but I pay close attention to the lid, base, wall thickness, and removal space. A standard chart may show a common jar box size, but a real jar may have a lid that is wider than the body, a heavy glass base, a raised top surface, or a decorative finish that should not touch the lid. If I use a standard size without checking these details, the jar may fit too tightly or sit too deeply inside the box.
For jars, I also consider how the customer will remove the product. A jar can be difficult to lift if it sits too deep in a tray or if there is no finger space. If the box is too loose, the jar may rotate or move during shipping. If it is too tight, the lid may rub or receive pressure marks. A standard chart cannot judge this balance. I need the real jar and a physical sample to confirm it.
Makeup Palettes and Compacts Need Thickness and Corner Testing
Makeup palettes, compact powders, blush cases, and pressed powder products often need more careful testing than a standard chart suggests. These products are usually flat, so buyers may focus on length and width. However, thickness, hinge area, clasp height, raised logo, curved lid, corner protection, and removal space also matter. If the box depth is too shallow, the palette may press against the lid. If the box is too loose, the palette may slide and hit the corners.
Pressed powder products also have hidden fragility. The outer case may look strong, but the powder inside can crack from repeated movement or impact. I always test whether the palette stays stable when the box is tilted, opened, closed, and gently moved. A standard size may match the basic outline, but sample testing shows whether the product is truly protected.
Sample-Size Products Still Need Proper Packaging Space
Sample-size skincare and makeup products can be especially challenging because the box is small but still needs to perform many functions. A mini serum, trial cream, small tube, sample lotion, or travel-size product may still need a readable ingredient list, usage instructions, barcode, batch code, brand artwork, insert space, and product protection. A standard small box may look efficient, but it can become too crowded or too weak for real use.
I do not assume that small products are automatically simple. A mini glass serum may still need lid clearance around the dropper. A small tube may still need space around the sealed end. A trial cream jar may still need removal space. If the box is too small, the product may be hard to pack, the text may be hard to read, and the customer experience may feel poor. Even sample packaging needs real measurement and physical checking.
Shipping Method Can Change the Final Box Size
The shipping method can also make a standard size less reliable. A product sold mainly through retail may need one type of box, while a product shipped directly to customers may need more internal protection, stronger structure, or better movement control. E-commerce shipping can expose a product to more direct handling, so the box may need cushioning, dividers, or a mailer-style structure. A standard cosmetic carton size may not be enough for that shipping environment.
For glass skincare bottles, powder palettes, or products with decorated surfaces, shipping risk can affect the final box dimensions. The box may need more internal support or a slightly different structure to prevent damage. At the same time, the packaging should not become oversized because too much space can create movement and increase shipping volume. I use the standard size only as a reference, then adjust based on the real shipping path.
Real Product Measurement Turns a Chart into a Useful Plan
A size chart becomes useful only when I compare it with the real product. I measure the longest side, widest point, total height, cap or closure area, product weight, lid clearance, insert space, and final packing direction. These measurements help me decide whether the standard size is close enough, whether it needs adjustment, or whether a fully custom size is more suitable.
This step also helps me avoid relying on product photos or volume labels. A photo can show shape, but it cannot show exact size. A volume number can show capacity, but it cannot show closure height or base thickness. Real measurement gives me the practical information needed for box development. Once I have real measurements, the standard chart becomes a reference instead of a guess.
Physical Sample Testing Confirms the Final Production Size
I always see physical sample testing as the final step before approving a cosmetic box size for production. A sample allows me to place the real product inside, close the lid, check the insert, test movement, review printable space, feel the opening experience, and judge the outside proportion. This is the moment when a standard estimate becomes a real packaging decision.
During sample testing, I look for problems that charts cannot show. I check whether the product touches the lid, whether the insert is too tight, whether the product shakes, whether the box closes smoothly, whether the product is easy to remove, and whether the finished size looks balanced. If something feels wrong, I adjust the size before bulk production. This is much safer than discovering the problem after thousands of boxes have been printed and assembled.
Custom Sizing Is Often the More Practical Choice
Sometimes a standard size works well after checking, and I am happy to use it if it truly fits the product. However, I do not force a product into a standard size just to simplify the project. If the product has a special closure, unusual shape, heavy weight, sensitive surface, insert requirement, limited labeling space, or shipping risk, a custom size may be more practical. Custom sizing does not always mean a complicated or expensive package. It often simply means adjusting the box to the real product.
A small adjustment in width can prevent surface rubbing. A small increase in depth can protect a dropper or pump. A slightly different length can reduce sliding. A better internal dimension can make the insert work properly. These changes may seem minor, but they can improve the final packaging experience significantly. In cosmetic packaging, a size that is slightly customized to the product is often more reliable than a standard size that almost works.
Standard Charts Should Guide the Discussion, Not End It
For me, standard cosmetic box size charts are helpful tools, but they should guide the discussion rather than end it. They can help buyers estimate common sizes, compare packaging options, and begin communication with a supplier. However, they cannot decide the final production size because they do not know the real product shape, closure design, weight, insert needs, material thickness, printable space, or shipping method.
I always start with the chart if it helps, but I finish with real measurement and sample testing. This approach gives the buyer the benefit of quick estimation without sacrificing accuracy. The final box size should not only match a common category. It should match the actual skincare or makeup product, the selected box style, the protection method, the artwork needs, and the customer experience. That is how a cosmetic packaging box becomes reliable in real production, not just reasonable on a size chart.
Common Cosmetic Packaging Box Size Mistakes to Avoid
When I review cosmetic packaging box size, I always remind myself that most sizing problems do not happen because the buyer does not care about quality. They usually happen because one small detail is missed too early in the process. A skincare bottle may be measured without its pump. A lipstick may be measured by the body instead of the cap. A cream jar may be sized by the base while the lid is actually wider. A box may be selected from a standard size chart before the insert, lid clearance, printable space, and shipping risk are checked. These mistakes may look small at the measurement stage, but they can become expensive once the dieline is created, artwork is approved, samples are made, or bulk production begins. That is why I like to treat this section as a practical prevention guide. The goal is not to make measuring feel complicated, but to help readers avoid the most common problems before they turn into sample revisions, delayed production, wasted material, or poor customer experience.
Measuring Only the Product Body
One of the first mistakes I try to prevent is measuring only the main product body. This often happens because the body looks like the most obvious part of the product. A serum bottle has a glass body, a lipstick has a tube body, a mascara has a long container body, and a cream jar has a jar body. However, the box does not hold only the clean center section. It holds the entire finished product. The cap, pump, dropper, shoulder, lid, base, decorative ring, hinge, sealed end, handle, and raised surface all become part of the real product size.
When only the body is measured, the box may look correct on a measurement sheet but fail in the sample. A serum bottle body may fit inside the box, but the dropper cap may touch the lid. A cream jar base may fit inside the tray, but the lid may scrape against the insert opening. A lipstick tube may fit through the carton, but the cap may be slightly wider and create friction. A palette may fit in length and width, but the hinge may make one side thicker. I always measure the full product outline because cosmetic packaging is judged by the actual object the customer receives, not by the simplified body shape in a drawing.
Forgetting the Cap, Pump or Dropper
I see caps, pumps, and droppers as some of the most important parts of cosmetic packaging measurement because they often control the final box size. A pump can increase height, create side direction, and become a pressure-sensitive point. A dropper can add height and may have a rubber bulb, metallic cap, glass pipette, or collar that needs protection. A cap may be wider than the container body, especially on lipstick, mascara, foundation bottles, cream jars, and spray products. If these parts are not measured correctly, the box size can become wrong even when the product body measurement is accurate.
For skincare products, forgetting the pump or dropper can create functional risk. If the box depth is too shallow, a pump may be pressed by the lid, or a dropper cap may rub against the top panel. For makeup products, forgetting the cap can create surface damage. A glossy lipstick cap, metallic mascara handle, or printed foundation cap may show scratches if the fit is too tight. I always measure the product in its fully closed and final assembled condition because that is how it will be packed, shipped, displayed, and opened.
Ignoring the Widest Point of the Product
Another common mistake is measuring the product from the most convenient angle instead of finding the true widest point. Cosmetic products often have shapes that are not perfectly straight. A bottle may be wider at the shoulder than at the center. A jar lid may extend beyond the jar body. A tube seal may be wider than the flexible body. A compact case may have a hinge, clasp, or rounded corner that adds width. If I measure only the front view or only the label area, I may miss the part that actually decides whether the product can fit safely inside the box.
The widest point is important because it affects insertion, side clearance, insert opening, and surface protection. If the box width is based on a smaller section, the product may scrape when packed, press against the carton wall, or become difficult to remove. This can be especially damaging for products with frosted glass, metallic caps, matte coatings, soft-touch finishes, printed logos, or glossy surfaces. I usually turn the product in my hand and measure it from different directions because the widest point is not always the most visible point.
Ignoring the Highest Point Before Choosing Box Depth
I also watch carefully for mistakes around height. Many buyers measure the general height of the product but forget the true highest point. This can happen with pumps, droppers, spray heads, raised jar lids, compact hinges, decorative caps, and uneven closures. If the highest point is missed, the box depth may become too shallow, and the product may touch the inside of the lid when the box is closed.
A shallow box can create pressure marks, lid deformation, poor closure, product scratches, or a tight opening experience. The box may technically close, but it may close because the product is being pressed, not because the depth is correct. I always want the product to have proper top clearance. The highest point should sit safely below the lid, especially when the product has a pump, dropper, glass cap, decorative lid, or sensitive surface. A good cosmetic box should protect the product from above, not squeeze it into place.
Measuring an Unfinished Product Sample
A sizing mistake can also happen when the buyer measures a product before it is fully assembled. Sometimes the final cap has not been confirmed, the pump has not arrived, the tube is not filled, the jar lid is temporary, or the compact case does not yet include the final hinge, mirror, label, or raised decoration. These early product samples can help start the packaging discussion, but they should not become the final sizing reference unless everyone understands that the measurement is temporary.
A filled cosmetic tube can become thicker than an empty tube. A final pump can add more height than a temporary cap. A glass jar with its final lid may be wider than the sample lid. A foundation bottle with a decorative collar may need more space around the neck. A palette with a raised logo may need more top clearance. I always prefer to confirm box size with the real final product, or at least mark the measurement clearly as provisional. This prevents the packaging team from building the dieline around a product version that will later change.
Confusing Product Size with Box Size
Product size is not the same as box size, and I think this is one of the most important lessons for buyers. Product size tells me the actual dimensions of the skincare or makeup item. Box size must include product fit, insert space, lid clearance, material thickness, folding structure, removal space, and sometimes protection for shipping. If a buyer sends a product measurement and expects the box to be exactly that size, the final packaging will usually become too tight.
For example, if a cream jar has a 60 mm lid diameter, the inside width of the box cannot simply be 60 mm. The jar needs clearance, and the tray or insert may also need space. If a serum bottle is 120 mm tall, the box depth may need additional top clearance for the dropper or pump. If a lipstick is 21 mm wide at the cap, the carton should not be designed with only 21 mm of internal width. I always separate product size from packaging size because the box is not a shell that touches every surface of the product. It is a protective and usable structure around the product.
Confusing Inside Dimensions with Outside Dimensions
Confusing inside dimensions and outside dimensions can create serious problems. Inside dimensions decide whether the product fits inside the box. Outside dimensions affect shelf display, shipping carton planning, material usage, storage, and visual proportion. A buyer may think in outside dimensions because those are easier to imagine, but production teams need inside dimensions to confirm real product fit. If this difference is not clear, the box may look right from the outside but fail internally.
This mistake becomes more serious when the box uses thicker material or a more complex structure. A rigid box with greyboard and wrapped paper loses more internal space than a simple folding carton. A mailer-style box may have corrugated thickness and folded panels that reduce usable space. A sleeve box has an inner tray and an outer sleeve, so there are multiple layers to consider. I always ask whether the measurement refers to the product, the inside box, the outside box, the insert opening, or the shipping carton. Clear naming prevents avoidable confusion.
Forgetting Material Thickness
Material thickness can quietly change the final fit, and it is often underestimated. Paperboard, greyboard, corrugated board, laminated paper, and wrapped specialty paper all have physical thickness. This thickness affects the difference between inside and outside dimensions. A box that appears large enough externally may have less internal space after the material is included. If the design is very tight, even a small difference in board thickness can affect how the product fits.
This is especially important for rigid boxes, sleeve boxes, drawer boxes, and mailer-style packaging. A rigid box may feel premium because of its thick structure, but that same thickness reduces usable space. A corrugated mailer box may need more outside size because the board and folds take up room. A folding carton may be thinner, but glue seams and folding flaps still matter. I always consider material thickness before approving the dieline because the physical board is part of the final measurement, not something separate from it.
Forgetting Insert Thickness
Another very common mistake is forgetting the space taken by inserts. Paperboard inserts, molded pulp trays, EVA foam, foam pads, dividers, and paper cushioning all occupy space inside the box. If the box is sized around the product alone and the insert is added later, the final fit may become too tight, too shallow, or difficult to assemble. The insert may bend, the product may press against the lid, or the customer may struggle to remove the item.
I prefer to treat the product and insert as one complete internal system. A serum bottle may need a paperboard platform that lifts the bottle higher. A cream jar may need a molded pulp tray with wall thickness. A foundation bottle may need EVA support because of its weight. A palette may need edge protection and a lifting gap. A lipstick or mascara may need a narrow insert to stop sliding. If the insert is not planned at the sizing stage, the final package may not work even if the product and empty box seem compatible.
Leaving No Lid Clearance
Leaving no lid clearance is a mistake that can create both functional and visual problems. The product should not touch the inside of the lid when the box is closed. This matters for pumps, droppers, caps, raised lids, glass bottles, compact hinges, and decorated product surfaces. If the product touches the lid, the box may close under pressure, and that pressure can create marks, scratches, deformation, or a forced closing feeling.
I always check lid clearance with the real product inside the sample. I close the box gently, open it again, and look for pressure marks or resistance. If a pump is pressed, a dropper cap rubs, a jar lid touches the top panel, or a compact surface leaves a mark, the box depth needs to be adjusted. Lid clearance is not wasted space. It is the protective space that allows the product to sit safely inside the box.
Making the Box Too Tight
A tight box may look precise in theory, but it can cause many problems in real use. If the product is too tightly packed, it may be difficult to insert, difficult to remove, and vulnerable to pressure during shipping. A tight carton can rub against a lipstick cap, squeeze a tube, press a pump, mark a jar lid, or make a compact case feel trapped. During production, a tight fit can also slow packing because each unit needs to be handled carefully.
I like a controlled fit, not a forced fit. The product should feel secure, but it should not require pressure to enter or leave the box. This distinction matters because paper packaging has normal production tolerance. Folding, gluing, lamination, material thickness, and manual assembly can create slight variations. If the approved sample is already too tight, bulk production may become inconsistent. I always leave enough practical clearance so the package can work across real production, not only in one perfect sample.
Leaving Too Much Empty Space
The opposite mistake is leaving too much empty space. A loose box may seem safer at first, but it can allow the product to move, shake, rotate, or hit the inner walls during handling and shipping. This can damage labels, glass surfaces, caps, pumps, powder palettes, printed product finishes, inserts, and the inside of the carton. It can also make the package feel less premium when the customer holds it.
I pay attention to this especially with mascara, eyeliner, lip gloss, slim tubes, round bottles, cream jars, compact cases, and palettes. Long narrow products can slide from end to end. Round bottles can rotate. Jars can shift inside trays. Palettes can hit corners and risk powder damage. A good cosmetic box should not be oversized simply to avoid tightness. It should have controlled clearance, meaning enough space for protection and removal but not so much space that the product loses stability.
Choosing a Box Only from a Standard Size Chart
Standard cosmetic box size charts can be helpful at the beginning, but they should not decide the final production size. A chart cannot know the real product shape, cap size, pump height, jar lid diameter, product weight, insert design, material thickness, shipping method, or artwork needs. It can help estimate a size range, but it cannot confirm whether the final package will work.
I often see this mistake when buyers assume all 30 ml serum bottles, 50 ml cream jars, lipstick boxes, or mascara cartons use similar dimensions. In reality, two products with the same volume can have very different outer shapes. One serum bottle may be tall and narrow with a long dropper, while another may be short and wide with a thick cap. One lipstick may have a simple straight cap, while another may have a decorative wider shell. I use standard charts only as references. The final decision must come from real measurement and sample testing.
Ignoring Product Movement During Handling and Shipping
A product that fits inside the box can still move too much during handling and shipping. This is a mistake because a static fit is not the same as a stable fit. The product will be tilted, packed, stacked, transported, opened, and sometimes repacked. If it shakes inside the box, it can damage the product surface or create a poor customer impression. If it is too tight, it can suffer pressure during transport.
I always test movement with the real product inside the sample. I gently tilt the box, shake it lightly, open and close it, remove and repack the product, and check whether it stays stable. If I hear rattling, feel sliding, or see the product shift after opening, I know the internal fit needs improvement. Movement testing helps confirm whether the box size, insert, and clearance work together in real life.
Ignoring the Customer Removal Experience
A box can pass the fit test and still fail the customer experience if the product is difficult to remove. This happens when the insert is too tight, the box depth is too deep, the product sits too low, or there is no finger space, lifting gap, notch, or pull tab. For cream jars, compact powder, palettes, glass bottles, and small smooth products, removal space is especially important.
I always ask whether the customer can take the product out naturally. If the customer needs to shake the box, press the insert, pull awkwardly, or touch the product surface too much, the packaging may feel poorly designed. Good cosmetic packaging should hold the product securely but still allow it to be removed comfortably. Size is not only about fitting the product inside; it is also about letting the customer experience the product smoothly.
Forgetting Printable Space for Labeling and Artwork
A box that fits the product is not complete if the outside panels do not have enough printable space. Cosmetic packaging often needs to include product name, ingredients, barcode, usage instructions, warnings, batch information, claims, shade details, and brand artwork. If the box is too small or too narrow, the information may become crowded, difficult to read, or poorly arranged.
This problem often appears with lipstick boxes, mascara boxes, sample-size skincare boxes, slim cartons, and small tubes. The product may fit, but the text may become too small, the barcode may have no clean placement, or the front panel may lose visual balance. I always consider printable space before confirming box size because cosmetic packaging needs to communicate clearly. The customer should be able to understand the product without struggling to read the package.
Approving Artwork Before the Final Dieline Is Confirmed
Approving artwork before the final dieline is confirmed can create unnecessary revisions. Artwork depends on the dieline because the dieline defines the panel size, fold lines, glue areas, flaps, and printable surfaces. If the box size changes after artwork approval, the design may need to be adjusted. The logo placement, ingredient text, barcode position, foil stamping area, embossing location, warning copy, and product claims can all be affected.
I prefer to confirm the structure first and then lock the artwork. If the product fit, insert, lid clearance, movement control, or outside dimensions are still being adjusted, the dieline should not be treated as final. This avoids a situation where the design looks complete but the box structure still needs changes. For cosmetic packaging, structure and artwork are connected. The box must fit the product, and the artwork must fit the box.
Ignoring Production Tolerance
Packaging production has small tolerances, and ignoring this can make a design too fragile in bulk production. Paperboard thickness, cutting, creasing, folding, gluing, lamination, wrapping, and manual assembly can create slight differences between units. This does not mean the production is poor. It simply means paper packaging is a physical product, and the structure needs practical allowance.
If the box has no tolerance, a small variation can make the product hard to insert or remove. A glue seam may reduce internal space slightly. A laminated carton may fold differently. A rigid box may have small variation around wrapped edges. An insert may sit slightly higher or lower. I always consider tolerance when approving a close fit because the final box must work consistently across production, not only in one perfect sample.
Using Product Photos Instead of Physical Measurement
Product photos are useful for understanding appearance, but they cannot replace physical measurement. A photo can hide thickness, distort proportion, or make the product look narrower than it really is. It may not show the true widest point, highest point, weight, base thickness, pump direction, lid diameter, or tube seal width. If a box is designed only from photos, the sample may fail when the real product arrives.
I use photos as supporting information, but I never rely on them as the final measurement source. I need actual dimensions, and when possible, I prefer to test the real product inside a physical sample. Cosmetic products are often small and detailed, so the difference between a photo impression and a real measurement can be significant. Real measurement is the foundation of reliable packaging size.
Not Rechecking Measurements Before Sampling
Before sampling, I like to recheck the main measurements because this is the last practical moment to catch mistakes before the sample is made. I confirm the product length, width, height, widest point, highest point, cap or pump size, inside dimensions, outside dimensions, insert space, lid clearance, and unit of measurement. This step may feel repetitive, but it can prevent many avoidable sample problems.
Once the sample is made, any correction may require a revised dieline, adjusted insert, new artwork layout, or another sample round. That costs time. A short measurement review before sampling is much easier than fixing a wrong box afterward. I see this recheck as a practical quality-control step, not just a technical formality.
Not Testing the Real Product Inside the Sample
One of the most serious mistakes is approving the box size without testing the real product inside the physical sample. Measurements and dielines are important, but the sample reveals the real packaging experience. It shows whether the product fits, whether the lid closes, whether the insert holds, whether the product moves, whether the surface rubs, whether the artwork panels feel balanced, and whether the product can be removed comfortably.
When I test a sample, I do more than place the product inside once. I close the box, open it again, tilt it gently, shake it lightly, remove the product, repack it, and check for pressure marks, surface scratches, movement, and removal difficulty. This gives me a much more reliable view of whether the size is ready for production. A sample should prove the size, not merely display it.
Not Recording the Approved Size Clearly
After the size is confirmed, I also think it is a mistake not to record the approved size clearly. The final product size, inside box size, outside box size, material thickness, insert opening, lid clearance, measurement unit, dieline version, and sample approval details should be clearly documented. If these details are not recorded, confusion can return later during production, reorder, artwork update, or supplier communication.
This is especially important for brands with multiple SKUs, shade ranges, product sizes, or repeated orders. A lipstick range may have many shades but one box structure. A skincare line may have several bottle sizes with similar artwork. A small dimension change can affect fit and artwork. When the approved size is recorded clearly, future production becomes easier to control.
Avoiding Size Mistakes Starts Before Production
For me, the best way to avoid cosmetic packaging box size mistakes is to slow down before sampling and production. I measure the full product, including the cap, pump, dropper, widest point, highest point, and final assembled condition. I separate product size, inside box size, and outside box size. I include insert thickness, lid clearance, printable space, movement control, removal comfort, unit conversion, material thickness, and production tolerance. I also make sure the final dieline is confirmed before artwork is locked.
These details may seem like extra work at the beginning, but they save time, cost, and frustration later. A wrong box size can affect product protection, artwork layout, sample approval, bulk production, shipping, and customer experience. A correct size gives the product a better fit, the packaging a cleaner presentation, and the buyer more confidence before production begins. In my view, careful sizing is not a small technical step. It is one of the foundations of reliable cosmetic packaging.
Final Checklist for Measuring Skincare and Makeup Products
Before I finalize a cosmetic packaging box size, I like to bring every measurement detail back to a practical checklist. This helps me review the full process in a clear way instead of only checking one number such as length, width, or height. Skincare and makeup products are often small, but their packaging size decisions can be surprisingly detailed. A pump may add height, a cap may change the widest point, a jar lid may need extra clearance, an insert may reduce the usable inside space, and a slim carton may not have enough room for readable labeling. This final checklist helps me make sure the box is not only close in size, but also practical for sampling, packing, shipping, display, and customer use.
| Checklist Item | What to Confirm |
| Real product sample | Measure the actual product sample instead of relying only on photos, product volume, 3D renderings, or catalog dimensions. A 30ml serum, 50ml cream jar, lipstick, mascara, or compact powder can have very different packaging needs depending on the real container shape, closure, material, and final filled condition. |
| Longest side | Confirm the true product length in the final packing direction. For lipstick, mascara, eyeliner, tubes, palettes, and skincare bottles, this means measuring the full end-to-end size, not only the visible body or label area. |
| Widest side | Measure the widest diameter, cap edge, jar lid, bottle shoulder, tube seal, compact hinge, palette corner, or body point. The widest part is not always the main product body, so I always check the product from more than one angle before confirming the box width. |
| Total height | Include the cap, pump, dropper, spray head, raised lid, compact hinge, decorative closure, or any raised structure. This measurement is especially important because it affects box depth and helps prevent the product from pressing against the inside of the lid. |
| Product weight | Check whether the product weight requires stronger paperboard, a more stable insert, reinforced bottom support, molded pulp, EVA foam, or a different box style. Heavy glass bottles, foundation bottles, cream jars, and skincare containers often need more support than lightweight plastic tubes or slim makeup products. |
| Insert space | Reserve enough space for paperboard inserts, molded pulp trays, EVA foam, foam pads, dividers, paper cushioning, or internal platforms. The product should not be measured alone if an insert will be used, because the insert takes up real space inside the box. |
| Lid clearance | Make sure the product does not touch the inside of the lid when the box is closed. This matters for pumps, droppers, caps, raised jar lids, glass bottles, decorated surfaces, compact cases, and any product top that could be scratched, pressed, or marked during handling and shipping. |
| Product removal | Confirm the product can be taken out easily without shaking the box, bending the insert, pulling awkwardly, or touching the product surface too much. Jars, palettes, compact powder, glass bottles, and smooth cosmetic containers often need finger space, a lifting gap, a notch, or a better tray height. |
| Movement control | Test whether the product shifts, rattles, rotates, slides, or hits the inner walls when the box is gently tilted, lightly shaken, opened, closed, and repacked. A good cosmetic box should control movement without making the product feel squeezed or trapped. |
| Label area | Make sure the box has enough printable space for the product name, ingredients, barcode, usage instructions, warnings, batch information, claims, shade details, and brand artwork. This is especially important for lipstick boxes, mascara boxes, sample-size skincare boxes, and slim cosmetic cartons. |
| Unit accuracy | Confirm whether the measurements are in inches or millimeters, and check conversions carefully when both units are used. I also confirm whether each number refers to product size, inside box size, outside box size, insert opening, or shipping carton size. |
| Physical sample | Test the final sample before production with the real product inside. Check product fit, insert performance, lid closure, lid clearance, movement, removal, surface protection, printable space, and outside proportion before approving the size for bulk production. |
This checklist is useful because cosmetic packaging size is not only a measurement question. It is also a product protection question, a production efficiency question, a labeling question, and a customer experience question. A box can be long enough but still too narrow at the cap. It can be wide enough but still lack space for an insert. It can close properly once, but still press against the product after stacking or shipping. It can fit the product inside, but still leave the customer struggling to remove it. These details are why I prefer to review the complete packaging situation before approving the dieline.
I also use this checklist to reduce communication mistakes between the buyer, designer, packaging supplier, and sample team. When every measurement is clearly reviewed, it becomes easier to understand whether the project is ready for a dieline, whether the insert still needs adjustment, whether the artwork has enough panel space, and whether the physical sample truly reflects the final product. This is especially helpful for brands with multiple SKUs, different shades, several bottle sizes, or similar-looking products that may still need slightly different box dimensions.
Before production, I always want the real skincare or makeup product to be tested inside the real sample box, with the intended insert, packing direction, closure, and final box style. I want to close the box, open it, gently tilt it, check whether the product moves, remove the product, place it back, and look for pressure marks, scratches, lid contact, tightness, or excessive empty space. This hands-on check helps me confirm whether the packaging size works in real use, not only on a measurement sheet.
A well-measured cosmetic packaging box should fit the real product, protect the most delicate details, support the insert, leave proper lid clearance, control movement during handling and shipping, provide enough printable space, and allow the customer to remove the product comfortably. When these points are confirmed before bulk production, the final packaging becomes more reliable, more professional, and more aligned with the product’s value.
When I measure skincare and makeup products for cosmetic packaging boxes, I always remind myself that the right box size is not decided by guesswork, product volume, or a standard size chart alone. A cosmetic box needs to fit the real product, protect the most delicate details, support the insert, leave enough lid clearance, control movement during handling and shipping, provide enough printable space, and still feel balanced when the customer opens it. This is why I see measurement as one of the most important steps before dieline design, sample approval, and bulk production.
A good cosmetic packaging box should not be too tight, too loose, too shallow, too deep, or too crowded with artwork. It should be measured around the real product in its final condition, including the cap, pump, dropper, jar lid, tube seal, compact hinge, raised surface, product weight, and final packing direction. These small details may not look important at the beginning, but they often decide whether the box closes smoothly, whether the product stays stable, whether the label remains clean, and whether the customer can remove the product comfortably.
I also believe that box size should be planned together with structure and presentation. Inside dimensions decide whether the product fits safely. Outside dimensions affect shelf display, shipping carton planning, material usage, and visual proportion. Insert space affects protection and stability. Lid clearance protects pumps, droppers, caps, glass bottles, and decorated surfaces. Printable space affects how clearly the product name, ingredients, barcode, usage instructions, warnings, batch information, claims, and brand design can appear on the box. When all of these details are considered together, the packaging becomes much more reliable.
Physical sample testing is the final step I always value before production. Measurements and dielines are necessary, but a real sample shows how the box performs in hand. I want to place the real product inside the sample, close the lid, open it again, gently tilt the box, check movement, test product removal, review lid clearance, and see whether the finished package feels balanced. This process helps catch problems before they become production delays, wasted materials, or customer complaints.
For brands that work with skincare, makeup, and beauty products, careful box measurement is not only a technical task. It is part of product protection, brand presentation, production efficiency, and customer experience. A well-measured box helps the product look more professional, arrive in better condition, and feel more thoughtfully packaged from the first touch. When the size is planned correctly before production, the final packaging can support both the product’s function and its perceived value.
If you are looking for a long-term paper box packaging supply partner, BorhenPack can help develop custom cosmetic packaging boxes based on real product size, structure requirements, insert needs, printing artwork, and production goals. From skincare boxes and makeup cartons to rigid boxes, folding cartons, paper inserts, and custom printed packaging solutions, I believe the best results come from careful measurement, clear communication, and physical sample confirmation before bulk production. A reliable packaging project starts with the right size, and the right size starts with understanding the real product.