
The cost of custom candle boxes is rarely decided by one single factor. When I review candle packaging quotations, I usually look beyond the box size, printed artwork, or overall appearance because the final price is influenced by many connected elements. Box structure, paper material, board thickness, candle weight, printing method, surface finishing, inserts, order quantity, tooling, sampling, packing, and shipping protection can all affect the total cost. This is why two candle boxes that look almost identical in a photo may receive very different quotations in real production.
The cost of custom candle boxes depends on factors such as box structure, materials, size, printing, finishing, inserts, order quantity, sampling, and shipping protection, all of which affect production complexity, packaging performance, and final unit cost.
One of the most common misunderstandings I see is comparing packaging only by appearance. A lower quotation may use thinner board, simpler printing, weaker inserts, fewer finishing processes, or more basic export packing. A higher quotation may include stronger materials, stricter color control, better structural support, more reliable product protection, or higher production consistency. Without understanding these details, it is easy to compare quotations unfairly or choose a packaging solution that appears cost-effective at first but creates problems later.
For candle packaging, cost should never be viewed separately from performance. Candles are often packed in glass jars, ceramic vessels, metal tins, gift sets, and premium retail packaging, which means the box must do more than simply hold the product. It may need to protect fragile containers, support transportation, improve shelf presentation, create a better unboxing experience, and maintain consistency across repeat orders. Every packaging decision can influence both the cost and the overall effectiveness of the final product presentation.
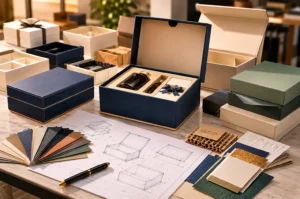
In this guide, I will explain the main factors that affect the cost of custom candle boxes in a practical and easy-to-understand way. My goal is not simply to discuss pricing, but to help you understand where packaging costs come from, which specifications truly influence quality, and where costs can often be optimized without sacrificing performance. Once these factors become clear, it becomes much easier to evaluate quotations, compare suppliers, and make packaging decisions with greater confidence.
Box Structure
Box structure is usually the first cost factor I pay attention to when evaluating custom candle boxes, because it quietly affects almost every part of the project. Many buyers first think about size, color, or logo finishing, but in real production, the structure often decides how much paperboard is needed, how many production steps are involved, whether the box can be shipped flat, how much manual assembly is required, and how stable the final packaging will be during retail display or international shipping. This is why two candle boxes with similar dimensions can receive very different quotations. The difference is often not only in the material, but in the way the box is built.
Simple Folding Carton Candle Boxes
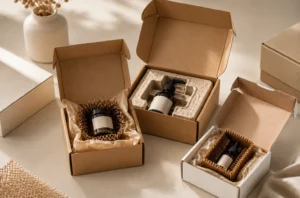
Simple folding carton candle boxes are usually one of the most cost-efficient structures because they are made from paperboard that can be printed, laminated, die-cut, creased, folded, and glued through a relatively efficient production process. I often see this structure used for single candle jars, lightweight candle products, retail shelf packaging, and brands that need customized printing without making the packaging cost too high. Since folding cartons can normally be shipped flat before packing, they also help reduce storage space and transportation volume compared with fully assembled rigid boxes.
From a cost point of view, folding cartons are easier to control because the production path is more standardized. The box may still look attractive with good artwork, matte lamination, foil stamping, or a clean window design, but the basic structure does not usually require heavy board wrapping or complicated hand assembly. However, I would not treat folding cartons as suitable for every candle project. If the candle jar is heavy, fragile, or positioned as a luxury gift product, a basic folding carton may need stronger paperboard, an insert, or an upgraded structure to provide enough support. Once those details are added, the cost will naturally move higher.
Rigid Candle Boxes
Rigid candle boxes usually cost more because they are made with thicker greyboard and wrapped with printed paper, specialty paper, or textured paper. Unlike a simple folding carton, a rigid box is not only printed and folded. It often needs board cutting, greyboard forming, paper wrapping, corner control, edge alignment, and final assembly. I see rigid boxes as a more premium structure because they create a stronger hand feel and a more stable shape, which can make a candle product feel more valuable before the customer even opens the box.
The higher cost of rigid candle boxes comes from both material and process. Thicker greyboard increases raw material usage, while wrapping and forming require more time and tighter quality control. Corners must be clean, lids must fit properly, and the surface should not show wrinkles, bubbles, glue marks, or misalignment. These small details are easy to ignore when looking at product photos, but they matter a lot in real production. For luxury candle brands, boutique home fragrance collections, and gift-ready candle products, this extra cost can be reasonable because the packaging supports a higher retail price and stronger brand perception.
Drawer Candle Boxes
Drawer candle boxes usually cost more than basic folding cartons because they are built with two functional parts: an outer sleeve and an inner tray. The cost is not only about using more material. The structure also requires accurate sizing so the tray can slide smoothly without being too loose or too tight. I pay attention to this point because the sliding experience directly affects how the customer feels about the packaging. A drawer box that moves smoothly can feel refined and gift-like, while a poorly fitted drawer can make the packaging feel cheap even if the material looks expensive.
In production, drawer candle boxes require more attention to dimensional tolerance, board thickness, wrapping accuracy, and insert matching. If the candle jar is heavy, the inner tray may need stronger support so it does not bend or deform during handling. If the box is used for a candle set, the tray may also need custom compartments or inserts to keep each candle in position. These extra structural requirements increase production time and quality control work. This is why drawer boxes are often better suited for premium candle sets, seasonal gift packaging, and boutique collections rather than the lowest-cost candle packaging projects.
Magnetic Closure Candle Boxes
Magnetic closure candle boxes are usually positioned as premium packaging, and their cost reflects that. This structure often combines rigid board construction with embedded magnets, accurate lid alignment, and a controlled closing experience. I usually consider this type of box when the packaging needs to create a strong unboxing impression, especially for luxury candles, holiday gift sets, wellness collections, or high-end home fragrance products.
The reason magnetic closure boxes cost more is that the structure has less room for error. The magnet position, board thickness, hinge area, lid shape, and closing strength all need to work together. If the magnets are not placed accurately, the box may not close neatly. If the board is too thin, the box may feel weak. If the hinge is not formed properly, the opening experience may feel unstable. These details increase both production difficulty and inspection requirements. From my perspective, magnetic closure packaging is not only a box style; it is part of the customer’s first physical interaction with the candle brand, so the added cost should be connected to the product’s price level and brand positioning.
Sleeve Candle Boxes
Sleeve candle boxes can be either economical or premium, depending on the design. A simple printed sleeve over a folding carton can be a smart way to add branding, improve shelf presentation, or create a more layered opening experience without choosing a fully rigid structure. In this case, the sleeve adds some material and die-cutting cost, but it may still remain relatively cost-friendly compared with a rigid gift box.
However, sleeve structures can become more expensive when the fit needs to be very precise or when the sleeve is paired with a rigid tray, specialty paper, foil stamping, embossing, or spot UV. I often remind buyers that a sleeve looks simple, but its tolerance is important. If the sleeve is too tight, the customer may struggle to open it. If it is too loose, the packaging may feel poorly made. For candle packaging, this matters even more when the product inside is glass, heavy, or part of a gift set. A well-designed sleeve can control cost and improve presentation at the same time, but it still needs proper structural planning.
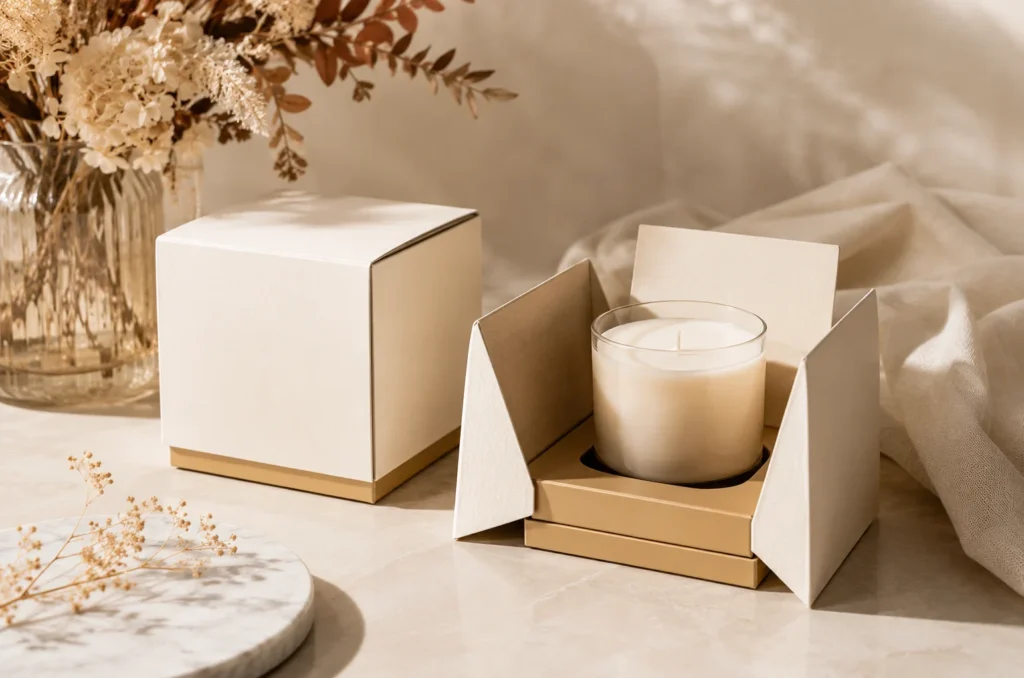
Lid and Base Candle Boxes
Lid and base candle boxes are common for gift-style candle packaging because they create a clear opening experience and a stronger sense of presentation. This structure usually includes a separate top lid and bottom base, which means more material, more forming work, and more attention to fit. I often see this structure used for single premium candles, candle gift sets, and products that need to look suitable for retail gifting.
The cost of lid and base boxes depends heavily on board thickness, box depth, lid fit, wrapping paper, and whether an insert is needed inside. A shallow lid may be easier to produce, while a deep lid can create a more luxurious look but may also require more careful forming. If the box is too tight, it may be hard to open. If it is too loose, the lid may move during shipping or retail handling. These fitting details are part of the hidden cost behind this structure. For buyers, the important point is that lid and base boxes are not expensive only because they look premium; they cost more because the structure needs to feel stable, balanced, and repeatable in bulk production.
Candle Gift Box Structures
Candle gift box structures usually cost more because they are designed to do more than protect the candle. They need to support presentation, gifting value, product arrangement, and sometimes a complete unboxing experience. A candle gift box may include a rigid base, sleeve, magnetic closure, ribbon pull, window area, multiple compartments, insert tray, or special opening direction. Each of these elements adds material usage, production steps, and assembly work.
When I evaluate candle gift packaging, I usually think about whether the structure supports the purpose of the product. A holiday candle set may need multiple compartments and a strong insert. A luxury single candle may need a rigid box with a smooth opening feel. A wellness candle collection may need natural-looking paper and a simple but stable structure. The more the structure is customized around presentation and product arrangement, the more the cost will increase. That does not mean the cost is wasted, but it should be intentional. Good gift packaging should add value to the candle, not simply add complexity for decoration.
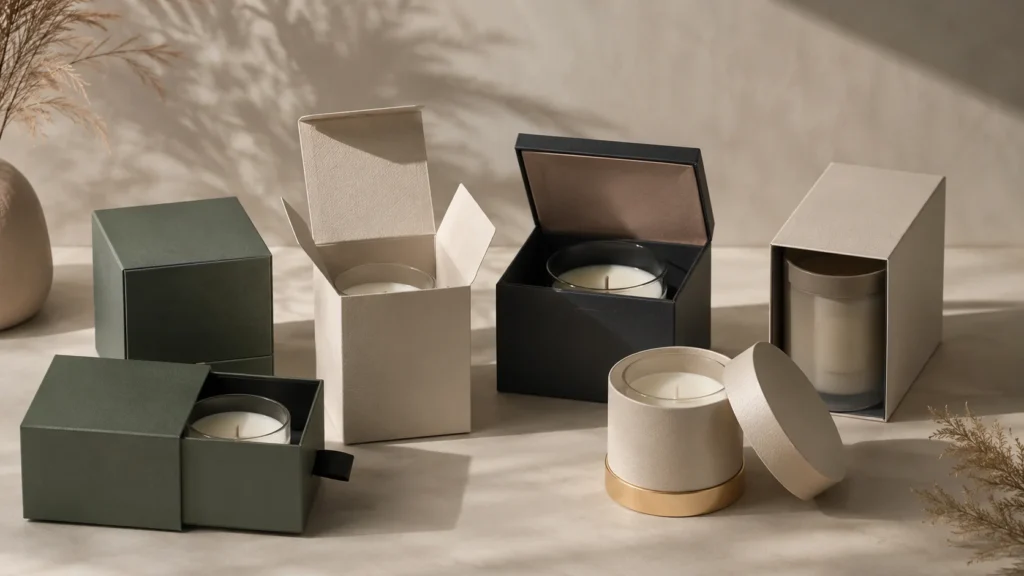
Why Structure Changes the Final Cost
The main reason box structure changes cost is that each structure creates a different production path. A folding carton can often be produced efficiently and shipped flat, while a rigid box or magnetic closure box may require thicker materials, forming, wrapping, assembly, and more inspection. A drawer box needs smooth sliding tolerance. A lid and base box needs accurate fitting. A candle gift box may need inserts, compartments, or special opening details. These are not only design choices; they are cost decisions.
When I compare custom candle box pricing, I do not only ask what the box looks like. I ask how it is made, how many parts it has, whether it can protect the candle properly, whether it needs manual work, and whether the structure can remain consistent during bulk production. A well-chosen structure can help control cost while still giving the packaging the right level of protection, brand value, and customer experience. For most buyers, the best structure is not always the cheapest or the most luxurious one. It is the structure that matches the candle’s weight, retail price, sales channel, brand positioning, and expected order quantity.
Material Type and Thickness
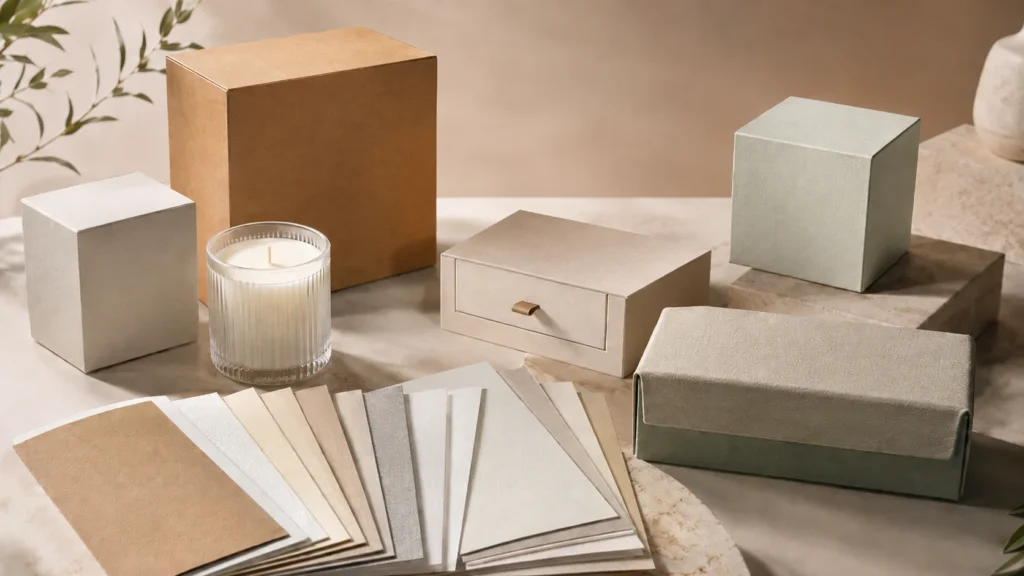
Material type and thickness are two of the most important cost factors in custom candle boxes because they influence the box from both a technical and visual point of view. When I evaluate candle packaging, I do not treat material as a simple background choice. I see it as the foundation that decides how strong the box feels, how clearly the artwork prints, how well the box protects the candle, how premium the packaging appears, and how stable the product remains during handling, storage, retail display, and shipping. This is why two candle boxes with the same structure and size can still have very different prices if they use different paper materials or different board thicknesses.
Standard Paperboard
Standard paperboard is often the most practical starting point for many custom candle boxes because it gives buyers a balanced combination of cost, printability, structure, and production efficiency. I often see this material used for folding carton candle boxes, single candle jar boxes, retail candle packaging, private-label candle products, and seasonal candle lines where the packaging needs to look professional without becoming too expensive. Its biggest advantage is that it works well with common production processes such as printing, lamination, die-cutting, creasing, folding, and gluing, which makes the cost easier to control in bulk production.
However, I do not like to describe standard paperboard as a cheap or basic choice, because the final result depends heavily on paper grade and thickness. A smooth, stiff, and clean paperboard can still create a candle box that looks refined and reliable, especially when the artwork is well designed and the printing is well controlled. On the other hand, a lower-grade board may look acceptable in a quote, but it can lead to weak edges, poor folding performance, dull printing, or a box that does not hold its shape well after packing. For this reason, I always look at whether the paperboard matches the candle’s weight, the box size, and the brand’s retail positioning before deciding whether it is truly cost-effective.
Kraft Paper
Kraft paper is often chosen when a candle brand wants to communicate a natural, eco-conscious, handmade, rustic, or wellness-oriented image. I often connect kraft paper with soy wax candles, aromatherapy candles, handmade candle collections, minimalist candle brands, and products that want to feel warm and honest rather than overly polished. The natural paper tone can give the packaging a more organic character, which is difficult to achieve with glossy coated paper or highly decorated luxury packaging.
From a cost perspective, kraft paper is not always as simple as many buyers expect. Some basic kraft materials can be economical, but stronger kraft paper, cleaner kraft surfaces, thicker kraft board, or certified kraft materials can increase the cost. Printing is also an important detail. Because kraft paper has a natural brown or unbleached background, ink colors will not appear the same way as they do on white coated paper. White ink, light colors, gradients, and photographic artwork may need extra planning or may not be suitable at all. When I evaluate kraft candle boxes, I always consider whether the brand design is built around the natural character of the material. If the design supports the paper, kraft packaging can look intentional and valuable. If the design fights against the paper, the final result can look less refined even if the material itself is appropriate.
Coated Paper
Coated paper is a common choice when candle packaging needs a cleaner, sharper, and more retail-ready appearance. I often see it used for custom candle boxes that rely on detailed artwork, full-color printing, refined logos, product illustrations, gradient backgrounds, or strong shelf impact. The smooth coated surface allows ink to sit more evenly, which can make colors appear brighter, lines appear sharper, and the overall packaging look more controlled.
The cost of coated paper is usually higher than some basic paperboard options, but the value often comes from its printing performance. For candle products sold in boutiques, department stores, gift shops, online marketplaces, or premium retail channels, the box is often the first visual proof of quality. If the packaging looks dull or inconsistent, customers may question the candle before they ever smell it. This is why I see coated paper as a good choice when brand image depends heavily on visual clarity. Still, it is not always the best answer. If the candle brand wants a natural, handmade, or understated style, an uncoated or textured material may express the brand better than a polished coated surface.
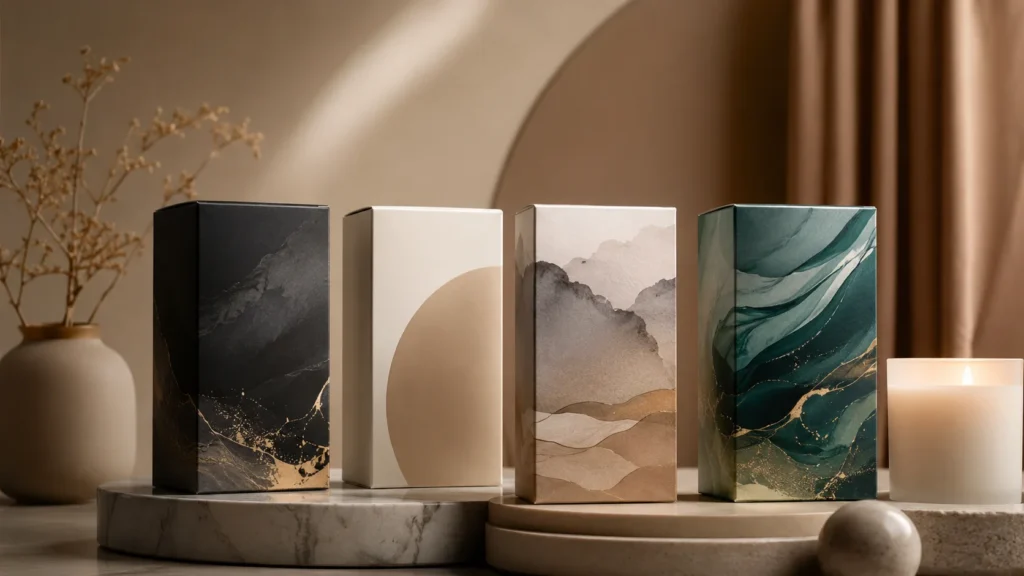
Specialty Paper
Specialty paper usually increases the cost of custom candle boxes because it is chosen for a specific look, texture, color, or emotional effect. I often see specialty paper used for luxury candle packaging, limited-edition candle collections, premium home fragrance products, holiday gift boxes, and boutique candle brands that want their packaging to feel more distinctive. Unlike standard paperboard, specialty paper is not selected only for function. It is selected because the surface itself becomes part of the brand experience.
The higher cost comes from both the material and the production sensitivity. Some specialty papers are more expensive to source, while others require extra care during printing, wrapping, gluing, foil stamping, embossing, or cutting. Certain surfaces may show scratches more easily. Some darker papers may need special ink treatment or foil decoration instead of normal printing. Some textured or colored papers may create slight batch variations that need to be understood before bulk production. In my view, specialty paper should be used when it clearly supports the product’s market position. It can make a candle box feel premium and memorable, but it should not be added only because it looks attractive in a sample. The buyer needs to ask whether the material helps the product sell at a higher perceived value.
Textured Paper
Textured paper affects cost because it adds a tactile quality that standard smooth paper cannot provide. When I hold a candle box made with linen paper, leather-like paper, fine-grain paper, natural fiber paper, or embossed texture paper, the surface immediately changes the way I experience the packaging. This is especially important for candle brands because candles are emotional products. Customers often buy them for home atmosphere, wellness, gifting, relaxation, or personal taste, so the packaging material should support that emotional connection.
Textured paper often costs more than ordinary paper because the surface treatment is more specialized and may require more careful production handling. It can also affect printing and finishing results. Small text, thin lines, detailed patterns, or soft gradients may not reproduce as clearly on a textured surface as they would on coated paper. Foil stamping and embossing may look beautiful on the right texture, but they need to be tested to make sure the details remain sharp. I usually see textured paper as a strong option for brands that want quiet luxury rather than loud decoration. It can make the box feel more premium without adding too many visual elements, but it requires careful design decisions to avoid wasting cost.
Greyboard
Greyboard is one of the key materials behind rigid candle boxes, lid and base boxes, drawer boxes, and magnetic closure boxes. It is usually hidden under the wrapping paper, but it plays a major role in the box’s strength, weight, shape, and premium feeling. When I evaluate the cost of rigid candle packaging, I always pay attention to greyboard thickness because it directly affects both the material cost and the customer’s physical impression of the box.
Thicker greyboard can make a candle box feel more solid, stable, and luxurious. It can also provide better support for heavy glass candle jars, candle gift sets, and packaging that needs to maintain its shape during shipping and retail handling. However, thicker greyboard is not automatically better. It uses more raw material, increases the weight of the finished box, takes up more space during storage and shipping, and may require more careful forming or wrapping. If the board is too thick for the box size, the packaging may become unnecessarily heavy and expensive. If it is too thin, the box may feel weak or lose its premium effect. This is why I prefer to choose greyboard thickness based on the candle’s actual weight, box structure, and sales channel instead of choosing the thickest option by default.
FSC-Certified Paper
FSC-certified paper can influence the cost of custom candle boxes because it involves responsible sourcing and certification requirements. I often see buyers ask about FSC materials when their candle products are sold in Europe, North America, Australia, or other markets where sustainability matters to consumers and retailers. The cost difference depends on the paper type, availability, thickness, grade, and whether the buyer needs certification documentation for the finished packaging project.
What I like about FSC-certified paper is that it can support both packaging function and brand trust. For candle brands that talk about natural wax, clean ingredients, wellness, or responsible living, the packaging material should not contradict the brand story. FSC-certified paper can help make the sustainability message more credible. However, I would still remind buyers that certification alone does not guarantee the best packaging result. The material still needs to print well, fold well, wrap well, and protect the candle properly. In other words, FSC certification should be part of the material decision, not a replacement for good material selection.
Material Thickness
Material thickness is one of the most direct reasons candle box costs change because thicker materials use more raw material and often require more careful production handling. I often find that buyers ask for thicker paper because they want the box to feel more premium, but thickness should always be connected to the candle’s real packaging needs. A small lightweight candle does not require the same board strength as a heavy glass candle jar. A simple retail folding carton does not require the same thickness as a rigid gift box. If the material is too thin, the box may deform, bulge, or fail to protect the candle properly. If the material is too thick, the buyer may pay for strength that does not create meaningful value.
Thickness also affects production details that buyers may not notice at first. Thicker paperboard may require stronger creasing to fold properly. It may affect glue performance, edge sharpness, die-cutting accuracy, and how flat the box remains after forming. For rigid boxes, thicker greyboard may improve the premium feel, but it also increases weight and shipping volume. For folding cartons, board thickness needs to be balanced with foldability because a carton that is too stiff may crack at the crease or become difficult to assemble. This is why I usually evaluate thickness together with box style, candle weight, insert design, and shipping conditions rather than treating it as a separate specification.
Matching Material to Candle Weight and Packaging Use
One detail I always consider is the relationship between material choice and the actual candle product. Candle packaging is different from many lightweight retail products because candles are often packed in glass jars, ceramic containers, metal tins, or heavy vessels. The box needs to carry not only the visual identity of the brand but also the physical weight of the product. If the candle is heavy and the packaging material is too weak, the box may bulge, collapse, or show stress marks during transport and handling.
The sales channel also matters. A candle box designed mainly for retail display may need strong shelf appeal and clean printing, while a candle box designed for e-commerce shipping may need stronger structure, better inserts, and more durable materials. A candle gift set may need a thicker board or a more stable inner tray because multiple products create more weight and movement inside the box. When I choose materials, I think about how the box will be used in real life, not only how it looks in a sample room.
How Material Affects Printing and Finishing Cost
Material choice also affects printing and finishing cost because not every paper performs the same way under ink, lamination, foil stamping, embossing, debossing, or spot UV. Smooth coated paper usually gives cleaner printing results, while kraft paper and textured paper require more design consideration. Dark specialty paper may need foil stamping or screen printing instead of standard CMYK printing. Thicker or rougher materials may need testing before applying detailed finishing.
This is an important point because buyers sometimes choose a material first and only later discover that their desired artwork or finishing does not work well on that surface. When this happens, the project may need extra sampling, artwork adjustment, or material replacement, which increases time and cost. I prefer to evaluate material, printing, and finishing together from the beginning. A beautiful candle box is not created by choosing expensive materials alone. It comes from matching the material surface with the right printing method and finishing process.
Why Material Type and Thickness Change the Final Cost
Material type and thickness change the final cost because they affect almost every stage of the custom candle box project. The material determines raw material price, structural strength, surface feel, printing performance, finishing compatibility, production difficulty, quality control requirements, shipping weight, and final customer perception. Thickness adds another layer of cost because it changes how much material is used and how the box behaves during folding, forming, packing, storage, and delivery.
When I compare candle box quotations, I always check whether the material specifications are truly comparable. Two quotes may describe the same box size and similar artwork, but one may use thinner paperboard, lower-grade paper, weaker greyboard, or a different certified material. On paper, the quotes may look close. In the customer’s hand, the boxes may feel completely different. This is why understanding material type and thickness is so important for buyers. It helps them judge whether a price difference is reasonable and whether the packaging will actually support the candle’s protection, presentation, brand positioning, and long-term selling value.
Box Size and Product Weight
Box size and product weight are two cost factors I always evaluate together because they affect far more than the visible dimensions of a custom candle box. A larger box uses more paper, but the real cost impact also comes from the unfolded dieline size, the amount of printing area, the insert size, the carton packing volume, and the shipping space required after production. At the same time, a heavier candle demands stronger packaging because the box must support real product weight during packing, stacking, storage, transportation, and final delivery. In my experience, this is why candle packaging cannot be priced accurately by size alone. A small lightweight candle may work well with a compact folding carton, while a heavy glass candle jar or multi-piece candle gift set may require stronger board, better internal support, and more careful protection, which naturally increases the packaging cost.
How Box Size Affects Material Usage
Box size affects cost because every part of the box needs material, including the front panel, back panel, side panels, bottom panel, top flap, glue flap, lid area, sleeve section, tray wall, and sometimes the insert. When I review custom candle box pricing, I do not only look at the finished length, width, and height. I look at the full production layout because the flat dieline often tells the real story of material consumption. A box that looks only slightly larger after assembly may require a noticeably larger paper sheet before folding, especially when it includes deep flaps, reinforced panels, a sleeve, a drawer tray, or a lid and base structure.
This is where many buyers misunderstand the cost difference between two similar boxes. A few millimeters added to each side may not look important in a product mockup, but in bulk production, those small changes are multiplied across hundreds or thousands of pieces. Larger boxes can also reduce how many pieces fit on one printed sheet, which may increase paper waste and lower production efficiency. From my perspective, good box sizing is not about making the packaging as small as possible. It is about finding the right size that protects the candle, presents the product well, supports the insert, and avoids paying for empty space that does not improve the customer experience.
Why Small Single Candle Boxes Usually Cost Less
Small single candle boxes usually cost less because they use less material, need a smaller dieline, and often have a simpler packaging function. I usually see this type of box used for standard candle jars, travel candles, tin candles, votive candles, small aromatherapy candles, and basic retail candle products. When the candle is lightweight and the brand does not require a luxury gift structure, a compact folding carton or paperboard box can often provide enough branding, shelf presence, and basic protection while keeping the unit cost more manageable.
However, I would not describe small boxes as simple in every case. A small candle box still needs accurate sizing because the tolerance is often tighter. If the candle jar is close to the inner box dimensions, even a small size error can make packing difficult or cause pressure on the box corners. If the box is too loose, the candle may move inside and create rubbing marks, noise, or damage during shipping. I usually pay close attention to the lid height, label thickness, jar shoulder, and whether the candle has an outer protective bag or decorative accessory. These details may seem small, but they affect the final box size and therefore the cost.
Why Large Candle Boxes Increase Cost
Large candle boxes increase cost because they require more paper, larger printing areas, stronger structural support, and often more careful forming. A larger box has wider panels, longer creasing lines, and bigger surfaces that need to remain flat and clean after production. If the material is not strong enough, large panels may bend, warp, or look weak after assembly. This is especially important for candle packaging because buyers often expect larger boxes to feel more premium, not thinner or less stable.
I often see large candle boxes used for luxury candle collections, holiday packaging, wellness gift sets, premium home fragrance products, and retail gifting. In these cases, the larger size can support a stronger presentation, but only when the internal space is designed with purpose. If the box is too large for the candle, the brand pays more for material, insert size, outer carton space, storage volume, and shipping weight without giving the customer a better experience. In my view, a large candle box should feel generous, balanced, and intentional. It should not feel like a small candle floating inside oversized packaging.
How Product Weight Changes Packaging Requirements
Product weight changes packaging requirements because the box must carry real pressure, not just display the candle attractively. Many candles are packed in glass jars, ceramic vessels, metal tins, concrete containers, or thick decorative holders, and these containers can be much heavier than the paper box itself. When I evaluate packaging for a heavy candle, I think about how the weight will press on the bottom panel, side walls, corners, insert, and outer carton during actual handling.
A weak structure may look acceptable when empty, but it can quickly show problems once the candle is placed inside. The bottom may sag, the side panels may bulge, the crease lines may crack, and the box may lose its shape after stacking. If the candle is shipped through e-commerce or international distribution, the risk becomes higher because the package may experience vibration, pressure, impact, and temperature or humidity changes. This is why heavier candles often need thicker paperboard, stronger greyboard, better inserts, reinforced bottom support, or a more stable rigid structure. These upgrades increase cost, but they are often necessary to avoid damage and quality complaints.
Glass Candle Jars and Fragile Containers
Glass candle jars usually increase packaging cost because they create two challenges at the same time: they are heavy and they can break. I treat glass candle packaging with extra care because a damaged candle jar is not just a packaging issue; it can become a customer experience problem, a safety concern, and a replacement cost. If the jar moves inside the box, it may hit the inner walls, rub against the surface, chip at the edges, or break during shipping impact.
For glass candle jars, the box needs better fit and better internal support. A simple box without an insert may be enough for some lightweight retail products, but glass candles often need a paper insert, cardboard divider, molded pulp tray, EVA insert, foam insert, or a custom-fit tray to hold the jar securely. The insert must support the bottom, limit side movement, and sometimes protect the lid or jar shoulder. These protective details add cost, but they also reduce hidden costs such as breakage, returns, customer complaints, repacking, and damaged brand reputation. In my opinion, protection is one of the areas where buyers should be careful about cutting cost too aggressively.
Multi-Piece Candle Sets
Multi-piece candle sets usually cost more because the packaging has to organize several products instead of holding one candle. A gift set may include multiple candle jars, tealights, tins, fragrance samples, matches, wick trimmers, cards, or other accessories. Each item has a different size, weight, and surface sensitivity, so the box needs a layout that keeps everything in place and still looks attractive when opened. This makes the structure more complex and often increases both material and labor cost.
When I evaluate candle set packaging, I pay attention to weight distribution because several items placed together can create uneven pressure inside the box. If all the heavy items sit on one side, the box may feel unbalanced or become more vulnerable during shipping. If the insert is too weak, the products may move, collide, or sink into the tray. A stronger insert or divided structure can solve these problems, but it also adds material, tooling, production time, and sampling requirements. For this reason, candle gift set boxes are usually priced higher than single candle boxes, even if the outer appearance looks simple.
Empty Space and Product Fit
Empty space inside the box affects both cost and protection. I often see brands choose a larger box because they want the candle packaging to look more premium, but too much empty space can create the opposite result. It can make the product feel less secure, require larger inserts, increase outer carton size, raise shipping volume, and create movement inside the package. A box with too much empty space may look impressive in a photo, but it can feel disappointing when the customer opens it and finds a small candle sitting inside a large cavity.
At the same time, the box cannot be too tight. Candle jars may have small dimensional variations, labels may add thickness, lids may sit slightly higher, and decorative elements may change the required inner space. I usually look for a fit that allows smooth packing while keeping the candle stable. Good fit tolerance helps reduce packing problems, avoid pressure marks, protect the printed surface, and improve the customer’s opening experience. In custom candle packaging, proper fit is one of the quiet details that separates professional packaging from packaging that only looks correct in a mockup.
Shipping Volume and Storage Efficiency
Box size also affects cost after production because it changes shipping volume and storage efficiency. A larger candle box takes up more room in export cartons, pallets, warehouses, and shipping containers. When the order quantity is small, this may not seem like a major issue. But when a buyer orders thousands of custom candle boxes, the difference in packing volume can become significant. More volume may mean more cartons, more warehouse space, more handling time, and higher transportation cost.
This is why I always consider packaging efficiency when thinking about candle box size. A box should look good as an individual product, but it should also work well in real logistics. If a slight size adjustment allows more boxes to fit into each carton or reduces wasted shipping space, the buyer may save money beyond the unit packaging price. For brands, importers, and distributors, this can be especially important because the true packaging cost includes production, packing, storage, and transportation together.
How Size Affects Inserts and Inner Support
Box size also affects the cost of inserts because the insert usually needs to match both the product and the outer box. If the box is larger, the insert may need more material to hold the candle in the correct position. If the candle is heavy, the insert may need thicker paperboard, stronger molded pulp, EVA, foam, or reinforced partitions. I often see buyers focus on the outer box cost first, but in candle packaging, the insert can become a meaningful part of the total price.
The insert is especially important when the candle needs to be centered, lifted, separated from other items, or protected from side impact. A well-designed insert can make the packaging look more premium and reduce product movement, but it requires accurate sizing and testing. If the insert is too loose, the candle will still move. If it is too tight, packing becomes slow and difficult. This is why box size, candle weight, and insert design should be discussed together instead of separately.
Why Size and Weight Change the Final Cost
Size and weight change the final cost because they influence the entire packaging system from material consumption to shipping performance. Box size affects paper usage, dieline layout, printing area, insert dimensions, carton packing quantity, storage volume, and freight efficiency. Product weight affects board strength, structural design, bottom support, insert selection, testing needs, and damage risk. When these two factors increase at the same time, the cost difference can become much more noticeable.
When I compare custom candle box quotations, I always try to understand the actual candle, not just the requested box. I want to know the candle dimensions, jar material, product weight, lid shape, label position, sales channel, packing method, and shipping conditions. A small lightweight candle may only need a simple and cost-efficient carton, while a heavy glass candle jar or multi-piece candle gift set usually needs stronger packaging and better internal support. Understanding this relationship helps buyers compare prices more accurately, avoid under-protecting the product, and choose a packaging solution that controls cost without creating unnecessary risk.
Printing Method and Color Requirements
Printing method and color requirements can change the cost of custom candle boxes more than many buyers expect because printing is not only about placing a logo on paper. When I evaluate candle packaging, I look at printing as a complete production decision that affects artwork preparation, plate setup, ink selection, machine adjustment, proofing, drying time, surface protection, color consistency, and final inspection. A candle box with a small one-color logo can usually be produced with fewer variables, while a box with full-color artwork, large dark backgrounds, gradient effects, inside printing, double-sided printing, and strict brand color standards requires much more control. This is why two candle boxes with the same size and structure can still have different prices when their printing requirements are different.
One-Color Printing
One-color printing is usually one of the most cost-efficient printing choices for custom candle boxes because the artwork is simpler, the color control is easier, and the production process has fewer variables. I often see one-color printing used for minimalist candle brands, kraft candle boxes, handmade candle packaging, private-label candle lines, and brands that want a clean logo-focused presentation. A black logo on white paperboard, white ink on kraft paper, or one soft brand color on a simple folding carton can still look elegant when the layout, material, and printing density are handled properly.
What I like about one-color printing is that it forces the design to be clear and intentional. It does not rely on complicated graphics to create value, so the quality of the paper, the logo placement, the spacing, and the overall proportion become more important. However, I would not describe one-color printing as automatically easy. Thin lines, small typography, large solid logo blocks, or reverse printing on dark backgrounds can still require careful ink control. If the ink is too light, the logo may look weak. If the ink is too heavy, small details may fill in or lose sharpness. From my perspective, one-color printing is cost-friendly only when the artwork is prepared with production reality in mind.
CMYK Full-Color Printing
CMYK full-color printing usually costs more than one-color printing because it uses four process colors to create a wider visual range. I often see CMYK printing used for candle boxes with fragrance illustrations, botanical artwork, seasonal patterns, lifestyle graphics, photographic visuals, soft gradients, and more expressive retail designs. This method is useful when the packaging needs to communicate mood, scent, product story, or shelf appeal through rich visual content.
The cost increase comes from the fact that CMYK printing needs more careful file preparation, color separation, machine setup, ink balance, and registration control. A small shift in one process color can change the final appearance of the artwork, especially when the design includes skin-like neutrals, pastel tones, deep backgrounds, or subtle fragrance-inspired gradients. I usually remind buyers that CMYK is flexible and powerful, but it is not the same as a guaranteed brand color match. If a candle brand has a very specific signature color, CMYK may need additional proofing or a Pantone color to keep the result stable across production batches.
Pantone Color Matching
Pantone color matching can increase the cost of custom candle box printing because it requires a more controlled approach to color. I often see Pantone colors used when a candle brand has a fixed identity color and needs that color to remain consistent across boxes, labels, paper bags, inserts, display materials, and repeat orders. For established candle brands, the packaging color is often part of brand recognition, so a slight color difference can feel like a quality issue even if the box structure is correct.
The important detail is that Pantone color does not exist in isolation. The final appearance still depends on the paper material, ink absorption, surface finish, lamination, and lighting conditions. The same Pantone color may look cleaner on coated paper, softer on uncoated paper, darker on kraft paper, and less predictable on textured or specialty paper. This is why Pantone matching often requires proofing on the actual material instead of relying only on a digital reference. In my experience, Pantone color matching is worth the added cost when color consistency protects brand trust, improves retail consistency, and supports repeat production over time.
Large Ink Coverage
Large ink coverage can increase printing cost because it requires more ink, more drying control, stronger surface protection, and closer quality inspection. I often see large ink coverage in candle boxes with full black backgrounds, deep navy panels, dark green brand colors, burgundy seasonal designs, full-surface patterns, or rich color blocks that cover most of the packaging. These designs can look premium and dramatic, but they also make production defects more visible.
Dark or full-coverage printing is more sensitive to scratches, rubbing marks, dust, fingerprints, color unevenness, and edge wear. If the printed surface is not protected properly, the box may look damaged even before it reaches the customer. The material also matters because some papers absorb ink more heavily and may create a less even finish. In this situation, I usually consider whether the project needs lamination, varnish, soft-touch coating, or extra handling control to protect the surface. Large ink coverage can create a strong visual identity for candle packaging, but it should be planned as a higher-control printing choice rather than a simple color decision.
Inside Printing
Inside printing adds cost because it expands the printed area and requires additional artwork planning, ink usage, setup control, and inspection. I often see inside printing used in candle gift boxes, premium folding cartons, subscription candle packaging, seasonal collections, and brand storytelling designs. A printed interior pattern, message, fragrance story, brand statement, or decorative color can make the box feel more complete when the customer opens it.
For candle packaging, I think inside printing can be valuable because candles are emotional products. The customer often expects a sense of atmosphere, warmth, relaxation, or gifting pleasure. The inside of the box becomes part of that experience, especially when the candle is purchased as a gift or shared on social media. However, inside printing should not be added only because it looks nice in a mockup. If the interior is not visible during normal use or does not support the customer experience, the added cost may not be necessary. I usually evaluate whether inside printing creates real perceived value before recommending it as part of the packaging specification.
Double-Sided Printing
Double-sided printing increases cost because both the outside and inside surfaces need to be printed, checked, dried, folded, and inspected. This can add more complexity than buyers first expect, especially when the artwork must align across fold lines, opening panels, windows, sleeves, or insert areas. I often see double-sided printing used for candle gift boxes, limited-edition collections, subscription packaging, and higher-end retail packaging where the box needs to feel finished from every angle.
The challenge is that double-sided printing creates more opportunities for variation. The outer design must look clean and brand-consistent, while the inner design must still align properly after folding or assembly. If the paper is thin, heavy ink coverage on both sides can also affect stiffness, drying time, and surface handling. From my perspective, double-sided printing is valuable when the packaging experience matters, but it should be used with intention. For basic candle boxes, a clean exterior and unprinted interior may be enough. For premium candles, the added interior detail can help justify a higher product price.
Gradient Colors
Gradient colors can increase printing difficulty because they require smooth transitions between shades. I often see gradients used in candle packaging to express fragrance notes, softness, warmth, mood, seasonality, or a luxury atmosphere. A soft pink-to-cream gradient, a sunset-inspired tone, or a deep-to-light fragrance color story can look beautiful on screen, but it is more demanding to reproduce on paper than a flat color.
The main challenge with gradients is consistency. If the printing is not controlled well, the gradient may show banding, uneven transitions, color shift, or visible noise. The result can also change depending on paper type and finishing. A gradient may appear smooth on coated paper but less controlled on kraft or textured paper. Lamination can make the color look deeper, while matte finishes may soften the contrast. When I review gradient artwork, I always consider whether the design has enough tolerance for real printing conditions. If the gradient is central to the packaging identity, proofing becomes very important, and that naturally adds time and cost.
Complex Artwork and Detailed Graphics
Complex artwork can increase cost because it requires more careful prepress work, higher-resolution files, accurate printing control, and stronger inspection. Candle packaging often uses botanical illustrations, fragrance patterns, small icons, line drawings, decorative borders, product descriptions, ingredient notes, scent stories, and brand storytelling elements. These details can make the box feel rich and thoughtful, but they also need to be prepared carefully so they remain clear after printing, folding, and finishing.
Fine details can behave differently depending on the material. Thin lines may lose sharpness on textured paper. Small text may become difficult to read on dark backgrounds. Detailed patterns may look crowded on a small box size. Metallic or special paper may affect contrast. I often remind buyers that artwork should be designed for the actual box size, not only for a large digital screen. A design that looks beautiful in a presentation file may become too busy or unclear after it is printed on a small candle carton. Production-aware artwork can reduce repeated proofing, avoid redesign costs, and make the final packaging look more professional.
Strict Brand Color Control
Strict brand color control can increase cost because it requires more preparation, proofing, production adjustment, and batch inspection. I often see this requirement from established candle brands, product managers, distributors, and retailers who need repeat orders to match previous packaging. When a candle brand has multiple scents, seasonal collections, or product lines, color consistency becomes even more important because all the boxes may be displayed together in stores or photographed together online.
Color control is affected by more than ink alone. Paper whiteness, paper absorption, coating, humidity, drying time, lamination, varnish, machine condition, and lighting during inspection can all influence the final result. Even a matte lamination and a gloss lamination can make the same printed color appear different. This is why I usually suggest treating color proofing as part of the project cost when the brand has strict color requirements. It may feel like an extra step, but it helps prevent larger problems such as mismatched batches, rejected goods, delayed shipments, or inconsistent retail presentation.
Printing on Different Paper Materials
Printing cost can also change depending on the selected paper material because each surface reacts differently to ink. Coated paper usually provides sharper color and cleaner details, while uncoated paper may absorb more ink and create a softer look. Kraft paper changes color appearance because of its natural brown base. Textured paper may reduce fine detail clarity. Specialty paper can require testing because some surfaces do not accept standard ink or finishing in the same way as ordinary paperboard.
This is an important point because printing and material should not be decided separately. I have seen many projects where the artwork looked perfect on a digital mockup, but the selected paper changed the color, sharpness, or finish in unexpected ways. When the material has a strong surface character, the printing method may need to be adjusted. Sometimes the better choice is to simplify the artwork, use foil stamping instead of detailed ink printing, or choose a smoother paper to achieve the desired visual result. These decisions can affect cost, but they can also prevent disappointment after sampling.
Proofing and Prepress Preparation
Proofing and prepress preparation can influence cost because they help turn a design file into something that can be printed reliably. Before bulk production, artwork may need file checking, dieline adjustment, bleed confirmation, color mode review, font inspection, image resolution checking, trapping, and finishing layer separation. I see this stage as very important because many printing problems begin before the box reaches the printing machine.
If the artwork file is not prepared properly, the project may require revisions, additional proofs, or even a new sample. This can add cost and delay production. For candle packaging, where color, texture, and brand feeling are important, proofing gives buyers a chance to check whether the printed result matches expectations. I usually see proofing not as a waste of money, but as a way to avoid much larger losses in bulk production. A careful prepress process can reduce risk and make the final box more consistent.
How Printing Requirements Change the Final Cost
Printing requirements change the final cost because they influence the entire production workflow from artwork checking to final quality inspection. A simple one-color design can usually be produced with lower complexity, while CMYK full-color printing, Pantone matching, large ink coverage, inside printing, double-sided printing, gradient colors, complex artwork, strict color control, special paper surfaces, and extra proofing all require more time and attention. Each factor may seem small, but together they can create a clear difference in the final quotation.
When I evaluate custom candle box printing, I always ask what the printing needs to achieve for the product. Some candle brands need strong visual storytelling, rich colors, and premium interior details because the packaging supports a higher retail price. Other brands may achieve a better cost-performance balance with simple printing, strong material choice, and a clean layout. The best printing decision is not always the most colorful or the most expensive one. It is the printing method that gives the candle box the right balance of visual impact, brand consistency, production stability, and cost control.
Surface Finishing
Surface finishing is one of the cost factors I pay close attention to because it can quickly change both the appearance and the price of custom candle boxes. For candle packaging, finishing is not only a decorative choice. It affects how the box feels in the customer’s hand, how the printed surface is protected, how premium the brand appears, and how difficult the production process becomes. A simple printed candle box may be cost-efficient and practical, while a box with matte lamination, gloss lamination, soft-touch lamination, foil stamping, embossing, debossing, spot UV, or special coatings requires extra materials, extra machines, extra setup, and more quality inspection. In my view, finishing should always be selected with a clear purpose, because every added process should either improve protection, strengthen brand perception, or support the selling price of the candle product.
Matte Lamination
Matte lamination is one of the finishing options I often see in candle packaging because it gives the box a soft, calm, and non-reflective surface. It is especially suitable for candle brands that want a modern, elegant, wellness-focused, or minimalist visual style. Compared with a plain printed surface, matte lamination can make the packaging look more refined and less commercial, which is why it is often used for premium candle boxes, aromatherapy candle packaging, and home fragrance products that want to feel quiet and tasteful.
From a cost perspective, matte lamination adds film material and an additional production step after printing. The printed sheet needs to go through the lamination process before die-cutting, folding, or box forming. This means more time, more handling, and more inspection. If the lamination is not well controlled, the surface may show bubbles, wrinkles, peeling, dust marks, or uneven adhesion. I usually see matte lamination as a practical upgrade because it improves both surface protection and brand presentation. It is not the most expensive finish, but it still increases the cost compared with a box that only uses standard printing.
Gloss Lamination
Gloss lamination gives candle boxes a bright, reflective, and more vivid appearance. I often see it used when the packaging design depends on strong color, rich artwork, seasonal patterns, or high shelf visibility. If a candle box uses full-color printing, floral illustrations, festive graphics, or bold retail colors, gloss lamination can make the design appear sharper and more eye-catching. It can also help protect the printed surface from light rubbing and handling marks.
However, I do not recommend gloss lamination for every candle brand. Candles are often connected with mood, scent, home atmosphere, and gifting, so the emotional tone of the packaging matters. Gloss lamination may feel energetic and commercial, but it may not suit a natural, handmade, luxury-minimal, or wellness-oriented brand. The cost comes from the film, lamination process, drying and handling control, and surface inspection. I usually consider gloss lamination when the candle packaging needs stronger retail impact, but I prefer matte or soft-touch finishes when the brand wants a softer premium feeling.
Soft-Touch Lamination
Soft-touch lamination usually increases the cost more than standard matte or gloss lamination because it creates a velvety, smooth, and more luxurious tactile experience. I often associate this finish with high-end candle boxes, luxury home fragrance packaging, boutique candle collections, and gift-ready candle products. For candles, the sense of touch is important because customers often connect the product with relaxation, comfort, atmosphere, and personal lifestyle. A soft-touch surface can make the box feel more intimate and premium before the candle is even opened.
The higher cost comes from the specialty film and the extra care required during production. Soft-touch surfaces can be sensitive to fingerprints, scratches, scuffing, and pressure marks, especially when the box uses dark colors or large ink coverage. This means the packaging may need better handling, suitable outer packing, and closer inspection. I usually recommend soft-touch lamination when the product’s retail price and brand positioning can support the added cost. If the candle is positioned as a premium gift or luxury home fragrance item, soft-touch lamination can add real perceived value. If the product is highly price-sensitive, the same budget may be better used on structure, material, or insert protection.
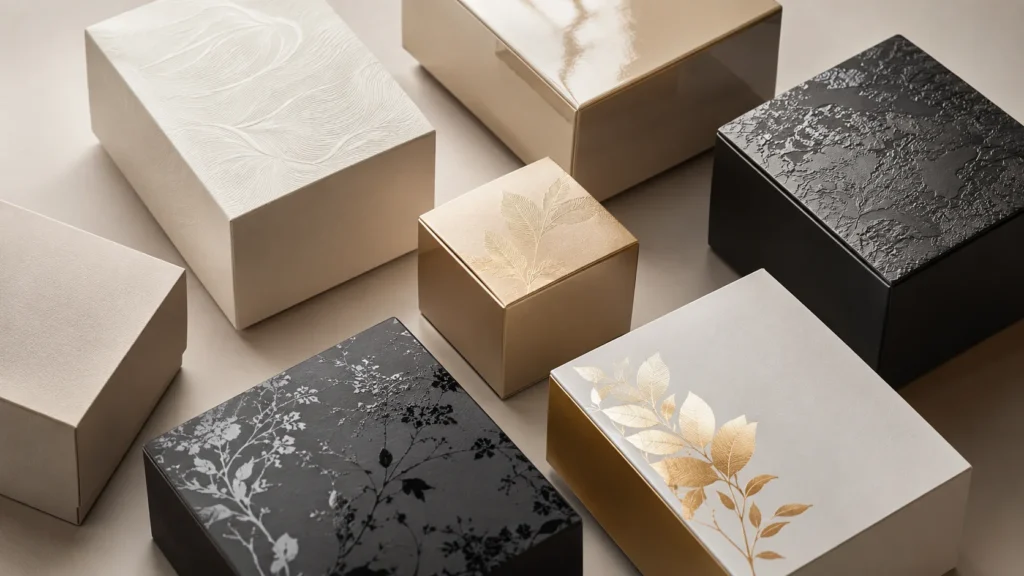
Foil Stamping
Foil stamping is one of the most common premium finishes for candle boxes because it can make a logo, brand name, fragrance name, or decorative detail stand out immediately. I often see gold foil, silver foil, rose gold foil, copper foil, holographic foil, and colored foil used on candle packaging to create a stronger gift feeling and a more luxurious visual impression. A small foil-stamped logo on a matte or textured surface can sometimes make the whole box feel more expensive without requiring complicated full-color artwork.
The cost of foil stamping comes from foil material, a stamping die, heat, pressure, machine setup, and positioning control. The larger the foil area, the more expensive and difficult the process usually becomes. Very fine lines, large solid foil areas, or foil that needs to align precisely with printed artwork may require more testing and stricter inspection. I always prefer foil stamping to be used with restraint. In many candle box projects, a small but well-positioned foil detail looks more elegant than a large metallic area that overwhelms the design. The goal is to highlight the brand, not to make the packaging look overdecorated.
Embossing
Embossing adds cost because it requires a mold to raise part of the design from the surface of the box. I often see embossing used for candle box logos, brand marks, fragrance icons, simple patterns, or decorative textures. The value of embossing is that it gives the packaging a physical detail the customer can feel. For candle products, this tactile quality can be very effective because the product category is already connected with sensory experience.
The final result depends heavily on material choice, board thickness, artwork design, pressure control, and the depth of the embossing. Some papers can hold embossed details beautifully, while others may not produce a clean or visible effect. Very small text, thin lines, or overly detailed patterns may not emboss well. From my perspective, embossing works best when the design is simple, spacious, and intentional. It can create a quiet premium effect without using bright colors or metallic shine, but it still adds tooling cost and production control requirements.
Debossing
Debossing presses the design into the surface instead of raising it, creating a subtle recessed effect. I like debossing for candle packaging because it feels calm, refined, and less aggressive than some shiny finishes. It is often used on rigid candle boxes, soft-touch laminated surfaces, textured paper boxes, and luxury gift packaging where the brand wants a more understated premium impression. A debossed logo can make the packaging feel crafted and intentional rather than simply decorated.
Debossing increases cost for similar reasons as embossing. It requires tooling, pressure control, suitable material, and careful inspection. If the board is too thin, the effect may be weak or may damage the structure. If the surface is too textured, the detail may not appear clearly. If the artwork is too small, the recessed effect may be difficult to see. I usually consider debossing when the brand wants quiet luxury and when the packaging material has enough quality to support the effect. It is not the loudest finishing option, but when used well, it can make a candle box feel very premium.
Spot UV
Spot UV adds a glossy highlight to selected areas of the packaging, creating contrast between matte and shiny surfaces. I often see spot UV used on logos, fragrance names, flame graphics, subtle patterns, water-like effects, or decorative lines. It is especially useful when a candle box has matte lamination and the brand wants certain details to catch the light without making the entire box glossy.
The cost of spot UV depends on the application area, thickness, detail level, and registration accuracy. If the spot UV needs to align exactly with printed artwork, the production process becomes more demanding. Large spot UV areas or very detailed patterns may also require more control to avoid uneven texture, misalignment, or surface defects. I usually recommend using spot UV selectively. A small highlight can add depth and sophistication, but too much spot UV can make the packaging feel busy or less refined. For candle boxes, subtle contrast often works better than excessive shine.
Special Coatings
Special coatings can increase the cost of candle boxes because they are used to create specific surface effects or improve performance. Some coatings help protect the printed surface from scratches, fingerprints, moisture, or rubbing. Others create a natural paper feel, a smooth touch, a satin effect, or a more durable surface. I often consider special coatings when the packaging uses dark colors, large ink coverage, soft-touch surfaces, or premium retail positioning where surface condition matters a lot.
The cost depends on the type of coating, the application method, the material compatibility, and the level of protection required. For example, a box with a dark matte surface may need better anti-scratch performance because small scuffs can be very visible. A candle box handled frequently in retail may need a more durable surface than packaging that stays inside an outer carton until purchase. I usually evaluate special coatings by asking what problem they solve. If the coating improves durability, protects a delicate finish, or supports the customer experience, it can be a smart cost. If it only makes the specification look more complicated, it may not be necessary.
Finishing on Different Paper Materials
The cost and final effect of surface finishing also depend on the paper material used for the candle box. I always pay attention to this because the same finish can perform differently on coated paper, kraft paper, textured paper, specialty paper, or wrapped rigid boxes. Foil stamping may look very sharp on smooth paper but less precise on heavily textured paper. Embossing may look stronger on thicker material but weaker on thin paperboard. Spot UV may create a clean contrast on matte lamination but may not be suitable for every uncoated surface.
This is why finishing should not be selected separately from material. A buyer may like a certain finish in a sample photo, but the actual result depends on the paper surface, ink coverage, lamination, and box structure. If the material and finish do not work well together, the project may need extra testing, which can add time and cost. In my experience, the most successful candle boxes are not created by adding many finishes. They are created by matching the right finish with the right material and design style.
Combining Multiple Finishes
Combining multiple finishes can make candle packaging look more premium, but it also increases cost and production risk. I often see premium candle boxes combine matte lamination with foil stamping, soft-touch lamination with debossing, textured paper with foil stamping, or spot UV with full-color printing. These combinations can create a beautiful layered effect, but each process adds its own setup, material, alignment requirement, and inspection point.
The challenge is that every finish must work together. Foil stamping needs accurate positioning. Embossing or debossing needs to match the artwork and material. Spot UV needs to align with the printed design. Lamination needs to protect the surface without changing the color too much. If too many finishes are used, the box may become expensive, difficult to produce consistently, and visually crowded. I usually prefer one or two strong finishing details rather than many competing effects. For candle packaging, restraint often feels more premium than excessive decoration.
How Surface Finishing Affects Perceived Value
Surface finishing affects perceived value because it changes the way customers experience the box before they experience the candle. A matte surface may feel calm and modern. A soft-touch surface may feel luxurious and intimate. A foil-stamped logo may feel gift-ready. An embossed or debossed detail may make the brand feel more crafted. Spot UV may add subtle light and contrast. These details can help a candle product feel more expensive, especially when the packaging is used for retail display, gifting, or online product photography.
However, perceived value should be connected to product positioning. I do not think every candle box needs premium finishing. If the candle is an entry-level product, too many finishes may increase cost without helping sales. If the candle is a luxury gift product, simple printing may not communicate enough value. The best finishing decision is the one that helps the customer understand the product’s price level, quality, and brand story at first touch.
Why Surface Finishing Changes the Final Cost
Surface finishing changes the final cost because it adds more than visual effect. It adds material, tooling, machine setup, production time, handling control, testing, and quality inspection. Matte lamination, gloss lamination, soft-touch lamination, foil stamping, embossing, debossing, spot UV, and special coatings all create different results, but each one also adds a layer of production complexity. When several finishes are used on the same box, the cost increases not only because of the finishes themselves, but because the entire production process becomes harder to control.
When I compare custom candle box quotations, I always look at whether the finishing choices are necessary for the product’s market position. A premium candle brand may benefit from soft-touch lamination, foil stamping, embossing, or debossing because the packaging needs to support a higher selling price and a stronger gifting experience. A more cost-sensitive candle line may look professional with good paper, clean printing, and one practical protective finish. The best surface finishing choice is not the most expensive one. It is the finish that improves appearance, touch, protection, and perceived value without creating unnecessary cost or production risk.
Inserts and Inner Support
Inserts and inner support can have a major impact on the cost of custom candle boxes because they decide how securely the product sits inside the packaging, how well the box performs during shipping, and how polished the product looks when the customer opens it. When I evaluate candle packaging, I never treat the insert as a small accessory. For many candle products, especially glass jars, heavy vessels, candle sets, and gift packaging, the insert is part of the protection system and part of the presentation system at the same time. A box may look beautiful from the outside, but if the candle moves inside, arrives damaged, or looks poorly positioned after opening, the packaging has not truly done its job. This is why inserts can increase the total cost, but they often help reduce hidden costs related to breakage, complaints, returns, and weak customer experience.
Why Inserts Matter in Candle Packaging
Inserts matter in candle packaging because candles are often heavier, more fragile, and more presentation-sensitive than many other retail products. I often see candles packed in glass jars, ceramic containers, metal tins, concrete vessels, or decorative holders, and these products do not behave like lightweight cosmetics or flat paper goods inside a box. If the candle has too much room to move, the jar can hit the inner walls, the lid can press against the top panel, the label can rub against the insert edge, and the box can lose its clean shape during transport.
I also pay attention to how the product looks when the box is opened. Candle packaging is often used for gifting, wellness products, home fragrance collections, and premium lifestyle items, so the inside of the box should feel organized and intentional. A loose candle sitting inside an oversized box can make the product feel cheaper, even if the outer printing looks expensive. A well-designed insert keeps the product stable, centered, and visually balanced, which helps the customer feel that the candle was packed with care.
Paper Inserts
Paper inserts are one of the most practical choices for many custom candle boxes because they can provide structure, support, and presentation without making the packaging feel too heavy or overly engineered. I often see paper inserts used for single candle jars, mid-range candle boxes, retail packaging, subscription candles, and brands that want to keep the whole packaging system more paper-based. Compared with EVA or foam, paper inserts usually feel more aligned with sustainable packaging expectations, especially when the candle brand wants a natural or responsible image.
The cost of a paper insert depends on the paperboard thickness, folding structure, number of support points, die-cut shape, and assembly method. A simple flat insert with one product opening is usually more cost-efficient, while a raised platform insert, locking structure, or multi-layer support insert will cost more because it uses more material and requires more forming work. When I evaluate paper inserts, I usually look at whether the candle is supported from the bottom, held from the sides, and protected from unnecessary movement. A good paper insert does not need to look complicated. It needs to hold the candle securely and make the inside of the box feel clean and stable.
Cardboard Dividers
Cardboard dividers are useful when a candle box needs to hold more than one product. I often see dividers used in candle gift sets, wholesale packs, seasonal candle collections, subscription boxes, and packaging that includes candles together with matches, cards, fragrance samples, or small accessories. The main purpose of a divider is to separate products so they do not touch, collide, scratch, or shift during handling and shipping.
The cost of cardboard dividers changes according to the number of compartments, board thickness, cutting accuracy, and how the divider is assembled inside the box. A simple cross divider may be relatively economical, while a custom divider with multiple product cells, different compartment sizes, or reinforced walls can increase cost. I always pay attention to weight distribution in this type of packaging. If several glass candle jars are placed in one box, the divider must be strong enough to keep them separated under pressure. If the divider is too thin or poorly fitted, it may bend during shipping and allow the products to move. That small weakness can create a much larger damage problem later.
Molded Pulp Inserts
Molded pulp inserts are often chosen when a candle brand wants a combination of protection, natural appearance, and a more sustainable packaging direction. I see molded pulp used more often for glass candle jars, eco-conscious candle brands, wellness candles, and packaging projects where the inner support needs to match a paper-based environmental message. Molded pulp can be shaped around the product, which helps hold the candle in place while reducing movement inside the box.
The cost of molded pulp inserts depends on mold development, product shape, material density, surface finish, order quantity, and testing requirements. A standard pulp shape may be more economical, but a fully custom molded pulp tray usually requires tooling and development cost. In my view, molded pulp is valuable when the brand wants more than basic protection. It can support the product physically while also reinforcing the brand’s sustainability positioning. However, it should be planned carefully because the mold, tolerance, and tray depth must match the candle jar accurately. If the fit is not controlled, the product may still move or become difficult to pack.
EVA Inserts
EVA inserts usually sit at a higher cost level because they provide a more precise, cushioned, and premium-looking interior. I often see EVA used in luxury candle gift boxes, high-end home fragrance packaging, limited-edition collections, corporate gift sets, and packaging where the product needs to look perfectly positioned when opened. EVA can be cut to fit the candle jar closely, which helps reduce movement and gives the inside of the box a very organized appearance.
The cost comes from the EVA material, thickness selection, custom cutting, surface finish, and assembly work. A thicker EVA insert gives stronger support, but it also increases material cost and can make the box heavier. A custom-shaped cutout requires accurate product measurements, because if the opening is too tight, packing becomes slow and difficult. If it is too loose, the candle may still move. I usually see EVA as a good option when presentation and protection are both important, but I would not use it automatically for every candle project. For a cost-sensitive candle line, a well-designed paper insert may be more suitable.
Foam Inserts
Foam inserts can provide strong cushioning, especially when the candle container is fragile, heavy, unusually shaped, or shipped through a more demanding logistics route. I often see foam used for premium glass jars, ceramic candle vessels, luxury sets, or packaging that needs extra shock absorption. Foam can help reduce impact by cushioning the product and limiting direct contact between the candle and the box walls.
The cost of foam inserts depends on foam density, thickness, cutting method, shape complexity, and whether the insert needs to be laminated, covered, or finished for a cleaner appearance. Foam can be very protective, but it may not always match the sustainability expectations of modern candle brands. I usually evaluate foam based on risk. If the candle is expensive, fragile, or difficult to replace, the protection may justify the cost. If the product does not require strong cushioning, foam may add unnecessary cost and may conflict with a more eco-conscious packaging direction.
Custom Trays
Custom trays can increase the cost of candle packaging because they are designed specifically around the product shape, product layout, and opening presentation. I often see custom trays used for candle gift sets, holiday collections, subscription boxes, influencer packaging, and premium retail sets that need to hold several items in a clean arrangement. A custom tray can make each candle, accessory, or card sit in its own position, which improves both protection and visual order.
The cost depends on the tray material, structural complexity, mold or tooling requirements, product quantity, and assembly process. A simple paper tray for one candle may be manageable, while a tray for several candles and accessories may require more design work and testing. I like custom trays when the packaging needs to create a strong impression after opening, but I also think they should be practical. The tray should be easy enough to assemble, strong enough to hold the product, and accurate enough to keep each item in place during shipping. A beautiful tray that is slow to pack or weak in transport can create hidden costs.
Insert Fit and Tolerance
Insert fit and tolerance are small details that can have a big effect on both cost and performance. I pay close attention to this because candle jars are not always perfectly identical. Glass thickness, label placement, lid height, decorative caps, and slight production variations can all affect how the product fits inside the insert. If the insert is designed too tightly, packing becomes difficult and workers may damage the box or product while forcing the candle into place. If the insert is too loose, the product may move during shipping and the insert fails to do its job.
Good tolerance requires careful measurement and sometimes sample testing. This can add time and cost at the beginning of the project, but it helps prevent bigger issues in bulk production. In my view, insert design should always consider the real product, not only the ideal dimensions in a design file. The insert needs enough space for smooth packing while still controlling movement. That balance is what makes the packaging feel professional and reliable.
How Inserts Affect Assembly Time
Inserts affect assembly time because they add extra steps to the packing process. A simple candle box may only need folding, gluing, product placement, and closing. A box with an insert may require folding the insert, locking tabs into place, placing the insert inside the box, positioning the candle, checking the fit, and making sure the final presentation is consistent. For gift packaging, this process can be even more detailed because the product must look neat when the customer opens it.
The more complex the insert, the more labor time it can require. This matters in bulk production because assembly time becomes part of the total packaging cost. I often look at whether the insert is easy to handle repeatedly. If an insert looks good in a sample but is difficult to assemble thousands of times, it can slow down packing and increase labor cost. A smart insert design should protect the candle and improve presentation while still being practical for real production.
How Inserts Improve Shipping Protection
Inserts improve shipping protection by reducing product movement and absorbing some of the stress that happens during transportation. Candle packaging may go through factory packing, carton stacking, warehouse storage, pallet loading, container shipping, courier handling, and final delivery. During this process, the box can experience vibration, compression, impact, and repeated movement. If the candle is not held securely, the outer box alone may not prevent damage.
A well-designed insert helps keep the candle centered and separated from hard contact points. It can protect the jar shoulder, lid, base, label, and decorative surface. It can also reduce the chance of the candle hitting the box walls or other products in the same package. I see this as one of the strongest reasons inserts are worth paying for. The insert may increase the upfront packaging cost, but it can reduce hidden costs caused by breakage, replacement shipments, returns, negative reviews, and damaged brand trust.
How Inserts Improve Product Presentation
Inserts improve product presentation because they control how the candle appears at the moment of opening. When a candle sits neatly in a fitted insert, the packaging feels intentional and complete. This matters a lot for candle products because they are often bought as gifts, home fragrance items, wellness products, or lifestyle accessories. The customer is not only buying wax and fragrance. They are also buying a feeling, and the packaging contributes to that feeling.
I often think of the insert as the stage inside the box. The outer box attracts attention, but the insert presents the product when the customer opens it. A clean paper insert can make a simple candle feel more organized. A molded pulp tray can make an eco-conscious candle feel more natural. An EVA insert can make a luxury candle set feel more premium. The insert should match the brand story, not just hold the product mechanically.
Inserts for Gift Sets and Multi-Product Packaging
Gift sets and multi-product candle packaging usually require more advanced inserts because the box must hold several items in a clean and secure layout. I often see candle sets that include different jar sizes, fragrance samples, matches, wick trimmers, cards, or accessories. Each item may have a different height, weight, and shape, so the insert needs to organize the full set without making the interior look crowded.
The cost increases because the insert must solve both structural and visual problems. It needs to prevent collision, distribute weight, create a balanced layout, and support the unboxing experience. If the insert is too simple, the products may move or look messy. If it is over-designed, the cost may become too high. I usually prefer an insert that gives each product a clear position while keeping the overall structure easy to assemble and stable during shipping.
Why Inserts and Inner Support Change the Final Cost
Inserts and inner support change the final cost because they add material, design work, die-cutting, tooling, assembly time, testing, packing control, and quality inspection. Paper inserts, cardboard dividers, molded pulp inserts, EVA inserts, foam inserts, and custom trays all have different cost levels because they solve different problems. Some are mainly used for basic positioning, some for stronger protection, and some for premium presentation.
When I compare custom candle box quotations, I always look beyond the outer box. I want to know whether the candle is properly supported, whether the insert matches the product weight, whether the material fits the brand image, and whether the packing process will work smoothly in bulk production. A cheaper box without proper inner support may look attractive in the quotation, but it can create higher costs later if products arrive damaged or the customer experience feels weak. In my experience, the best insert choice is not always the most expensive one. It is the insert that matches the candle’s weight, fragility, sales channel, shipping method, brand positioning, and expected customer experience.
Order Quantity
Order quantity is one of the most important factors affecting the unit price of custom candle boxes because packaging production includes many preparation costs before the first finished box is produced. When I evaluate candle box pricing, I never see quantity as only a purchase number. I see it as the factor that decides how setup costs, printing preparation, die-cutting work, material purchasing, machine adjustment, labor planning, quality inspection, and packing arrangements are spread across the whole order. A small order usually has a higher unit cost because the same preparation work is shared by fewer boxes, while a larger order usually reduces the unit price because production becomes more stable, continuous, and efficient.
Why Small Orders Usually Have a Higher Unit Cost
Small orders usually have a higher unit cost because custom candle box production still requires a complete production setup, even when the order quantity is limited. I often see buyers assume that if they order fewer boxes, the total production should simply become proportionally cheaper. In reality, the factory still needs to review artwork, check the dieline, prepare printing files, purchase material, adjust machines, arrange die-cutting, control color, test finishing, prepare inserts if needed, and confirm packing standards. These steps exist whether the order is 500 pieces or 5,000 pieces.
This is why the unit price of a small order can feel high compared with a larger order. The buyer is not only paying for the paperboard, ink, glue, lamination, or finishing used on each box. They are also paying for the time and resources required to prepare a custom production run. When these preparation costs are divided across fewer boxes, each box carries a larger share of the total cost. From my perspective, small orders are useful for product testing, market validation, or early-stage candle launches, but buyers should understand that low quantity does not always mean low unit price.
Setup costs are one of the clearest reasons order quantity affects candle box pricing. Before bulk production begins, there may be artwork checking, prepress preparation, printing setup, color adjustment, die-cutting setup, lamination setup, foil stamping alignment, embossing mold preparation, insert testing, machine calibration, and packing confirmation. I see setup costs as the cost of getting the entire production system ready before the packaging can be made consistently.
Once this setup work is completed, producing additional boxes becomes more efficient. The machines are already adjusted, the material is already prepared, the color target has already been approved, the die-cutting position is confirmed, and the packing process is already understood. This is why the unit cost often decreases when quantity increases. The same preparation supports more finished boxes, so each box carries a smaller portion of the setup cost. In my experience, this is one of the most important points buyers need to understand when comparing different quantity quotations.
Printing Preparation and Color Control
Printing preparation can have a strong impact on quantity-based pricing because custom candle boxes often require artwork review, file checking, plate preparation, ink adjustment, proofing, and machine testing before mass printing begins. This is especially true when the packaging uses CMYK printing, Pantone matching, large ink coverage, gradient colors, inside printing, or strict brand color requirements. Even for a small order, these printing steps cannot be skipped if the buyer expects professional and consistent results.
For small quantities, the printing preparation cost is spread across fewer boxes, which pushes up the unit price. For larger quantities, the same printing preparation supports a longer and more efficient print run. I often pay close attention to this when candle brands request premium artwork or exact color matching. A simple one-color logo may be easier to produce at a lower quantity, while a box with full-color artwork and strict brand color control usually becomes more cost-efficient when the order quantity is higher. This does not mean every brand should order more than it needs, but it does explain why printing-heavy packaging often shows a clearer price difference between low and high quantities.
Die-Cutting and Tooling Efficiency
Die-cutting and tooling also affect how order quantity changes the unit price. Most custom candle boxes need a dieline, cutting die, creasing lines, and sometimes additional tooling for windows, sleeves, inserts, drawer trays, rigid box components, magnetic closures, or gift box structures. These tools are necessary because the packaging must be shaped accurately and repeatably in bulk production. A candle box may look simple after assembly, but its production still depends on precise cutting, creasing, folding, and forming.
For a small order, the cost of preparing and using these tools is divided across fewer boxes, so the unit cost becomes higher. For a larger order, the same die or tooling can be used across more pieces, making each box more economical. I often remind buyers that tooling is not only a one-time technical detail. It affects the accuracy, consistency, and efficiency of the entire production run. If the candle box includes a custom insert, complicated folding structure, rigid box format, or gift packaging design, the quantity becomes even more important because the setup work behind the structure is more demanding.
Material Purchasing and Material Efficiency
Material purchasing is another reason order quantity affects the cost of custom candle boxes. Packaging materials such as paperboard, greyboard, kraft paper, coated paper, specialty paper, wrapping paper, lamination film, foil, insert materials, glue, and outer cartons all need to be prepared according to the project requirements. When the order quantity is higher, material purchasing can often be planned more efficiently, and production waste can be controlled better.
For small orders, material purchasing may be less efficient because some materials have supplier minimums, standard sheet sizes, or leftover portions that cannot always be used for another project. If a buyer chooses specialty paper, a custom color paper, FSC-certified paper, or a less common finishing material, the minimum purchasing quantity may affect the final price even when the order itself is small. In a larger order, the material can be used more fully, waste can be spread more efficiently, and the production plan becomes more stable. From my perspective, material efficiency is one of the hidden reasons larger quantities often receive better unit pricing.
Machine Adjustment and Production Continuity
Machine adjustment affects pricing because printing machines, laminating machines, die-cutting machines, folding and gluing machines, foil stamping machines, and assembly lines all need time to reach stable production conditions. This setup time does not disappear because the order is small. In some cases, the time spent preparing the machines may be close to or even longer than the time spent producing the actual small order.
Larger orders usually benefit from better production continuity. Once the machine is running correctly, the job can continue for a longer period with fewer interruptions. This improves speed, reduces waste, and helps workers maintain consistent quality. I often think of this as one of the practical advantages of larger quantity. The more continuous the production run is, the easier it becomes to control color, cutting accuracy, folding quality, finishing alignment, and packing consistency. That improved efficiency is reflected in the unit price.
Labor Planning and Assembly Cost
Labor planning also changes with order quantity, especially for candle boxes that require manual work. Folding cartons may be more machine-efficient, while rigid boxes, drawer boxes, magnetic closure boxes, gift boxes, inserts, ribbons, windows, and multi-piece candle sets often require more hand assembly. When the order quantity is small, labor preparation and training time are still needed, but the cost is divided across fewer boxes.
For larger orders, workers can repeat the same process more efficiently after the packing and assembly method is confirmed. The team becomes familiar with the structure, insert placement, product fitting, and final packing standard. This can improve speed and reduce mistakes. I pay attention to labor cost because many buyers only think about materials, but for complex candle gift packaging, assembly can be a meaningful part of the final quotation. Quantity affects how efficiently that labor can be organized.
Quality Inspection and Production Control
Quality inspection also has a relationship with order quantity. Custom candle boxes may need checks for printing color, material surface, lamination quality, foil stamping position, die-cutting accuracy, folding quality, glue control, insert fit, rigid box forming, packing condition, and carton strength. These inspection steps are necessary whether the order is small or large, especially when the packaging is used for premium candles, glass jars, or retail gift sets.
For small orders, inspection preparation still takes time, and the quality standard still needs to be confirmed. For larger orders, inspection can be organized more systematically across the full production run. I see this as another reason quantity affects cost. Professional packaging production is not simply about making boxes quickly. It is about producing them consistently. The more complex the candle box, the more important quality control becomes, and the more the cost structure depends on a realistic order quantity.
Why Larger Orders Usually Reduce Unit Price
Larger orders usually reduce the unit price because fixed and semi-fixed costs are spread across more boxes. Once the artwork is approved, materials are ready, machines are adjusted, colors are controlled, dies are prepared, and workers understand the process, each additional box can usually be produced more efficiently. This is why buyers often see better pricing when they request higher quantity tiers.
However, I do not think buyers should expect the unit price to decrease endlessly. Every candle box still has material cost, printing cost, finishing cost, labor cost, inspection cost, packing cost, and sometimes insert cost. The biggest price improvement usually happens when the order moves from a very small quantity into a more practical production range. After that, the price may continue to improve, but the reduction becomes more gradual. I prefer to look at quantity tiers realistically so buyers can understand where the best cost-performance point may be.
MOQ and Practical Production Limits
MOQ exists because custom packaging production needs a minimum level of efficiency to make the project practical. I understand why new candle brands often want very low quantities when testing a product, but custom boxes are not produced the same way as ready-made packaging. Once a box has a custom size, custom artwork, custom material, special finishing, or custom insert, the production process needs preparation, and that preparation has a cost.
The practical MOQ depends on many factors, including box structure, material type, printing method, surface finishing, insert design, and overall production complexity. A simple folding carton may be more flexible at a lower quantity, while a rigid candle box with specialty paper, foil stamping, magnetic closure, and EVA insert will usually need a higher quantity to make the unit price reasonable. From my perspective, MOQ should not be viewed only as a barrier. It is also a reflection of how custom production works and how costs are controlled.
Quantity Planning for New Candle Products
Quantity planning is especially important for new candle products because buyers need to balance unit cost against inventory risk. A small order can help a brand test a fragrance line, confirm packaging design, launch a seasonal product, or validate customer response without committing too much inventory. The trade-off is that the unit cost will usually be higher. A larger order can reduce the unit price, but it requires more confidence in the product, sales channel, storage capacity, and cash flow.
When I think about quantity planning, I usually look at the brand’s stage. If the candle line is new and the market response is uncertain, a smaller first order may be reasonable even if the unit cost is higher. If the brand already has repeat customers, retail orders, distributor demand, or stable e-commerce sales, a larger quantity may be more cost-effective. The best quantity is not simply the one with the lowest unit price. It is the quantity that fits the brand’s sales forecast, budget, storage capacity, and reorder plan.
Repeat Orders and Long-Term Cost Efficiency
Repeat orders can improve long-term cost efficiency because the project becomes more stable after the first production run. The structure, dieline, material, color standard, finishing method, insert fit, and packing method may already be confirmed. This makes later production easier to plan and reduces the risk of repeated adjustments or unexpected problems.
I often see mature candle brands benefit from this because their packaging becomes a repeatable production standard rather than a new development project every time. The unit price still depends on the quantity ordered, but repeat production can reduce communication time, sampling uncertainty, color risk, and structural revision. For brands that plan to sell the same candle line over multiple seasons or reorder regularly, investing in a stable first production standard can support better long-term cost control.
Why Order Quantity Changes the Final Cost
Order quantity changes the final cost because it affects how preparation costs, material purchasing, printing setup, tooling, machine adjustment, labor planning, quality inspection, and packing work are distributed across the order. Small quantities usually create a higher unit price because the same production preparation supports fewer boxes. Larger quantities usually reduce the unit price because production becomes more efficient and each box carries a smaller share of the setup and coordination cost.
When I compare custom candle box quotations, I always look at quantity together with the rest of the packaging specification. A low-quantity order with a rigid box, specialty paper, foil stamping, custom insert, and strict color control will naturally have a much higher unit cost than a larger order of simple folding cartons. Understanding this relationship helps buyers compare prices more accurately and plan packaging orders more intelligently. In my experience, the goal is not always to order the largest possible quantity. The goal is to choose a quantity that balances unit cost, inventory risk, cash flow, sales demand, and long-term packaging stability.
Tooling, Die-Cutting, and Setup Costs
Tooling, die-cutting, and setup costs are often hidden inside the total cost of custom candle boxes, but I consider them some of the most important factors behind a realistic quotation. When buyers look at a finished box, they usually notice the paper, printing, color, structure, and finishing first. What they do not always see is the preparation required before production can begin. A custom candle box may need a new cutting die, special mold, creasing setup, insert tooling, foil stamping die, embossing mold, machine adjustment, material testing, or structural trial before it can be produced consistently. These costs may not be obvious from the outside, but they directly affect box accuracy, candle fit, assembly quality, and bulk production stability.
Why Tooling Costs Exist
Tooling costs exist because custom candle boxes are made to match a specific product, structure, and brand requirement. I often see buyers think that once the artwork and box size are confirmed, production can start immediately. In reality, the factory still needs physical tools to turn that design into a repeatable packaging product. A folding carton needs a cutting die. A custom insert may need its own die. A molded pulp tray may need a mold. A foil logo needs a stamping die. An embossed or debossed brand mark needs a separate mold. These tools are what make the box possible in real production.
I see tooling as the bridge between a packaging idea and a stable production result. Without accurate tooling, the box may not cut cleanly, fold properly, close smoothly, or hold the candle securely. This matters even more for candle packaging because the product inside is often heavy, fragile, and size-sensitive. A small mistake in tooling can lead to a loose insert, a tight lid, a weak bottom, a poorly aligned sleeve, or a drawer that does not slide correctly. For this reason, tooling cost should not be viewed as a random extra charge. It is part of building a custom packaging system that can be repeated accurately.
Cutting Dies for Custom Candle Boxes
Cutting dies are important because they create the flat shape of the box before it is folded, glued, wrapped, or assembled. I usually think of the cutting die as the physical version of the dieline. It cuts the outer shape, creates internal openings, forms locking tabs, and prepares crease lines so the paperboard can become the final candle box. For a simple folding carton, the cutting die may be relatively straightforward. For a candle box with windows, sleeves, drawer trays, shaped openings, handle areas, hanging holes, locking structures, or custom inserts, the die-cutting work becomes more demanding.
The cost of a cutting die depends on the box size, structure complexity, number of cut lines, number of crease lines, and level of precision required. A larger or more complex dieline usually needs more careful die preparation and testing. If the cutting die is not accurate, the finished box may not fold neatly, the panels may not align, the candle may not fit correctly, or the glued area may not hold well. From my perspective, die-cutting is one of the areas where precision quietly protects the whole project. Buyers may not notice it when everything is correct, but they will notice immediately if the box is hard to assemble or looks uneven.
Creasing and Folding Setup
Creasing and folding setup affect cost because custom candle boxes need clean, accurate, and durable fold lines. I pay close attention to creasing because it is one of the small production details that strongly affects the final appearance of a box. If the crease is too shallow, the board may resist folding and the box may look bulky or poorly formed. If the crease is too deep, the paper surface may crack, especially when the box uses thick paperboard, coated paper, lamination, large ink coverage, kraft paper, or specialty paper.
This is especially important for candle packaging because many candle boxes need to support heavier products. The folds are not only decorative lines; they help define the box shape and structural strength. A poorly controlled crease can weaken the bottom, affect lid closure, create rough corners, or make the box feel unstable after assembly. In my view, good creasing is one of the quiet signs of professional packaging. It takes setup time and testing, but it helps the box look cleaner and perform better in real use.
Setup Costs Before Production
Setup costs before production include the preparation work needed to make the project ready for stable manufacturing. I usually think of setup as everything that happens before the factory can produce boxes continuously. This may include artwork checking, dieline review, file preparation, color setup, material testing, machine adjustment, die installation, lamination setup, foil stamping alignment, embossing pressure testing, folding and gluing adjustment, insert fitting, and packing standard confirmation.
These steps may not be visible in the finished candle box, but they influence the final result. A candle box with one-color printing and a simple folding structure may require less setup. A luxury candle gift box with rigid board, specialty paper, foil stamping, embossing, magnetic closure, custom insert, and strict color control requires much more preparation. I see setup as a risk-control stage. It helps identify problems before bulk production begins, which is far better than discovering structural or color issues after thousands of boxes have already been made.
Special Molds for Inserts and Inner Support
Some candle boxes require special molds or tooling for inserts and inner support. I often see this when the packaging is designed for glass candle jars, ceramic vessels, heavy containers, multi-piece candle sets, or gift boxes that need a more organized presentation. A molded pulp insert may need a custom mold. An EVA insert may need custom cutting tools. A foam insert may require a shaped cutting process. A paper insert may need its own die-cutting layout. These inner components are not just accessories; they help hold the candle securely inside the box.
The cost of insert tooling depends on the material, product shape, cavity depth, number of openings, fitting tolerance, and protection requirements. A simple paper insert may be relatively easy to produce, while a molded pulp tray or custom EVA insert may require more development work. I usually evaluate insert tooling by asking how much movement the candle needs to avoid and how the product should look when the box is opened. If the candle is heavy or fragile, a better insert may increase the project cost, but it can reduce damage risk and improve the customer experience.
Tooling for Foil Stamping, Embossing, and Debossing
Finishing processes can also require separate tooling, and this is another cost buyers sometimes overlook. A foil-stamped logo usually needs a stamping die. An embossed design needs a raised mold. A debossed detail needs a pressing mold. If the design includes multiple foil areas, large metallic patterns, very fine lines, or precise alignment with printed artwork, the tooling and setup become more demanding.
I often see this in premium candle boxes where the brand wants a small gold foil logo, a debossed fragrance name, or an embossed pattern on a soft-touch surface. These finishes can make the packaging feel more refined, but they also require accurate pressure, heat, position control, and material compatibility testing. The same foil or embossing design may perform differently on coated paper, textured paper, specialty paper, or laminated surfaces. From my perspective, finishing tooling is worthwhile when it strengthens the brand presentation, but it should be planned carefully so the added cost creates visible or tactile value.
Machine Adjustment and Production Calibration
Machine adjustment is another setup cost that affects custom candle box pricing. Printing machines, die-cutting machines, laminating machines, foil stamping machines, folding and gluing machines, and box forming equipment all need adjustment before stable production begins. The machine settings may need to change depending on paper thickness, board stiffness, ink coverage, lamination film, box structure, glue area, and finishing requirements.
For simple projects, machine setup may be relatively quick. For more complex candle packaging, the adjustment can take longer because the production team needs to make sure the color is stable, the cutting is accurate, the crease does not crack, the glue holds properly, and the box forms correctly. I see this as part of the real cost of customization. A custom candle box is not only designed differently; it also needs the production line to be prepared differently.
Testing and Structural Adjustment
Testing and structural adjustment can add cost because custom candle boxes often need to be checked before bulk production. I usually look at whether the candle fits smoothly, whether the insert holds the product securely, whether the lid closes correctly, whether the drawer slides well, whether the sleeve has the right tightness, whether the bottom supports the candle weight, and whether the box can be packed efficiently. These checks may lead to small changes in the dieline, board thickness, crease position, insert shape, or assembly method.
This stage is especially important for glass candle jars, heavy vessels, rigid candle boxes, drawer boxes, magnetic closure boxes, and multi-piece gift packaging. A digital drawing may look perfect, but the real product can reveal issues that are not obvious on screen. The jar may be slightly taller than expected. The lid may need more clearance. The insert may hold too tightly. The drawer may drag when opened. In my experience, testing is not just an added cost; it is a way to avoid much larger losses during bulk production.
Why Complex Structures Require More Accurate Die-Cutting
Complex structures require more accurate die-cutting because every part of the box must work together. A simple folding carton may tolerate small variations more easily, but a drawer box, magnetic closure box, lid and base box, sleeve box, window box, or multi-compartment gift box has more points where accuracy matters. The panels, folds, trays, sleeves, lids, inserts, and glue areas all need to align correctly.
For candle packaging, this accuracy becomes even more important because the product is often rigid and heavy. If a drawer tray is slightly too tight, the customer may struggle to open it. If a sleeve is too loose, the packaging may feel low quality. If a lid and base box does not fit well, the premium experience is weakened. If an insert opening is inaccurate, the candle may move during shipping. This is why complex custom candle boxes usually require better tooling, more testing, and closer setup control before production.
How Tooling and Setup Affect Small Orders
Tooling and setup costs affect small orders more strongly because the preparation work is divided across fewer boxes. A cutting die, mold, printing setup, stamping die, embossing tool, insert tool, or machine adjustment may be required whether the buyer orders a few hundred boxes or several thousand boxes. When the order quantity is low, each box carries a larger share of these preparation costs.
This is one reason small custom candle box orders often have a higher unit price. The buyer may compare only the physical box and wonder why the unit cost is high, but the cost is also coming from the work required to prepare a custom production run. I usually explain this because it helps buyers compare quotations more realistically. A low-volume custom project can be useful for testing, but it is rarely the most efficient way to spread tooling and setup costs.
Reusing Tooling for Repeat Orders
One advantage of custom tooling is that some tools can often be reused for repeat orders if the box size, structure, and design remain the same. I see this as an important point for mature candle brands or product lines that will be produced again in the future. Once the cutting die, insert die, or certain tooling has been developed and approved, future orders may become smoother because the production team already has a confirmed standard.
However, tooling reuse depends on whether the design stays unchanged. If the buyer changes the box size, candle jar, insert shape, opening structure, or artwork area that affects the dieline, new tooling may be needed. In my view, brands that plan long-term candle packaging should think carefully before finalizing the first structure. A well-planned dieline can support repeat production, reduce future development time, and improve consistency across orders.
Why Tooling, Die-Cutting, and Setup Change the Final Cost
Tooling, die-cutting, and setup change the final cost because they prepare the candle box for accurate, repeatable, and stable production. Cutting dies, special molds, creasing setup, insert tooling, finishing tools, machine adjustment, and structural testing all help turn a custom packaging concept into a physical box that works in real production. These costs may not be obvious in the finished package, but they affect product fit, folding quality, assembly efficiency, surface finishing accuracy, and bulk production consistency.
When I compare custom candle box quotations, I always look at whether the project requires new tooling, special molds, complex die-cutting, or extra setup work. A simple folding carton with a standard structure will usually have lower setup requirements than a rigid candle gift box with a custom insert, foil stamping, embossing, and a special opening design. Understanding these hidden preparation costs helps buyers compare quotes more fairly. It also helps them see that the lowest visible box price may not always reflect the real production work needed to make the packaging accurate, protective, and consistent.
Sampling and Proofing
Sampling and proofing can add upfront cost to a custom candle box project, but I see this step as one of the most useful ways to avoid expensive mistakes before bulk production. A quotation can explain the price, and a digital mockup can show the design direction, but neither one can fully prove whether the box size is accurate, whether the candle fits securely, whether the material feels right, whether the printed color matches the brand, whether the finish performs well, or whether the opening experience feels premium enough. For candle packaging, this matters even more because many candles are packed in glass jars, ceramic vessels, heavy containers, or gift sets where protection, presentation, and customer experience all need to work together. A sample may increase the early project cost, but it gives buyers a physical reference before they commit to thousands of boxes.
Why Sampling Adds Upfront Cost
Sampling adds upfront cost because it is not the same as producing one piece from a fully running bulk production line. I often see buyers compare a sample cost with the bulk unit price and feel confused, but the two costs follow different logic. A sample may require separate artwork checking, dieline review, material preparation, structural testing, digital printing or small-batch printing, manual cutting, handmade assembly, finishing trials, insert adjustment, and individual inspection. The factory may need to spend time preparing one physical reference even though the final order has not yet entered mass production.
From my perspective, sampling should be understood as development work rather than ordinary box production. The value of a sample is not only that it gives the buyer one box to look at. Its real value is that it helps confirm whether the packaging specification is practical, whether the design can be produced, and whether the structure is ready for bulk manufacturing. This is especially important when the candle box includes a custom size, rigid structure, drawer opening, magnetic closure, specialty paper, foil stamping, embossing, custom insert, or strict color requirement. These details need to be checked physically because they can affect both cost and production risk.
Structure Testing
Structure testing is one of the most important reasons I pay attention to sampling. A candle box may look correct in a digital dieline, but the physical sample shows whether the structure actually works in real use. I usually check whether the box folds cleanly, whether the lid closes properly, whether the drawer slides smoothly, whether the sleeve feels too tight or too loose, whether the magnetic closure feels secure, whether the bottom can support the candle weight, and whether the overall shape stays stable after assembly.
This is especially important for candle packaging because candles are often heavier than many other retail products. A glass candle jar, ceramic vessel, or multi-piece gift set can create pressure points that are not obvious in a flat design file. If the structure is too loose, the product may move during shipping. If it is too tight, packing becomes difficult and the box may deform. If the bottom support is weak, the box may fail under the product’s weight. In my view, structure testing helps buyers catch these issues before they become bulk production problems.
Color Proofing
Color proofing helps buyers understand how the actual printed color will look on the selected material. I always remind buyers that colors on a screen are not reliable enough for final packaging approval because every screen shows color differently. Paper color, ink absorption, printing method, coating, lamination, drying time, and lighting conditions can all change the final result. A soft cream, warm beige, deep green, dark navy, natural brown, or luxury black tone may look very different after it is printed on paper.
For candle brands, color proofing can be especially important because color often communicates scent, mood, season, and brand identity. A lavender candle may depend on a soft purple tone. A sandalwood candle may use warm brown or beige. A holiday candle may need deep red, green, or metallic details. If the printed color does not match the intended feeling, the whole product presentation can feel wrong. I see color proofing as a way to protect brand consistency before bulk production begins, especially when the packaging uses Pantone matching, CMYK full-color artwork, large ink coverage, gradients, or repeat-order color standards.
Material Confirmation
Material confirmation is another major reason sampling matters. Paperboard, kraft paper, coated paper, textured paper, specialty paper, greyboard, and FSC-certified paper all have different thickness, stiffness, surface texture, color tone, printability, and hand feel. I often find that buyers can only make a confident decision after touching the actual material because photos and written descriptions cannot fully show how the paper behaves.
For candle boxes, material choice affects both protection and perceived value. A material may look beautiful in a reference image but feel too thin for a heavy glass jar. A textured paper may feel premium but may not reproduce small printed details clearly. Kraft paper may support a natural brand story but may make light ink colors appear weaker. A thicker greyboard may feel luxurious but may also increase weight and cost. Sampling helps buyers judge these trade-offs physically. In my experience, this is one of the best ways to avoid choosing a material that looks good on paper but does not support the actual product.
Finishing Trials
Finishing trials can add cost because premium surface processes often need to be checked on the actual material. Matte lamination, gloss lamination, soft-touch lamination, foil stamping, embossing, debossing, spot UV, and special coatings can all behave differently depending on the paper surface, ink coverage, artwork detail, heat, pressure, and alignment. I have seen foil look sharp on smooth coated paper but less clean on textured paper, and I have seen embossing look strong on thicker board but weak on thinner materials.
For candle packaging, finishing often plays a major role in perceived value. A soft-touch surface can make a luxury candle box feel more refined. A foil-stamped logo can make a gift box feel more premium. A debossed detail can create quiet elegance. However, these effects should be confirmed before bulk production because they are difficult to judge accurately from a digital mockup. I see finishing trials as a practical way to decide whether a finishing process is truly worth the added cost and whether it can be produced consistently.
Insert Fit and Product Protection
Sampling is especially useful for checking insert fit and product protection. I usually place the actual candle or a product sample inside the box to see whether the jar sits securely, whether the lid has enough clearance, whether the insert is too tight, whether the product moves when the box is handled, and whether the packaging still looks neat after opening. These details are critical for glass jars, ceramic vessels, heavy candle containers, and multi-piece candle sets.
The insert may look correct in a structural drawing, but the real product can reveal problems. A label may add thickness. A lid may be slightly taller than expected. A glass jar may have small dimensional variation. A tray opening may be too tight for smooth packing or too loose for safe shipping. If these issues are discovered during sampling, they can usually be adjusted before bulk production. If they are discovered after production, the cost of correction becomes much higher. This is why I consider insert testing one of the most valuable parts of the sampling process for candle packaging.
Opening Experience
The opening experience is another detail that sampling helps buyers evaluate. Candle packaging is often connected with gifting, relaxation, home fragrance, wellness, and lifestyle, so the way the package opens can influence how customers feel about the product. I usually check whether the lid lifts smoothly, whether the drawer slides naturally, whether the sleeve has the right resistance, whether the magnetic closure feels satisfying, and whether the candle is presented neatly when the box is opened.
This experience cannot be fully understood from a digital mockup because it involves touch, movement, friction, weight, and timing. A box may look premium in a rendering but feel awkward when opened. A sleeve may look elegant but be too tight in the customer’s hand. A drawer may look beautiful but drag during opening. A magnetic box may look expensive but close weakly if the alignment is poor. I see sampling as the moment when packaging moves from visual design to real customer experience.
Packing and Assembly Check
Sampling also helps check whether the packaging is practical to assemble and pack. I often pay attention to whether the box can be folded efficiently, whether the insert is easy to place, whether the candle can be inserted without damaging the surface, whether the lid closes smoothly after packing, and whether the final box can be placed into outer cartons without deformation. A sample that looks good but is slow or difficult to assemble can increase labor cost during bulk production.
For candle boxes, assembly matters because many projects involve inserts, rigid structures, gift layouts, or fragile glass containers. If workers need too much time to adjust each product, the packing process becomes less efficient. If the box surface is easily scratched during assembly, the defect rate may increase. If the insert is too tight, the product may need force to fit, which creates risk. In my view, a good sample should not only look attractive. It should also prove that the packaging can be packed smoothly and repeatedly.
Pre-Production Sample as a Production Standard
A pre-production sample can become the physical standard for bulk production, and I think this is one of the most valuable reasons to invest in sampling. Once the buyer approves the sample, it can serve as a reference for box size, material, color, printing quality, finishing effect, insert fit, opening feel, and packing method. This helps reduce misunderstanding between design expectations and production reality.
Without an approved sample, both sides may rely too much on digital files, photos, or written descriptions, which can leave room for different interpretations. A physical sample creates a shared standard. It allows the buyer and production team to compare bulk products against something real rather than only discussing abstract requirements. For repeat orders, this standard can also help maintain consistency from one production batch to another.
When Sampling Is Especially Important
Sampling is especially important when the candle packaging has more variables or higher risk. I would be more cautious with a heavy glass candle jar, rigid gift box, drawer box, magnetic closure box, custom insert, specialty paper, dark full-coverage printing, Pantone color matching, foil stamping, embossing, soft-touch lamination, molded pulp insert, or multi-piece candle gift set. These packaging types involve more details that can affect cost, fit, and final quality.
For simple folding cartons with familiar material and simple printing, the sampling process may be more straightforward. But when the packaging is premium, protective, or intended for repeat retail orders, I usually see sampling as a smart investment. It helps confirm that the packaging can meet both brand expectations and production requirements. In many cases, the sample cost is much smaller than the cost of correcting a mistake after bulk production.
Why Sampling and Proofing Change the Final Cost
Sampling and proofing change the final cost because they add development work before bulk production. Structure testing, color proofing, material confirmation, finishing trials, insert fitting, product protection checks, opening experience review, assembly testing, and pre-production approval all require time, materials, and technical attention. These steps increase upfront cost, but they also reduce the chance of producing a large order with the wrong size, wrong color, weak structure, poor fit, or unsatisfactory finish.
When I evaluate custom candle box costs, I do not treat sampling only as an extra charge. I treat it as part of responsible packaging development. A good sample helps buyers see, touch, test, and approve the packaging before committing to bulk production. For candle packaging, where protection, presentation, scent storytelling, gift value, and customer experience all matter, sampling is often one of the most practical ways to control risk and make better packaging decisions.
Packing and Shipping Protection
Packing and shipping protection can affect the cost of custom candle boxes because the project does not end when the boxes are printed, formed, and inspected. When I evaluate candle packaging cost, I always think about what happens after production: how the finished boxes are stacked, how they are packed into outer cartons, how the surfaces are protected, how moisture is controlled, and how the cartons will move through warehouses, trucks, ports, containers, and final delivery. This matters because candle boxes often use delicate printing, premium finishing, rigid structures, or gift-ready surfaces that can be damaged if the packing method is too simple. A box may leave the production line looking perfect, but poor packing can still lead to crushed corners, rubbing marks, deformation, dirty surfaces, moisture damage, or damaged finishes before the buyer ever receives the goods.
Outer Cartons
Outer cartons affect cost because they are the first major protection layer for finished candle boxes during storage and transportation. I often see buyers focus only on the unit price of the candle box itself, but the outer carton is what protects those boxes from stacking pressure, carton handling, warehouse movement, and transport vibration. If the carton is too weak, the finished boxes inside can be compressed. If the carton is too large, the boxes may move and rub against each other. If the carton is too tightly packed, pressure can damage corners, lids, sleeves, or rigid box edges.
The cost of outer cartons depends on carton size, corrugated strength, board grade, carton wall structure, packing quantity, gross weight, and whether export-grade cartons are needed. For short-distance delivery, a standard carton may be enough. For international shipment, I usually prefer a stronger carton because the goods may pass through several handling points before arrival. A slightly stronger outer carton may increase packing cost, but it can protect the value already invested in paper, printing, finishing, and box forming. In my view, saving too much on outer cartons can be risky when the candle boxes are premium, heavy, or intended for retail display.
Inner Protection
Inner protection affects cost because finished candle boxes may need additional layers inside the shipping carton to prevent movement, friction, and surface damage. I pay close attention to this when the boxes use matte lamination, soft-touch lamination, dark full-coverage printing, foil stamping, embossing, spot UV, textured paper, or specialty paper. These finishes can make the packaging look beautiful, but they can also make surface damage easier to notice if the boxes rub during shipping.
Inner protection may include paper wrapping, tissue paper, layer sheets, dividers, corner pads, protective film, or a tighter carton arrangement. The purpose is not only to fill space. It is to stop the finished boxes from moving against each other during transport. If a soft-touch black candle box rubs against another box for a long sea shipment, even a small mark can make the packaging feel defective. For gift packaging and retail-ready candle boxes, I usually see inner protection as a necessary part of quality preservation rather than an optional extra.
Packing Quantity Per Carton
Packing quantity per carton can change cost because it affects carton strength, handling weight, surface protection, and shipping efficiency. I often review how many candle boxes are placed in each carton because too many boxes can create pressure damage, while too few boxes can increase carton count, freight volume, and packing material cost. The right carton quantity needs to balance protection and logistics efficiency.
For rigid candle boxes, drawer boxes, magnetic closure boxes, and premium gift boxes, I usually prefer more controlled packing because the structures can be sensitive to corner pressure and surface rubbing. For flat-packed folding cartons, the packing method may be more efficient, but the cartons still need to avoid bending, moisture, and edge damage. A carton that is too heavy may be difficult to handle safely and may increase the risk of dropping or compression. A carton that is too light but too large may waste shipping space. In my view, carton quantity is a practical detail that can quietly affect both cost and arrival condition.
Careful Stacking
Careful stacking affects cost because cartons need to be arranged in a way that avoids compression, deformation, and uneven pressure during storage and shipping. I pay attention to stacking especially when candle boxes are large, rigid, gift-style, or made with delicate surface finishes. If cartons are stacked too high or if the weight is not distributed evenly, the lower cartons may be compressed, and the boxes inside may develop crushed corners, flattened panels, warped lids, or pressure marks.
International shipping makes stacking more important because cartons may remain under pressure for weeks during sea freight or warehouse storage. The packing plan may need stronger cartons, suitable carton dimensions, layer boards, pallet support, corner boards, wrapping film, or stacking limits. These details can increase cost, but they also help the boxes arrive in a condition suitable for retail, gifting, or product assembly. I see careful stacking as part of the hidden quality control process after production.
Moisture Protection
Moisture protection can affect cost because paper-based packaging is sensitive to humidity. I always think about moisture when candle boxes are shipped internationally, stored for a long time, or transported through humid climates. Paperboard, greyboard, kraft paper, coated paper, wrapping paper, and corrugated cartons can all absorb moisture. Once moisture enters the packaging, it may cause warping, soft corners, surface marks, mold risk, weak cartons, or changes in box shape.
The level of moisture protection depends on the shipping route, climate, season, transit time, storage conditions, and material type. Some projects may need polybagging, moisture-resistant outer packing, desiccants, pallet wrapping, sealed cartons, or better carton closure. I usually consider moisture protection more seriously for rigid boxes, specialty paper boxes, kraft paper boxes, and packaging with premium finishes because these materials and surfaces need to remain clean and stable. Moisture protection adds cost, but it can prevent damage that is much more expensive to fix after arrival.
Export Packing
Export packing usually costs more than basic domestic packing because international shipments face longer transit time, more handling points, and more unpredictable conditions. I treat export packing as an important part of the project because custom candle boxes may travel from the factory to a local warehouse, then to a port, then into a container, then to a destination warehouse, and finally to the buyer’s facility. Each transfer creates risk from pressure, vibration, impact, humidity, and rough handling.
Stronger export packing may include reinforced outer cartons, controlled carton weight, better internal protection, moisture control, palletizing, corner protection, carton labels, carton sealing, and careful stacking instructions. These details do not make the candle box itself look more beautiful, but they help protect the final result. In my experience, export packing is especially important for premium candle boxes because the buyer needs packaging that arrives clean, undamaged, and ready for retail or assembly. A beautiful box that arrives crushed is no longer a successful packaging solution.
Surface Rubbing and Scratch Prevention
Surface rubbing and scratch prevention can increase packing cost when candle boxes use delicate materials or premium finishes. I often see this issue with dark matte boxes, soft-touch laminated boxes, foil-stamped boxes, spot UV designs, textured papers, and specialty paper surfaces. These boxes can look excellent when freshly produced, but they may show scratches, scuffs, fingerprints, or rubbing marks if the packing method does not control movement.
To reduce rubbing, the packing may need protective paper between layers, individual wrapping, soft separators, tighter carton fitting, or controlled box orientation. The right solution depends on the surface sensitivity and the buyer’s quality expectations. A standard retail carton may tolerate small handling marks, but a luxury candle gift box may not. I usually judge this based on how visible the damage would be to the final customer. If a small scratch can reduce the perceived value of the product, then scratch prevention becomes part of the real packaging cost.
Corner and Edge Protection
Corner and edge protection matters because corners and edges are often the first places where damage appears. I pay close attention to this for rigid candle boxes, lid and base boxes, drawer boxes, magnetic closure boxes, and candle gift boxes because clean edges are part of the premium impression. Even if the main surface is printed beautifully, crushed corners or rubbed edges can make the packaging feel poorly handled.
Corner and edge protection may require stronger cartons, better packing density, layer boards, corner boards, edge protectors, or careful carton placement. For rigid boxes, the corner quality is especially important because the structure is already formed before shipping, so it cannot be flattened and protected the same way as simple folding cartons. The cost of this protection is usually smaller than the cost of replacing damaged goods or receiving complaints from buyers. In my view, corner protection is one of the most practical ways to preserve packaging value during transportation.
Palletizing and Handling Control
Palletizing and handling control can affect cost when candle boxes are shipped in larger quantities or internationally. I often consider whether the cartons should be placed on pallets, wrapped with film, protected with corner boards, and arranged to reduce movement during transport. Palletizing can add cost because it uses extra materials and may increase volume, but it can also reduce handling damage by keeping cartons more stable as a unit.
This is especially useful for premium candle packaging, large export orders, and cartons that should not be thrown or heavily compressed. Palletized shipments are often easier to move with forklifts and can reduce repeated manual handling. However, palletizing should be planned according to shipping method, carton size, destination warehouse requirements, and freight cost. I do not treat it as necessary for every order, but when the packaging is delicate or the order quantity is large, it can be a smart protective choice.
Shipping Method and Transit Risk
The shipping method affects how much protection the finished candle boxes need. Air freight, sea freight, courier delivery, truck transport, and warehouse distribution all create different risks. I usually think about transit time, handling frequency, stacking pressure, humidity exposure, vibration, and final delivery conditions before judging whether the packing method is enough.
Sea freight may need stronger moisture protection and stacking control because the transit time is longer and cartons may sit in containers for weeks. Courier shipments may need stronger shock protection because boxes are handled more frequently and less predictably. Truck transport may require stable carton stacking and protection against compression. Warehouse distribution may require packaging that can survive repeated movement before reaching the final buyer. The correct packing method should match the real shipping route rather than assuming one standard method works for every project.
Packing for Retail-Ready Candle Boxes
Retail-ready candle boxes need more careful packing because they are not just protective containers. They are part of the product presentation. I often think about whether the boxes will go directly to a brand warehouse, distributor, retailer, or fulfillment center. If the boxes are already printed, finished, and intended for shelf display, they need to arrive clean, flat, and free from obvious surface damage.
This can affect packing cost because retail-ready boxes may need better surface protection, cleaner cartons, controlled packing direction, and stricter inspection before shipment. A box with minor rubbing marks might still protect the candle, but it may not be acceptable for retail display. In my view, the higher the customer-facing value of the packaging, the more important the packing method becomes.
Why Packing and Shipping Protection Change the Final Cost
Packing and shipping protection change the final cost because they add materials, labor, carton strength, inner protection, moisture control, stacking planning, surface protection, corner protection, palletizing, and export packing requirements. These costs may not be part of the candle box itself, but they help protect the box after production. Without proper packing, even a well-made candle box can arrive damaged.
When I compare custom candle box quotations, I always look at whether the packing method matches the product value and shipping route. A lower quote may use simpler packing, but that can create higher risk if the boxes arrive with crushed corners, rubbing marks, deformation, moisture damage, or damaged finishes. A slightly higher packing cost may protect the value of the whole project. For candle brands, importers, distributors, and e-commerce sellers, the real goal is not only to produce beautiful boxes. The goal is to receive boxes that remain clean, well-shaped, and ready for retail, gifting, assembly, or delivery to customers.
Why Two Similar Candle Boxes May Have Different Prices
Two candle boxes may look almost identical in photos, but their actual production costs can be very different because many important details are hidden behind the visible surface. When I compare custom candle box quotations, I never judge only by the box shape, logo position, color, or general style. A product photo cannot fully show board thickness, paper grade, material stiffness, printing accuracy, color control, finishing quality, insert design, structural tolerance, assembly standard, or shipping protection. This is why one candle box may appear similar to another online, yet one quotation is much higher because it includes better material, more controlled production, safer inner support, or stronger export packing. For buyers, the key lesson is simple: visual similarity does not always mean production similarity.
Material Quality Behind the Same Appearance
Material quality is one of the first things I check when two similar candle boxes have different prices. In a photo, two boxes may both look like white paperboard boxes, kraft boxes, rigid gift boxes, or matte black candle boxes. However, one may use lower-grade paper, thinner paperboard, weaker greyboard, or a less stable wrapping paper, while the other may use cleaner paper, stronger board, better stiffness, higher brightness, smoother surface, or more consistent material quality.
This difference becomes much clearer when the box is touched, packed, stacked, or shipped. A cheaper material may look acceptable when the box is empty, but it may feel weak once a heavy glass candle jar is placed inside. It may also bend more easily, show rougher edges, absorb ink unevenly, or lose shape during handling. A higher-quality material usually increases cost, but it can improve structure, printing result, surface appearance, and customer perception. In my view, buyers should never compare candle box prices without confirming the exact material type and thickness behind each quotation.
Board Thickness and Structural Strength
Board thickness can create a major price difference even when two boxes have the same size and structure. A rigid candle box made with thicker greyboard will usually feel more solid, more stable, and more premium than one made with thinner board. A folding carton made with stronger paperboard may hold its shape better than a carton made from lighter material. These differences are often difficult to identify from photos, but they become obvious when the box is held or used.
I pay close attention to thickness because candles are often heavier than many other consumer products. Glass jars, ceramic vessels, and multi-piece candle sets can put pressure on the bottom, side walls, corners, and inserts. If the board is too thin, the box may bulge, deform, crack at the crease, or fail during transport. If the structure uses stronger board, the cost increases, but the packaging can provide better support and a more reliable customer experience. This is why two boxes that look similar on screen may perform very differently in real use.
Paper Surface and Hand Feel
Paper surface and hand feel can also explain price differences that are not obvious in photos. Two candle boxes may both appear matte or natural, but one may use basic coated paper while another uses specialty paper, textured paper, dyed paper, or a higher-grade wrapping paper. The surface may feel smoother, softer, more tactile, more natural, or more luxurious depending on the material selected.
For candle packaging, I think hand feel matters because candles are often emotional products. Customers buy them for home atmosphere, wellness, gifting, fragrance, and lifestyle experience. A box that feels refined in the hand can support a higher perceived product value, while a box that feels thin or rough may weaken the brand impression. A better paper surface usually costs more, but it can help the packaging communicate quality before the customer even opens the box.
Printing Accuracy and Color Control
Printing accuracy can make two similar candle boxes cost very differently. One box may use basic printing with loose color tolerance, while another may require stricter color matching, sharper detail reproduction, better ink density, cleaner registration, or Pantone color control. In photos, both boxes may appear close enough, but in real production, these printing differences can strongly affect brand consistency and shelf presentation.
I often see this issue with candle packaging that uses dark backgrounds, soft fragrance colors, gradient tones, botanical illustrations, small text, or signature brand colors. A lower-cost print may show uneven ink coverage, dull color, visible color shift, or less precise detail. A more controlled printing process costs more because it requires better prepress work, proofing, machine adjustment, and inspection. For candle brands that need repeat orders or multiple scents displayed together, printing accuracy is not just a visual preference. It helps protect brand identity.
Finishing Quality and Surface Details
Surface finishing can create a significant price difference between two boxes that look similar at first glance. A photo may show both boxes as matte, glossy, or premium-looking, but the actual finishing process may be very different. One box may use a basic matte lamination, while another may use soft-touch lamination, anti-scratch coating, foil stamping, embossing, debossing, spot UV, or a specialty coating.
I usually evaluate finishing through touch, light reflection, surface durability, and how well it supports the candle brand. A soft-touch box may feel more luxurious than a standard matte box. A foil-stamped logo may require a custom die and accurate positioning. Embossing or debossing may add tactile value that is not always visible in photos. These processes add cost because they require additional materials, machine setup, tooling, pressure control, and inspection. Buyers should always confirm the exact finishing process before assuming two boxes are equivalent.
Insert and Inner Support Differences
Insert and inner support are often hidden inside the box, but they can strongly affect cost. Two candle boxes may look identical from the outside, yet one may have no insert or only a very simple paper support, while the other may include a custom paper insert, cardboard divider, molded pulp tray, EVA insert, foam insert, or engineered tray. Since the insert is not always shown clearly in photos, this difference is easy to miss.
For candle packaging, I consider the insert especially important because candles are often heavy, fragile, or gift-oriented. A better insert can reduce product movement, protect the jar, support the lid, improve the opening presentation, and reduce shipping damage. A cheaper insert may reduce the quotation, but it can increase the risk of broken glass, scratched labels, loose product movement, or messy presentation. When I compare prices, I always check what kind of inner support is included and whether it matches the candle’s weight and fragility.
Structural Tolerance and Product Fit
Structural tolerance is another reason similar-looking candle boxes may have different prices. A drawer box may look the same in two photos, but one may slide smoothly while another feels tight, loose, or uneven. A sleeve box may look simple, but the sleeve fit can completely change the customer experience. A lid and base box may appear premium, but if the lid does not fit correctly, the entire box feels poorly made.
I judge candle packaging by how it functions, not only how it photographs. Good structural fit requires accurate dielines, reliable tooling, controlled die-cutting, clean creasing, careful forming, and consistent assembly. These details often increase production cost because they require more testing and inspection. For premium candle packaging, the way the box opens, closes, slides, or holds the product can be just as important as the printed design. This is why structural tolerance should always be part of quotation comparison.
Assembly Quality and Manual Work
Assembly quality can create price differences, especially for rigid boxes, drawer boxes, magnetic closure boxes, gift boxes, boxes with inserts, and multi-piece packaging. Two boxes may look similar in a front-facing photo, but one may have cleaner wrapped edges, better corner finishing, stronger glue control, more accurate magnet placement, smoother tray movement, and more consistent insert positioning. These details often depend on skilled labor and quality control.
I often pay attention to corner sharpness, lid alignment, edge wrapping, glue marks, surface bubbles, tray fit, and whether the box feels stable when opened. Better assembly takes more time and may increase cost, but it also reduces defects and improves the customer experience. A cheaper box may save cost by reducing manual control, but that can lead to uneven corners, weak bonding, poor alignment, or inconsistent quality across the order.
Packing and Shipping Protection
Packing and shipping protection can also explain why two quotations are different. One quotation may include basic outer cartons, while another may include stronger export cartons, inner protection, layer sheets, moisture protection, corner protection, controlled stacking, or better surface rubbing prevention. These packing details may not appear in a product photo, but they can determine whether the boxes arrive in usable condition.
I pay close attention to packing when candle boxes are shipped internationally or when they use delicate surfaces such as dark printing, soft-touch lamination, foil stamping, textured paper, or rigid structures. Poor packing can lead to crushed corners, rubbing marks, deformation, dirty surfaces, or damaged finishes. A lower quote may look attractive at first, but if the boxes arrive damaged, the real cost becomes much higher. In my view, packing protection is part of the packaging value, not an unrelated shipping detail.
Production Standard and Quality Control
Production standard is one of the hidden reasons prices may differ even when the specifications seem similar. One supplier may use looser tolerance, simpler inspection, lower material control, or more basic packing to reduce cost. Another may spend more time checking printing color, paper surface, box dimensions, folding accuracy, glue control, insert fit, corner quality, and final packing condition. These differences are not always visible in a quote, but they affect the final result.
When I compare candle box prices, I look for signs of production stability. A slightly higher price may reflect better quality control, fewer defects, stronger repeat-order consistency, and lower risk during bulk production. A lower price may still work for simple packaging, but for premium candle boxes, retail-ready packaging, or gift sets, weak production standards can create problems later. In my experience, consistency across the full order is often where the real value of a quotation becomes clear.
Why Visual Appearance Alone Is Not Enough
Visual appearance alone is not enough because photos only show the surface result. They cannot fully reveal material strength, board thickness, paper grade, printing accuracy, finishing touch, insert protection, structural tolerance, assembly quality, packing method, or production consistency. Two candle boxes may look almost identical online, but one may be designed to hold a heavy glass jar during international shipping, while the other may only be suitable for light retail use.
When I compare custom candle box quotations, I always look at the full specification behind the box. I want to understand the material, thickness, structure, printing method, color standard, finishing process, insert design, tooling, sampling, packing, and shipping protection. This helps buyers compare prices more fairly and avoid choosing a cheaper option that may create quality problems later. The real question is not only whether two boxes look similar. The real question is what each quotation actually includes and whether that specification matches the candle product’s real needs.
How to Control Candle Box Costs Without Lowering Quality Too Much
Controlling candle box costs does not mean making the packaging as cheap as possible. When I evaluate cost reduction, I always separate “unnecessary cost” from “necessary value.” Necessary value includes product protection, structure stability, suitable material strength, clear printing, practical inserts, and a presentation level that matches the candle brand. Unnecessary cost usually comes from oversized boxes, over-complicated structures, too many finishing processes, excessive material thickness, inefficient inserts, unrealistic MOQ planning, or design details that look attractive in a mockup but do not improve the customer experience. The best way to control candle box costs is to remove waste while keeping the packaging functional, reliable, and suitable for the product’s market position.
Simplify the Box Structure Without Making It Look Basic
Simplifying the box structure is one of the most effective ways to control custom candle box costs because structure affects material usage, tooling, forming, assembly, packing, and shipping volume. I often see buyers choose magnetic closure boxes, drawer boxes, rigid boxes, or multi-layer gift structures because these formats look premium in reference photos. These structures can be valuable for luxury candle sets, but they may not be necessary for every product. A standard single candle jar may only need a clean folding carton, a sleeve carton, a lid and base box, or a simple rigid structure to achieve the right balance between protection and presentation.
A simpler structure does not have to feel cheap. In many candle packaging projects, clean proportions, suitable paper, accurate printing, and one well-chosen finishing detail can create a more professional impression than an overly complicated box. I usually ask whether the customer will truly notice the added structure, whether it improves protection, and whether it supports the retail price of the candle. If the answer is not clear, simplifying the structure may reduce cost without damaging the brand image. The goal is to choose a structure that feels intentional rather than excessive.
Reduce Finishing Processes That Do Not Add Clear Value
Reducing unnecessary finishing is another practical way to control candle box costs because every surface process adds material, setup, handling, and inspection. I often see packaging designs that use matte lamination, foil stamping, embossing, spot UV, soft-touch lamination, and special coatings together on one box. This may look impressive at first, but it can also make the packaging expensive, visually crowded, and more difficult to produce consistently.
When I evaluate finishing, I always ask what role each process plays. Foil stamping may highlight the logo. Embossing may add tactile value. Soft-touch lamination may create a luxury hand feel. Spot UV may create subtle contrast. But if several finishes are used without a clear hierarchy, the buyer may pay for complexity rather than value. I usually prefer one or two strong finishing details that support the brand message. A matte box with a small foil logo can often feel more refined than a box filled with multiple effects that compete for attention.
Optimize the Box Size to Reduce Hidden Costs
Optimizing the box size can reduce cost in several ways because box dimensions affect paper usage, insert size, outer carton volume, storage space, and shipping cost. I often see brands request a larger box because they want the candle to feel more premium, but an oversized box can create hidden waste. It uses more paper, requires a larger insert, takes up more carton space, increases freight volume, and may make the candle feel small or poorly supported when opened.
When I review candle box sizing, I look at the candle diameter, jar height, lid shape, label thickness, insert structure, packing tolerance, and opening experience. The box should have enough room for smooth packing and product protection, but it should not create empty space that adds cost without value. Sometimes a small size adjustment can improve the whole project. It can reduce paper consumption, make the insert more efficient, improve carton packing quantity, and lower logistics cost while keeping the packaging attractive and retail-ready.
Choose Materials That Match the Product Instead of Over-Specifying
Choosing suitable materials can help control costs without weakening the packaging. I often see buyers assume that thicker board, specialty paper, or premium textured materials automatically mean better packaging. In some cases, they do. A heavy glass candle jar or luxury gift box may need stronger greyboard and better wrapping paper. But in other cases, over-specifying materials only increases cost without improving performance or customer perception.
I usually match the material to the candle’s actual needs. A lightweight candle may not require very thick paperboard. A simple retail carton may not need expensive specialty paper. A gift box may need stronger board, but it may not need the thickest available greyboard. A natural candle brand may get stronger value from kraft paper and clean printing than from costly decorative paper. The right material should support strength, print quality, hand feel, and brand positioning without adding cost that the product does not need.
Use Insert Design to Protect the Candle Efficiently
A more efficient insert design can reduce cost while still protecting the candle. I often see insert costs increase when the insert uses too much material, has too many folded parts, requires slow manual assembly, or is designed more for appearance than function. For some candle boxes, a simple paper insert or cardboard divider may provide enough support. For heavier glass jars, molded pulp, EVA, or foam may be necessary, but the design still needs to be efficient.
I never suggest removing the insert blindly, especially when the candle is heavy or fragile. A missing or weak insert may reduce the quotation at first, but it can lead to broken jars, scratched labels, loose movement, and a poor unboxing experience. Instead, I prefer to ask whether the insert can be simplified while still holding the product securely. A good insert should reduce movement, support the product, improve presentation, and remain practical for bulk packing. The most cost-effective insert is not the cheapest insert. It is the one that solves the protection problem with the least unnecessary complexity.
Improve Printing Efficiency Without Weakening the Brand
Printing requirements can often be adjusted to control cost without making the packaging feel lower quality. Full-color artwork, Pantone matching, large ink coverage, gradients, inside printing, and double-sided printing can all increase production difficulty and proofing requirements. I often see strong candle packaging created with simpler artwork, clean typography, one controlled brand color, and a carefully selected paper material.
This does not mean the packaging should look plain. A simple design can look premium when the spacing, logo placement, color tone, and material choice are well considered. If the candle brand does not truly need complex illustrations or strict color matching, simplifying the artwork can reduce cost and improve production stability. I usually think of printing efficiency as a balance between visual impact and repeatability. The design should be attractive, but it should also be realistic to produce consistently.
Increase Order Quantity Only When It Fits the Business Plan
Increasing order quantity can reduce the unit price because setup costs, printing preparation, die-cutting, material purchasing, machine adjustment, and quality control are spread across more boxes. I often see a clear difference between small test-order pricing and larger production-run pricing. Once the production line is prepared, producing more boxes usually becomes more efficient.
However, I do not recommend increasing quantity only to chase a lower unit price. If the candle product is new, the fragrance is untested, the sales channel is uncertain, or the brand has limited storage space, a smaller first order may be safer even if the unit price is higher. If the candle line already has stable sales, repeat demand, distributor orders, or confirmed retail placement, a larger order may make more financial sense. The right quantity should balance unit cost, cash flow, storage capacity, reorder timing, and sales confidence.
Avoid Combining Too Many Premium Features in One Box
Avoiding too many premium features is a smart cost-control strategy because premium elements can quickly stack on top of each other. I often see candle box projects that combine rigid structure, specialty paper, full-color printing, foil stamping, embossing, soft-touch lamination, custom inserts, and luxury export packing all at once. This may be appropriate for a high-end candle gift set, but it may be unnecessary for a standard retail candle product.
When I evaluate a packaging design, I try to identify the main value driver. If the box structure is already premium, the surface finishing can often be simpler. If the paper texture is already strong, the artwork may not need to be complicated. If the insert creates a beautiful gift presentation, the outer box may not need excessive decoration. In my experience, focused packaging usually feels more premium than packaging that tries to include every expensive feature. Good cost control often comes from choosing what matters most and removing what does not.
Keep Protection Where the Product Really Needs It
Cost control should never remove the parts that protect the candle. I am especially careful about this because candles are often packed in glass jars, ceramic vessels, metal tins, or heavy containers. Reducing board thickness too much, removing inserts, using weak outer cartons, or skipping proper packing protection may make the quotation look lower, but it can create higher costs later through damage, returns, customer complaints, replacement shipments, and brand reputation loss.
I usually separate protective cost from decorative cost. Decorative cost can often be adjusted more flexibly. Protective cost needs more caution. If the candle is heavy, the box needs enough strength. If the jar is fragile, the insert needs to hold it securely. If the boxes are shipped internationally, the outer packing needs to protect the finished packaging. In my view, the best cost-saving decisions remove waste, not safety.
Plan Repeat Orders Around a Stable Packaging Standard
Planning for repeat orders can help control long-term costs because the first production run often carries more development work. Once the structure, dieline, material, printing color, finishing method, insert fit, and packing method are confirmed, future orders can follow a clearer standard. This reduces uncertainty, improves consistency, and makes production planning more efficient.
I often see mature candle brands benefit from packaging stability. If the box size, artwork, and insert change every order, new setup costs and development risks appear repeatedly. If the brand keeps a stable packaging standard, repeat production becomes smoother and easier to control. For buyers who expect long-term sales, I usually think it is better to invest in a practical, repeatable packaging solution rather than constantly redesigning the box for small short-term changes.
Compare Total Value Instead of Only Unit Price
Comparing total value is important because the lowest unit price is not always the lowest real cost. A very cheap candle box may save money upfront but create problems in structure, color consistency, surface quality, insert protection, packing strength, or shipping performance. If those problems lead to damage, rejected goods, delayed launch, returns, or poor customer reviews, the real cost becomes much higher than the original quotation.
When I evaluate candle box costs, I look at the full value of the packaging. I consider whether the box protects the product, supports the brand image, can be produced consistently, fits the sales channel, and arrives in good condition. A good candle box does not need every premium feature, but it should not feel weak, poorly fitted, or unreliable. The best cost-control strategy is to reduce unnecessary complexity while keeping the parts that protect the candle and support the brand’s value.
Why Cost Control Should Focus on Smart Trade-Offs
Cost control should focus on smart trade-offs because every packaging decision affects something else. A simpler structure may reduce cost, but it still needs to protect the candle. A thinner material may save money, but it must still hold the product. Fewer finishes may reduce production complexity, but the box should still feel aligned with the brand. A smaller box may save material and shipping cost, but it must still allow proper fit and presentation.
When I think about reducing candle box costs, I do not ask what can be removed randomly. I ask what can be adjusted without weakening the customer experience or increasing risk. The best result usually comes from a balanced combination of suitable structure, right-sized dimensions, appropriate material, efficient insert, focused printing, necessary finishing, realistic order quantity, and proper packing. That is how buyers can control candle box costs without lowering quality too much.
As I have discussed throughout this guide, the cost of custom candle boxes is influenced by much more than the box itself. Factors such as box structure, material selection, board thickness, box size, printing requirements, surface finishing, inserts, order quantity, tooling, sampling, packing methods, and shipping protection all contribute to the final cost. This is why two candle boxes that appear very similar in photos can sometimes have significantly different prices once the full specification is reviewed.
One of the most important lessons I have learned from packaging projects is that the lowest quotation is not always the most cost-effective solution. A lower price may result from thinner materials, weaker structural support, simplified printing, lower-grade inserts, reduced quality control, or basic shipping protection. At the same time, a higher quotation is not automatically better if the packaging includes features that add cost without creating meaningful value. The goal should always be to find the right balance between cost, product protection, brand presentation, production efficiency, and long-term supply reliability.
When these cost factors become clear, comparing quotations becomes much easier. Instead of focusing only on the unit price, I believe it is more valuable to understand exactly what is included in the packaging specification. A well-designed candle box should protect the product, support the customer experience, strengthen brand positioning, remain practical for production, and perform reliably throughout storage and shipping. The best packaging solution is rarely the cheapest option or the most expensive option. It is the option that aligns with the product, target market, budget, and long-term business goals.
If the objective is to reduce packaging costs without sacrificing quality, I would focus on removing unnecessary complexity rather than eliminating important functions. Simplifying the structure, optimizing box dimensions, selecting suitable materials, improving insert efficiency, choosing only the finishing processes that add real value, and planning order quantities strategically can often reduce costs while maintaining packaging performance.
For anyone evaluating custom candle packaging, taking the time to understand these cost drivers before requesting quotations can lead to better supplier comparisons, more accurate budgeting, fewer production surprises, and stronger long-term results. Clear packaging specifications almost always lead to better decisions.
At BorhenPack, we work closely with candle brands, importers, distributors, and packaging design agencies to develop custom candle boxes that balance quality, functionality, and cost efficiency. Whether the project involves folding carton candle boxes, rigid candle boxes, candle gift boxes, candle mailer boxes, or custom insert packaging, we believe that the best packaging decisions come from understanding the real factors behind the cost. If you are planning a custom candle packaging project, our team is always available to review your requirements and help identify the most practical solution based on your product, brand positioning, and budget.